It’s not about how a shot looks, but about what it says — where the viewer looks, how close they feel, and what the frame says about the person. Five common errors, and the simple rules that fix them.
You can watch the video here, otherwise keep reading below.
Language, not looks
Here are 5 framing mistakes that I often see in student projects and first-time directors, and a few simple rules to avoid them.
Before we start, one thing about how I’m looking at these images. This video is about language, not about looks. I’m not judging whether an image looks good, but whether it carries the intended meaning: where you’re told to look, how close you feel to the person, what the frame is saying about them. You can break all these rules, just be aware about them.
Also, be sure to check out my Patreon for more in-depth content.
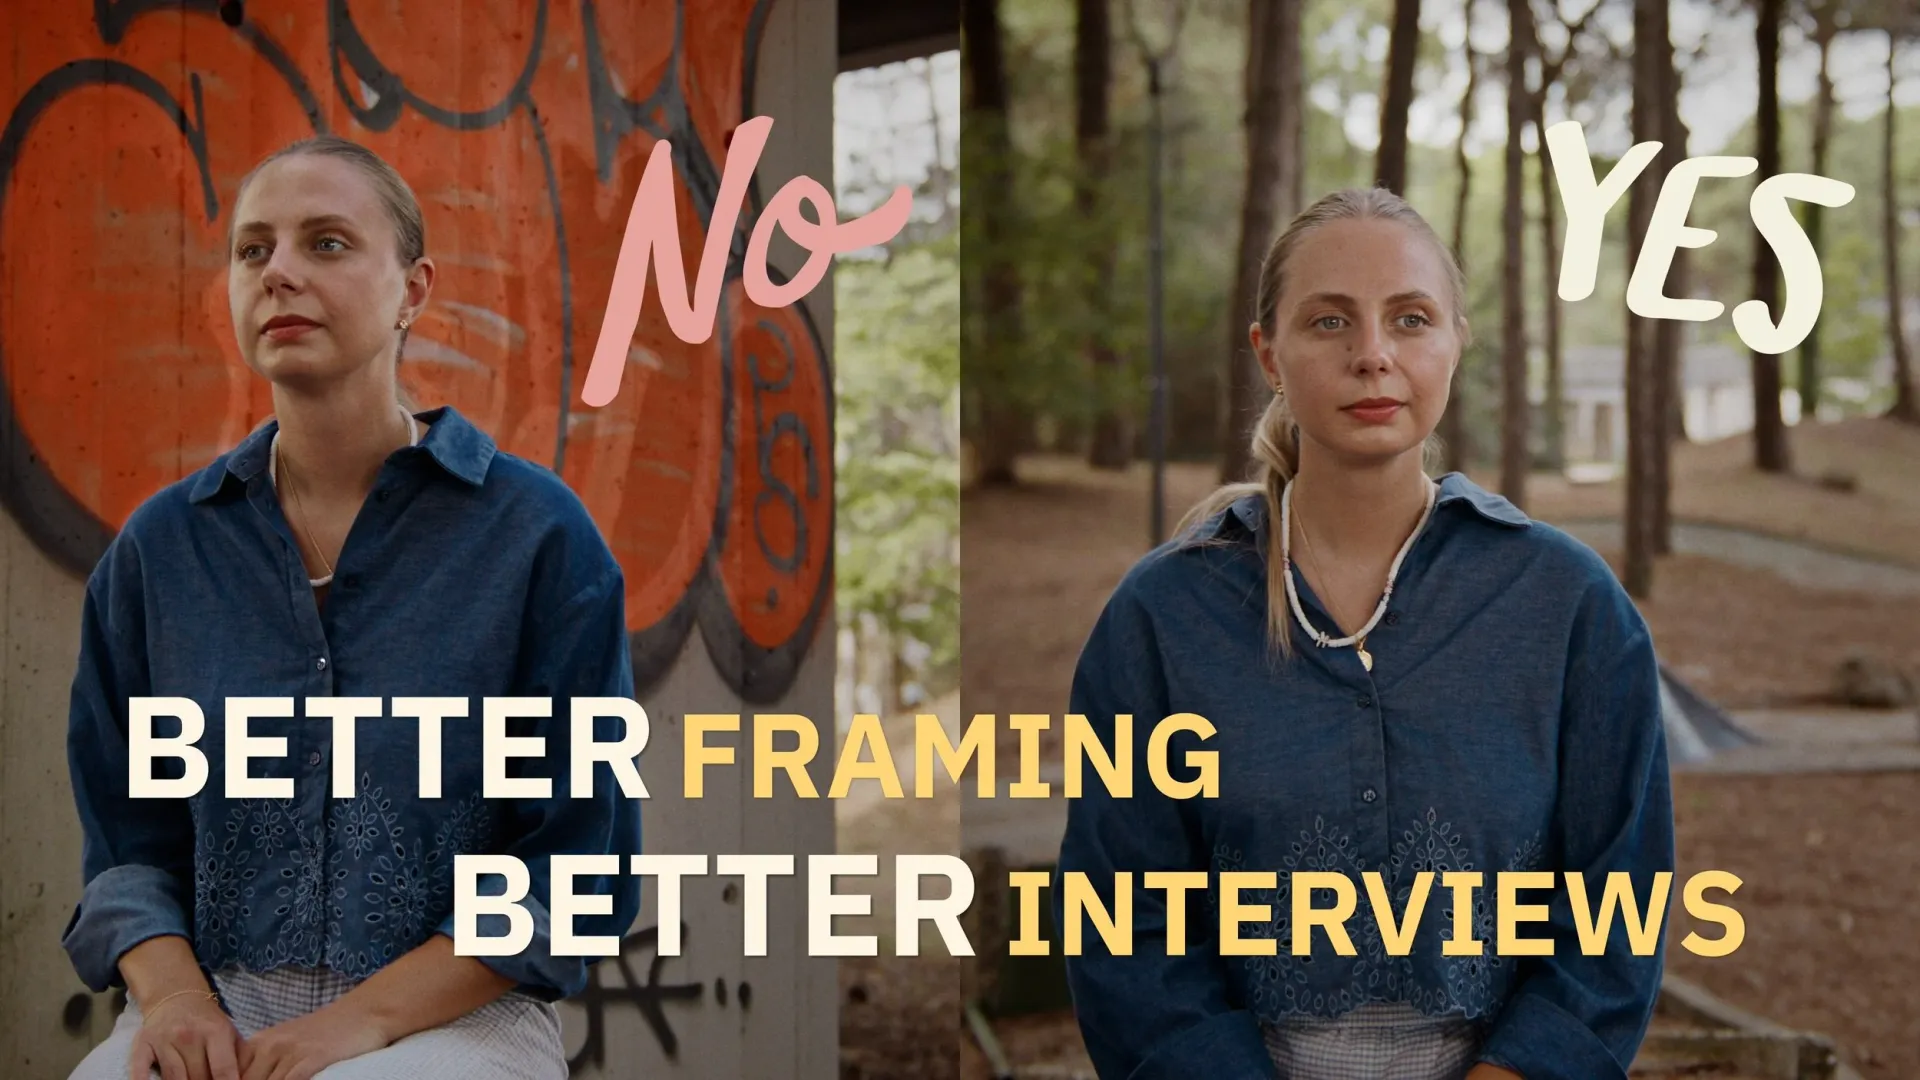
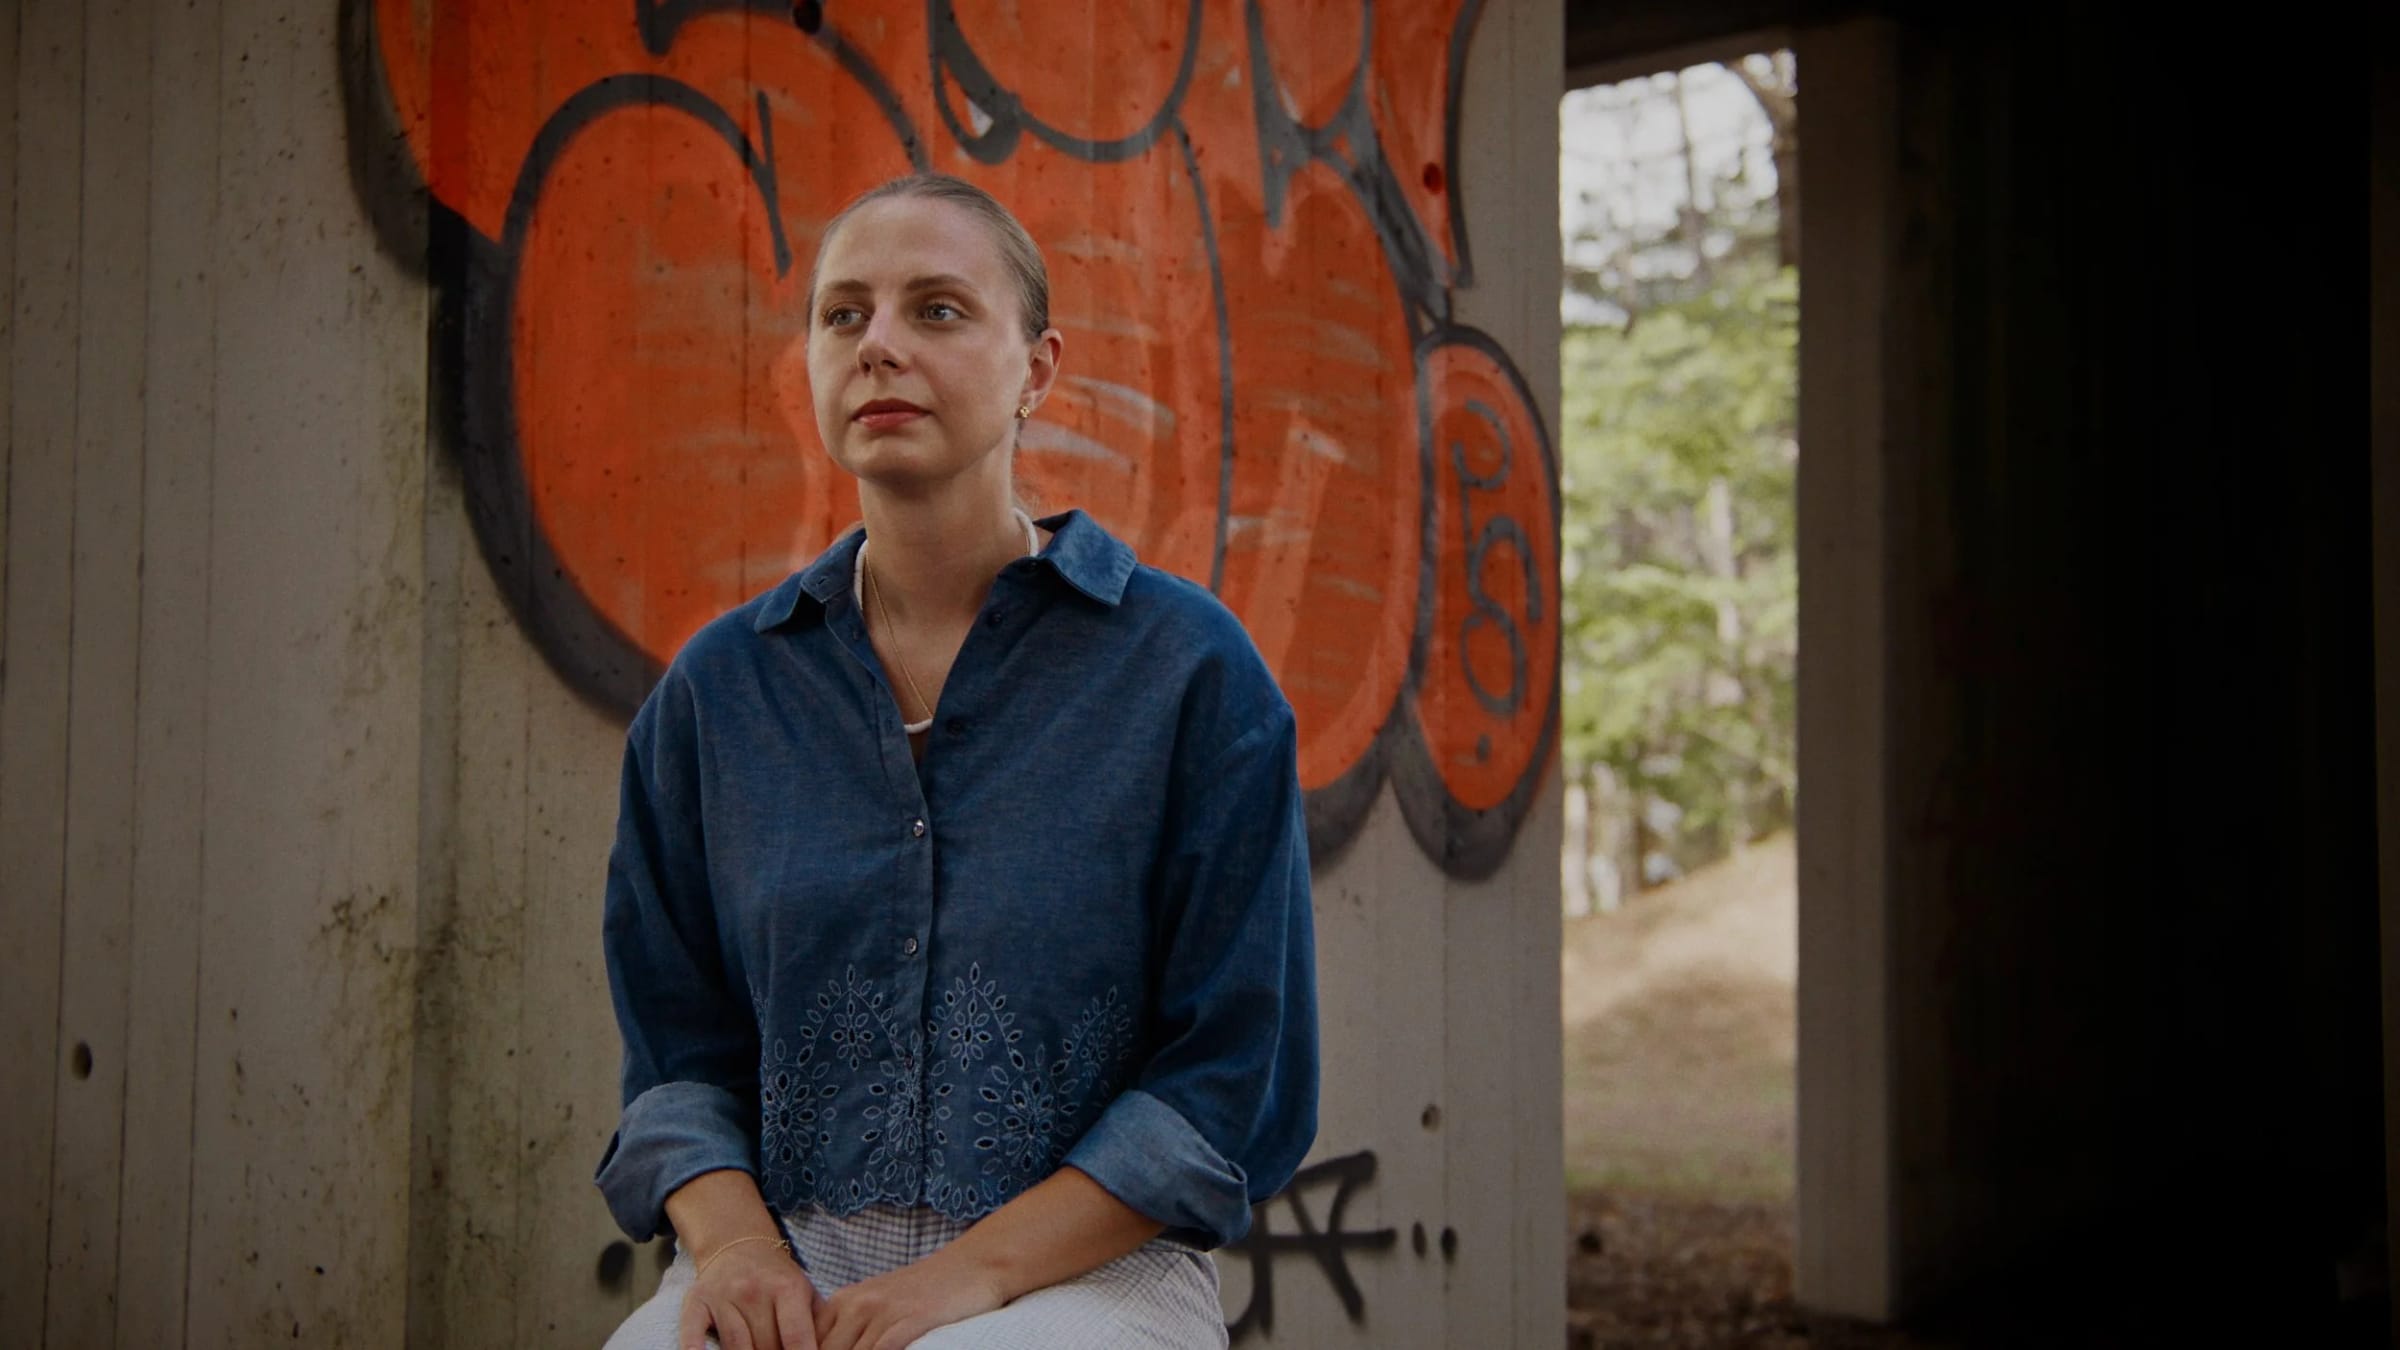
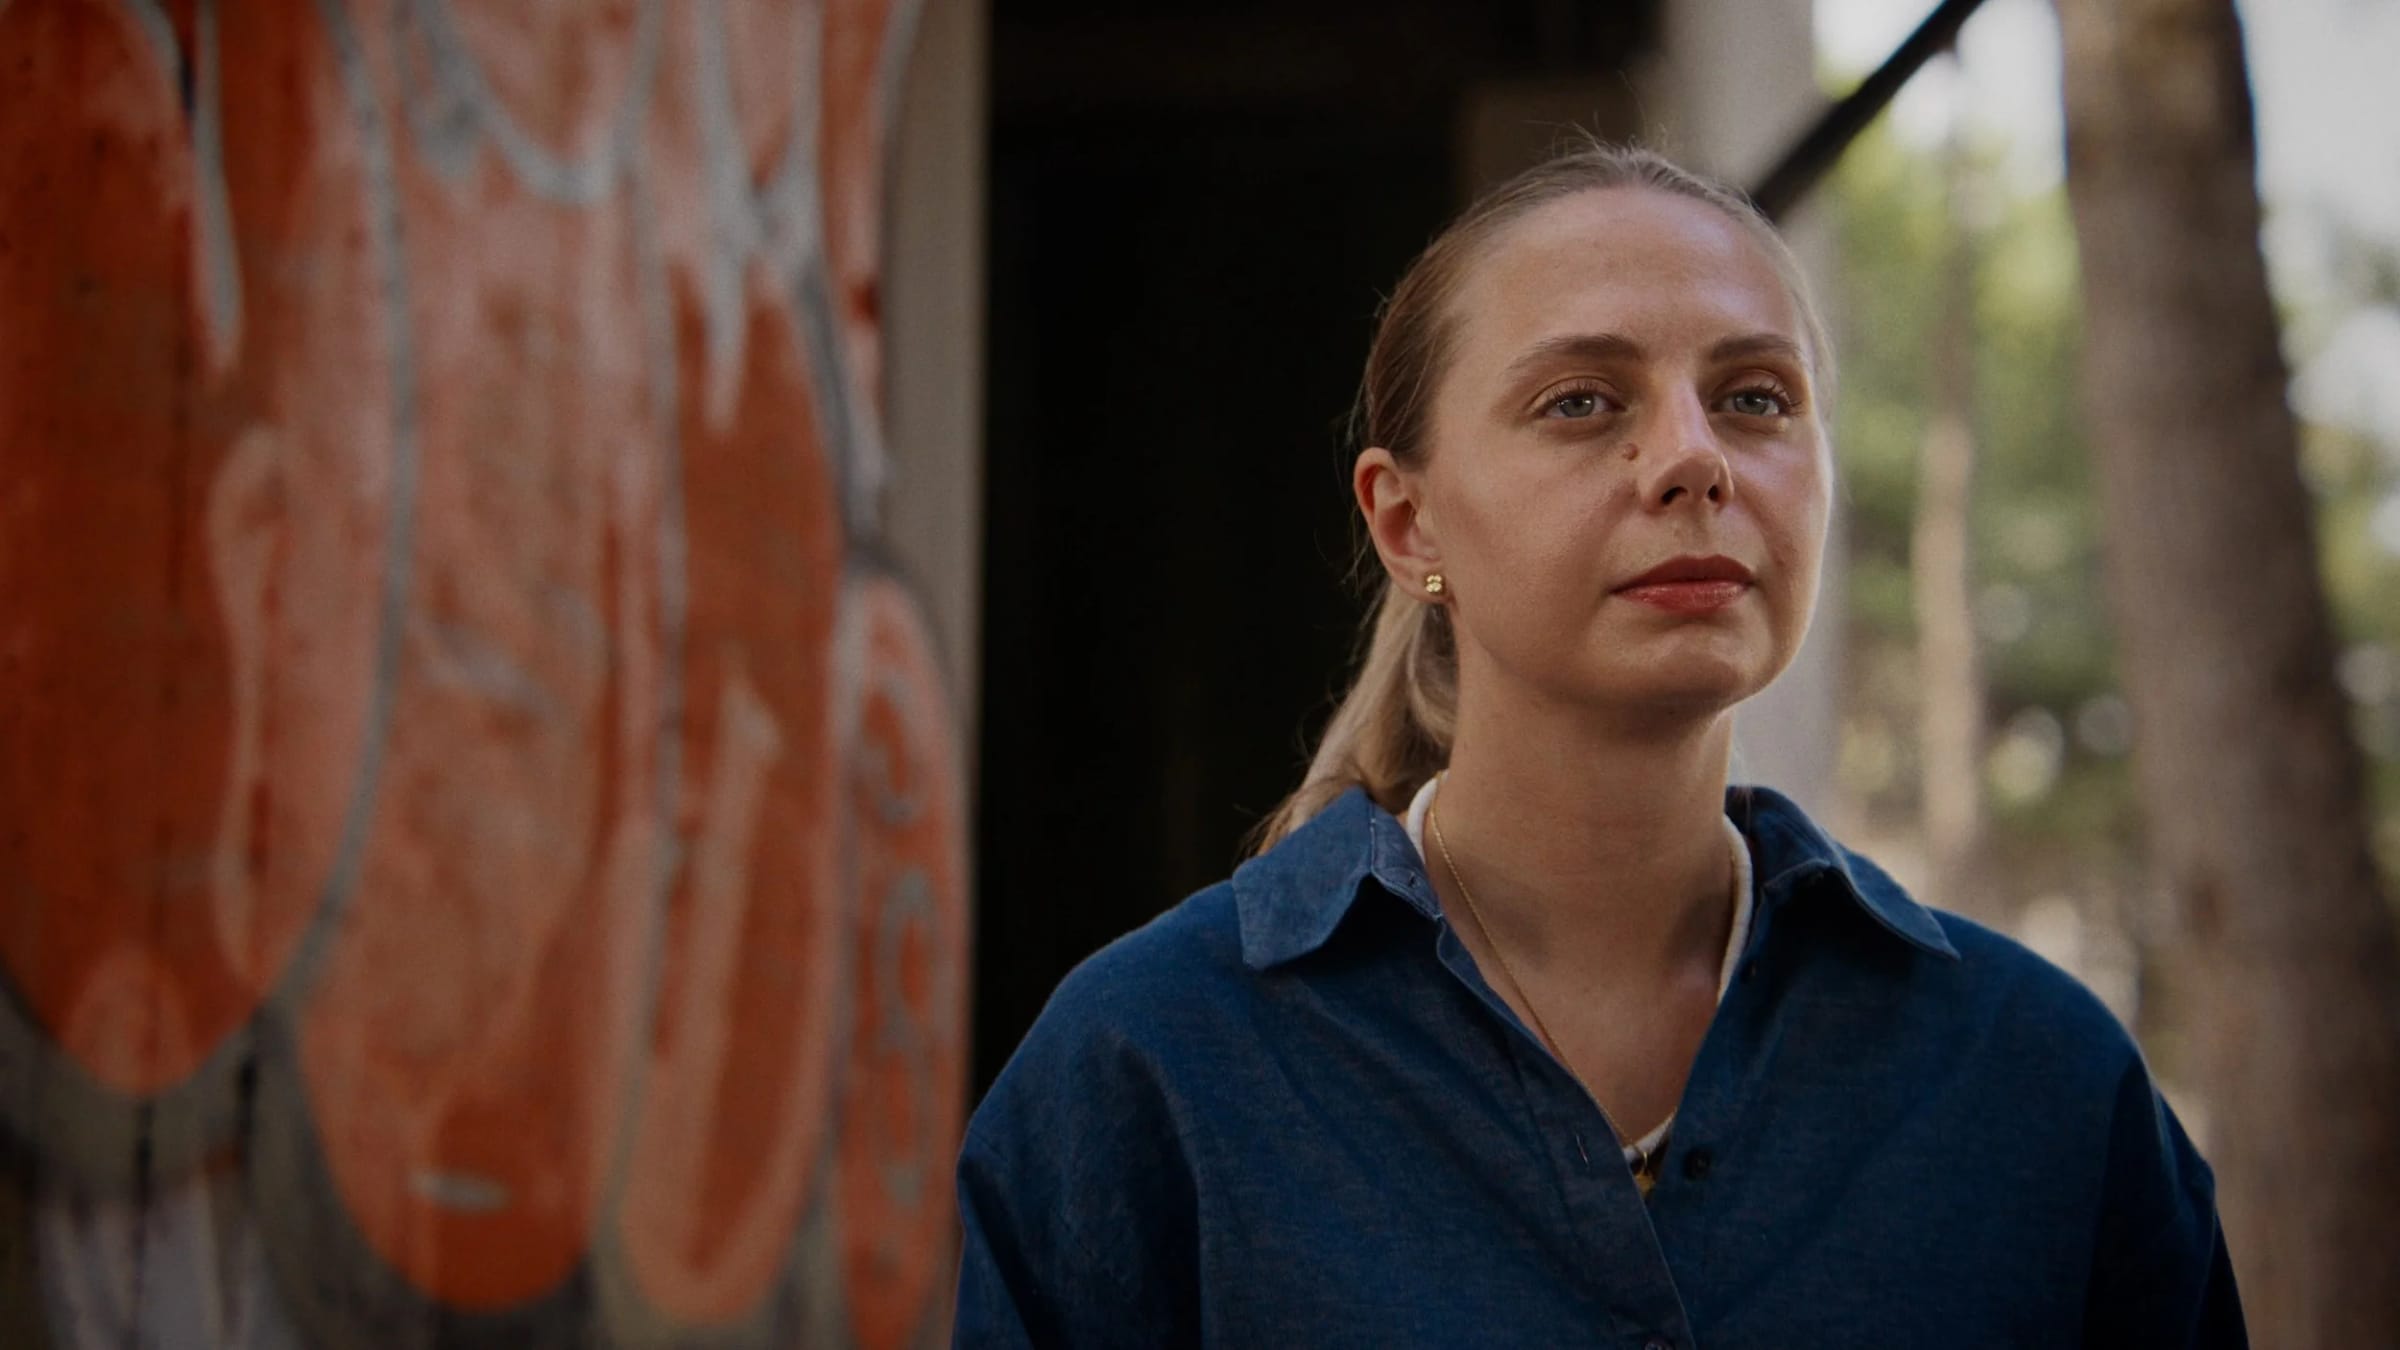
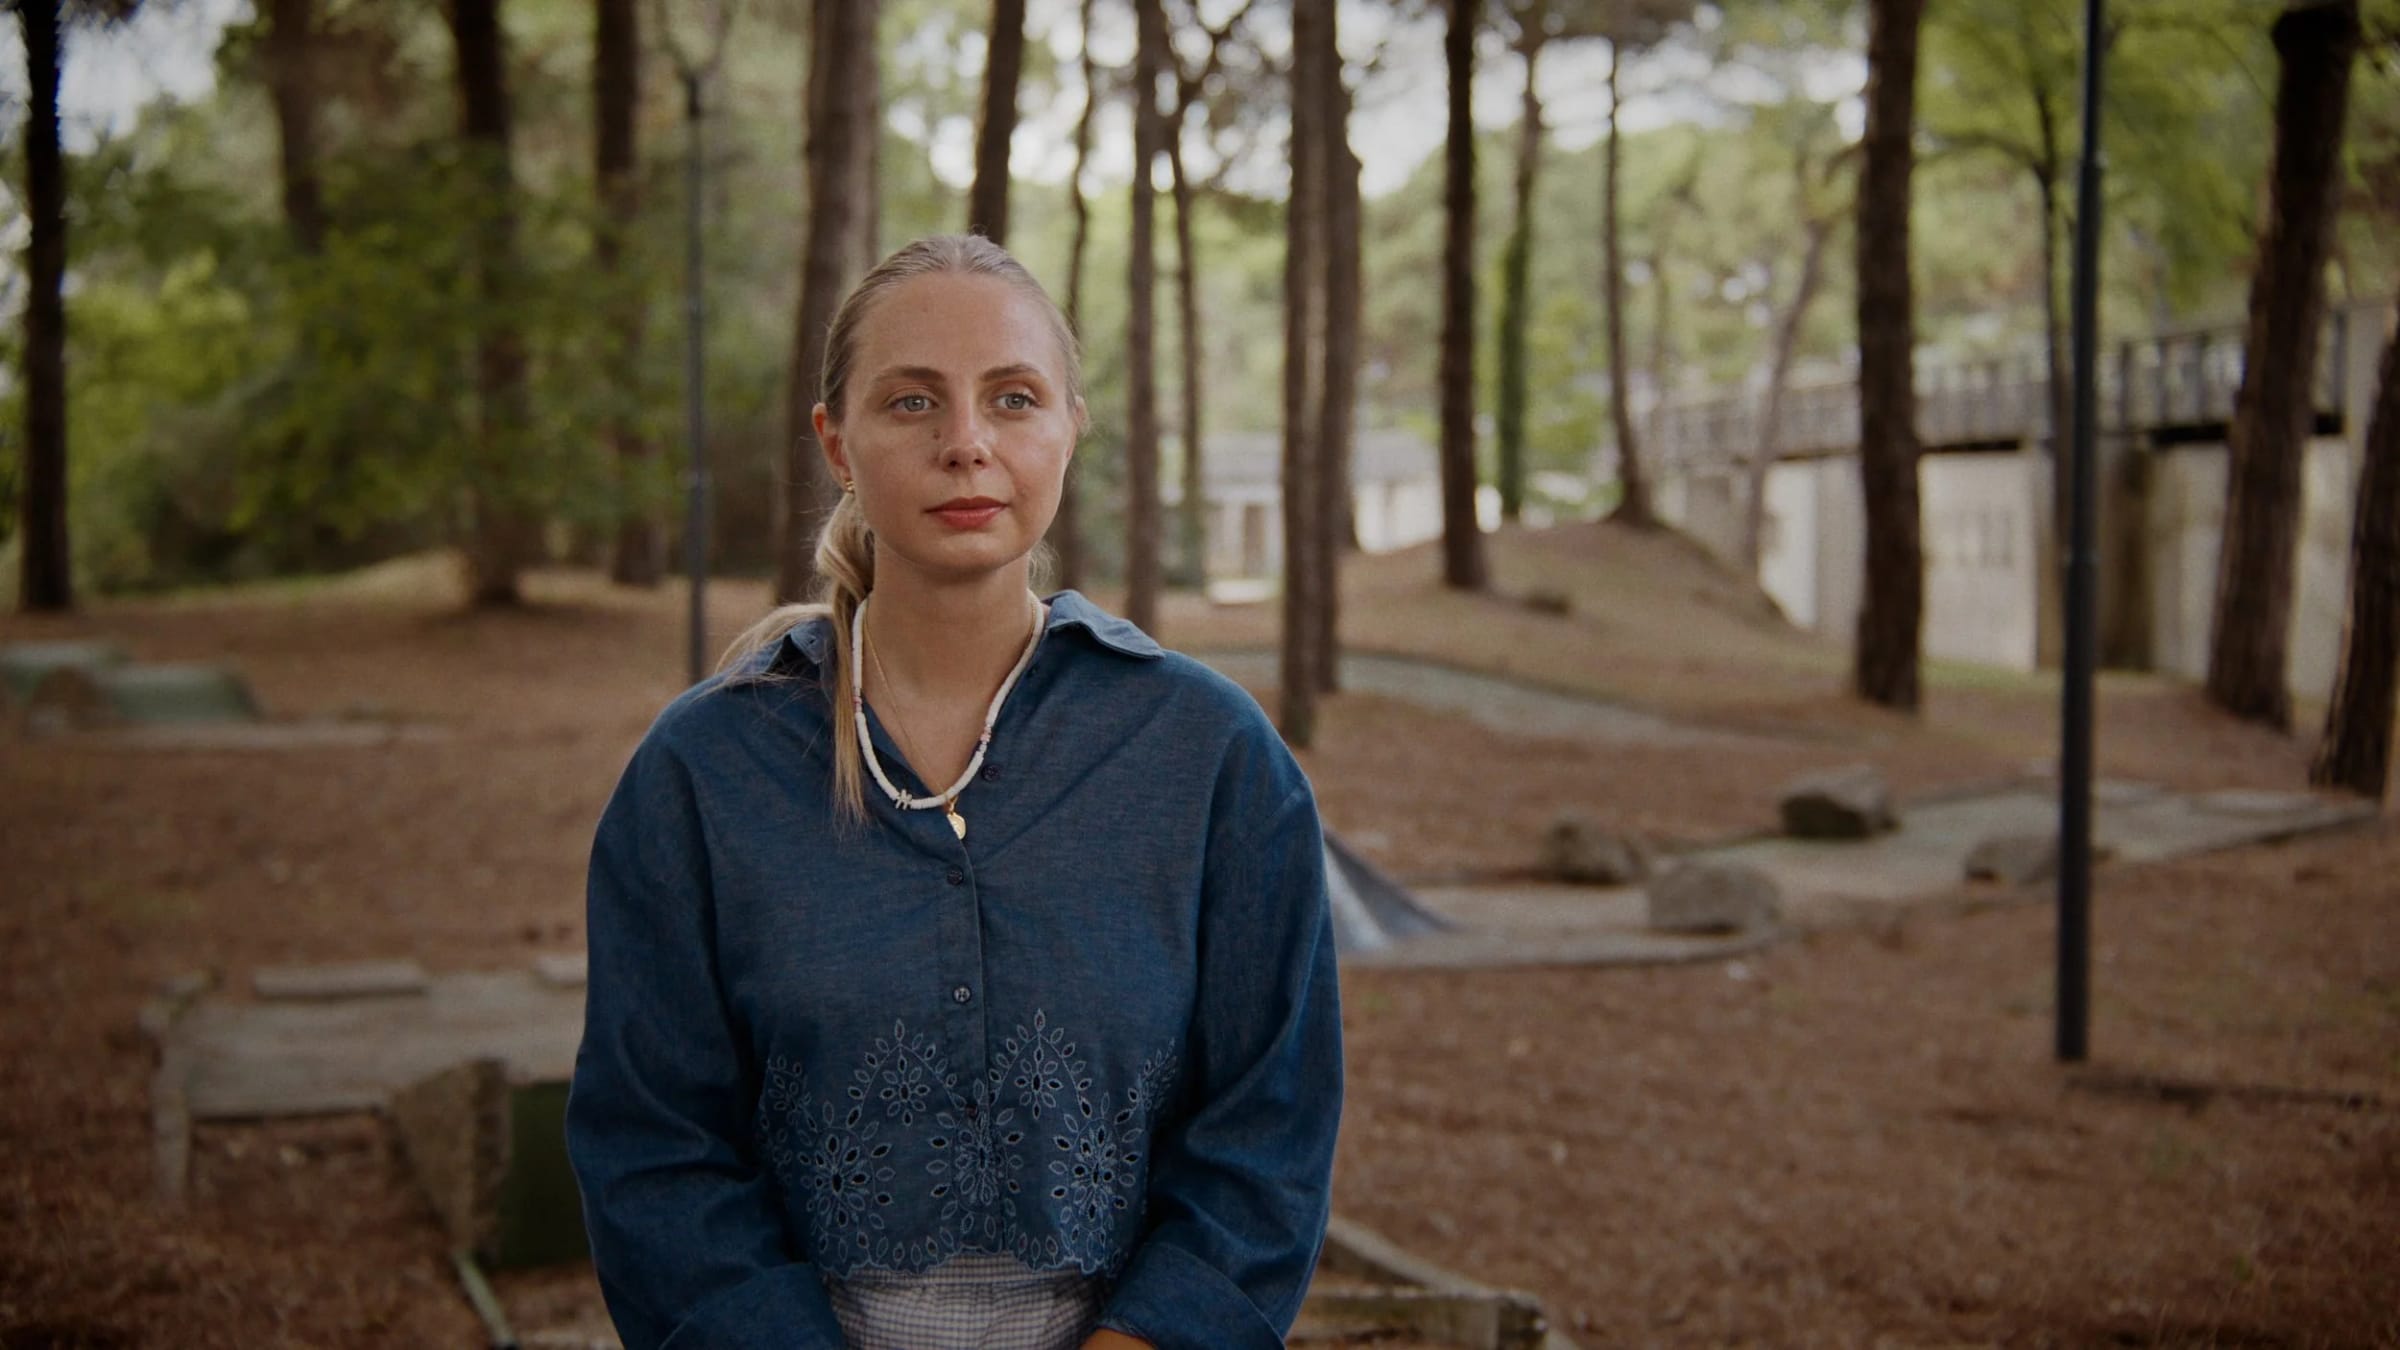
So let’s start from these two images. These combine all the issues I’ll talk about, see if you can spot them. Now let’s see how to fix them one by one.
1. Placing the interviewee against a wall
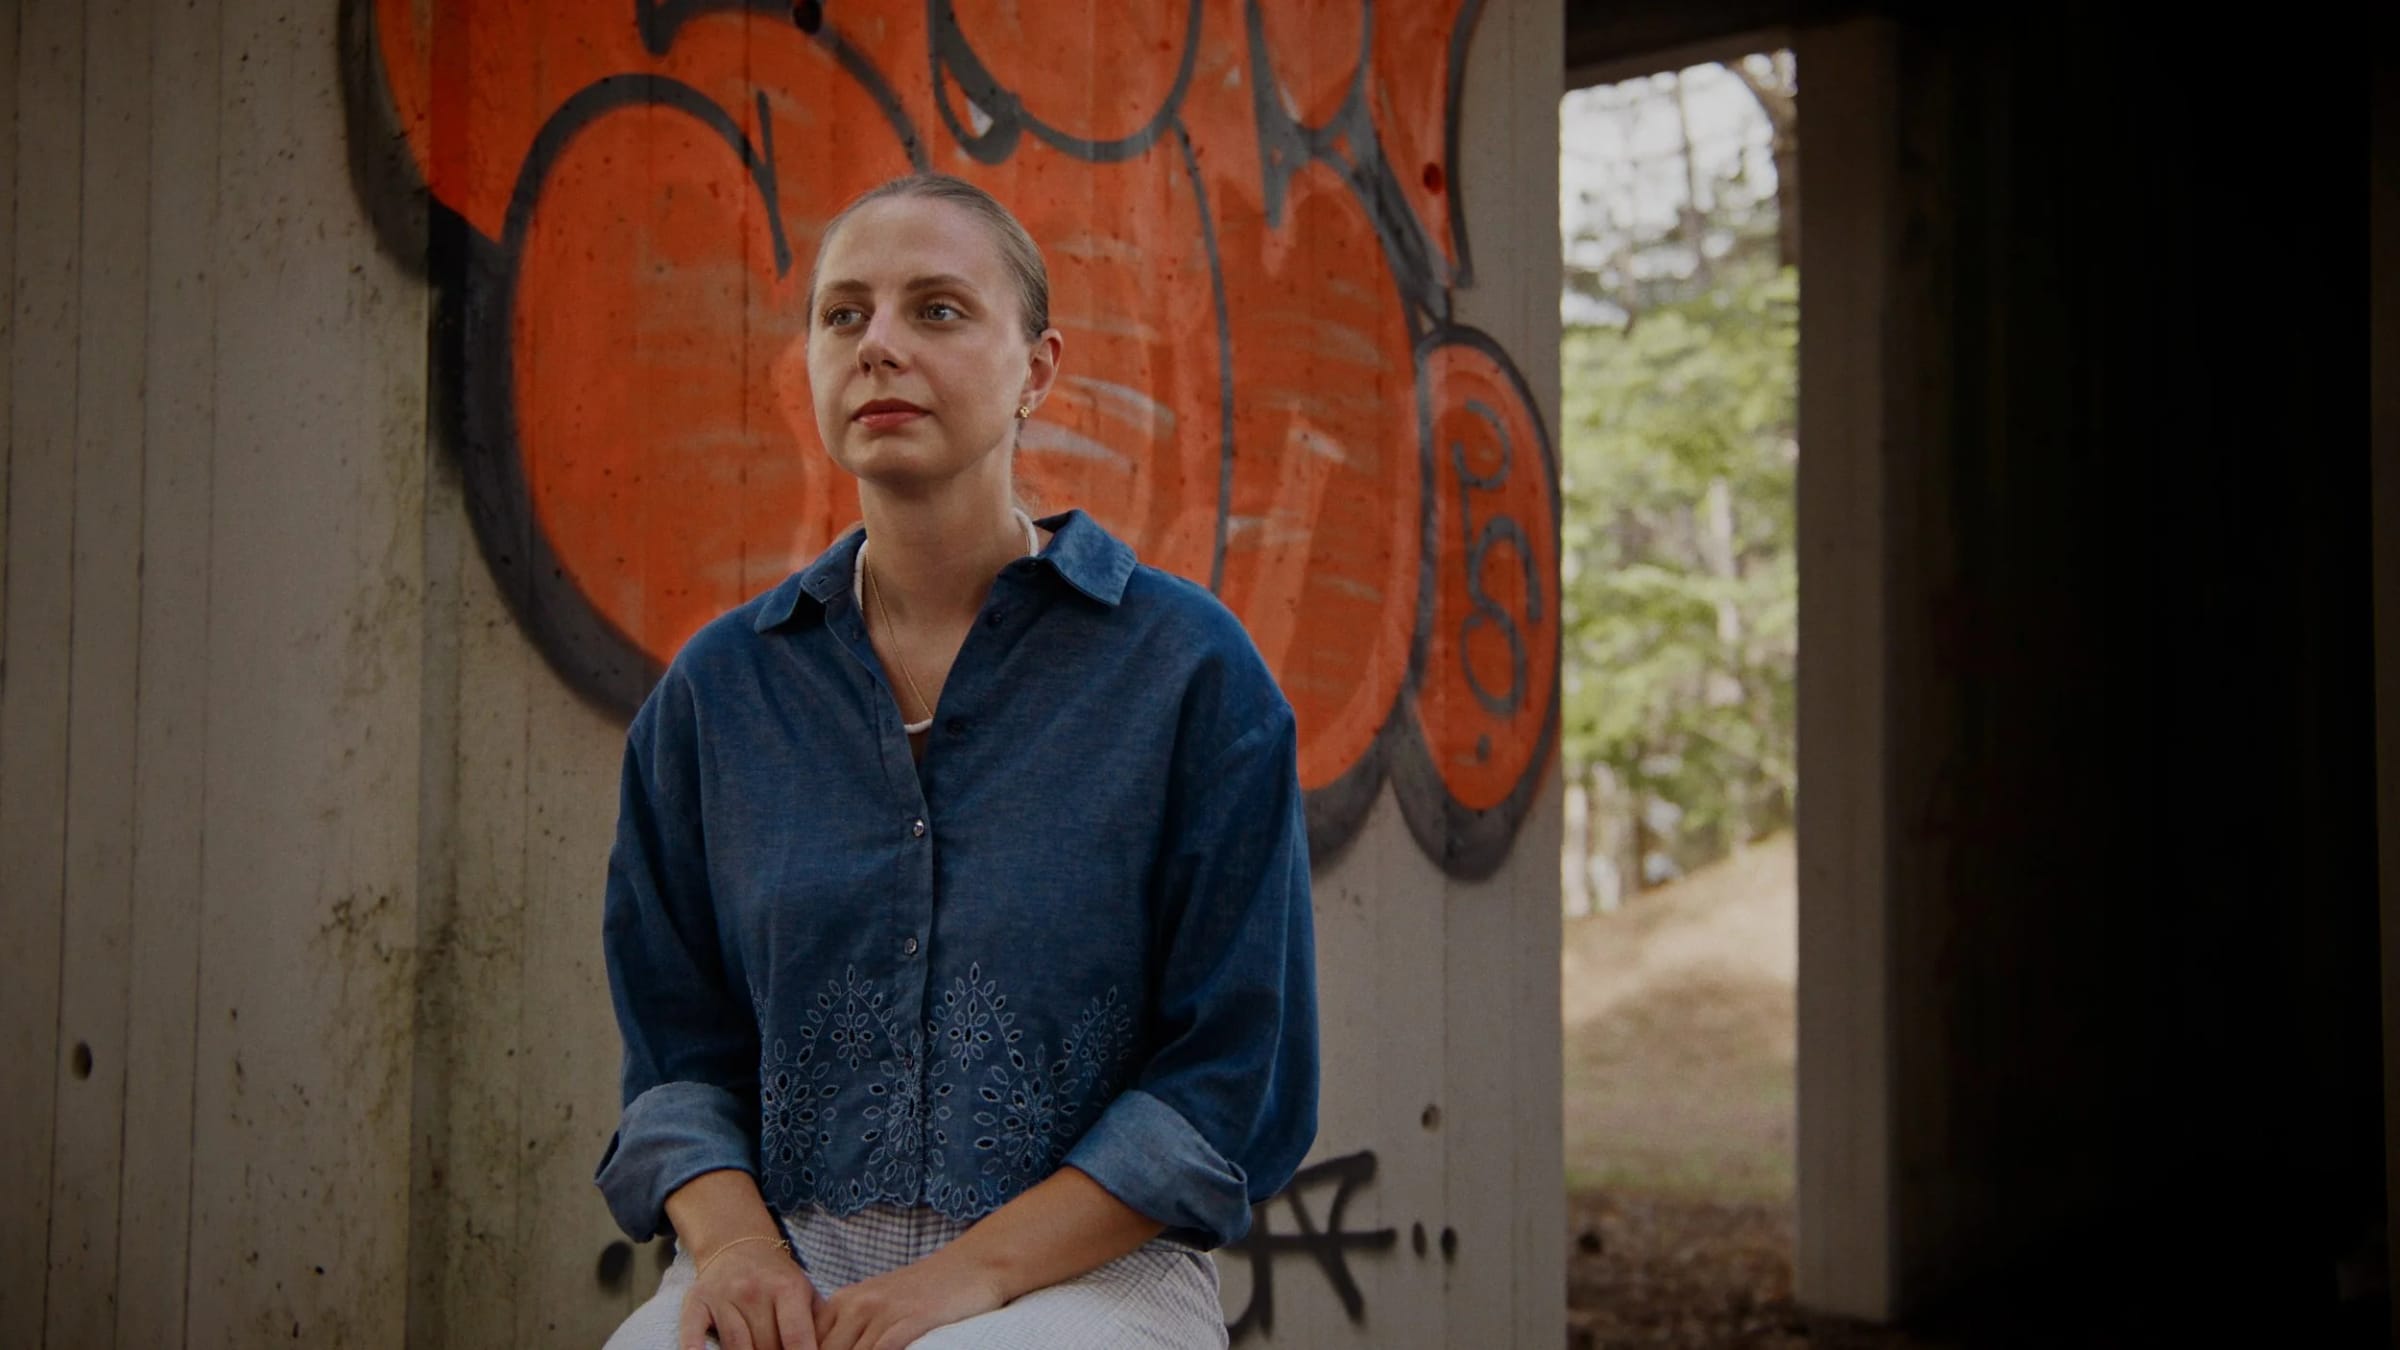
The first issue is placing the subject too close to the background, or in a small space. A wall right behind the subject can make them look stuck in a small place, constrained, or held there against their intention.
This is a very common issue, which is sometimes unavoidable if you’re shooting in a tiny space. But there is always a way to mitigate it.
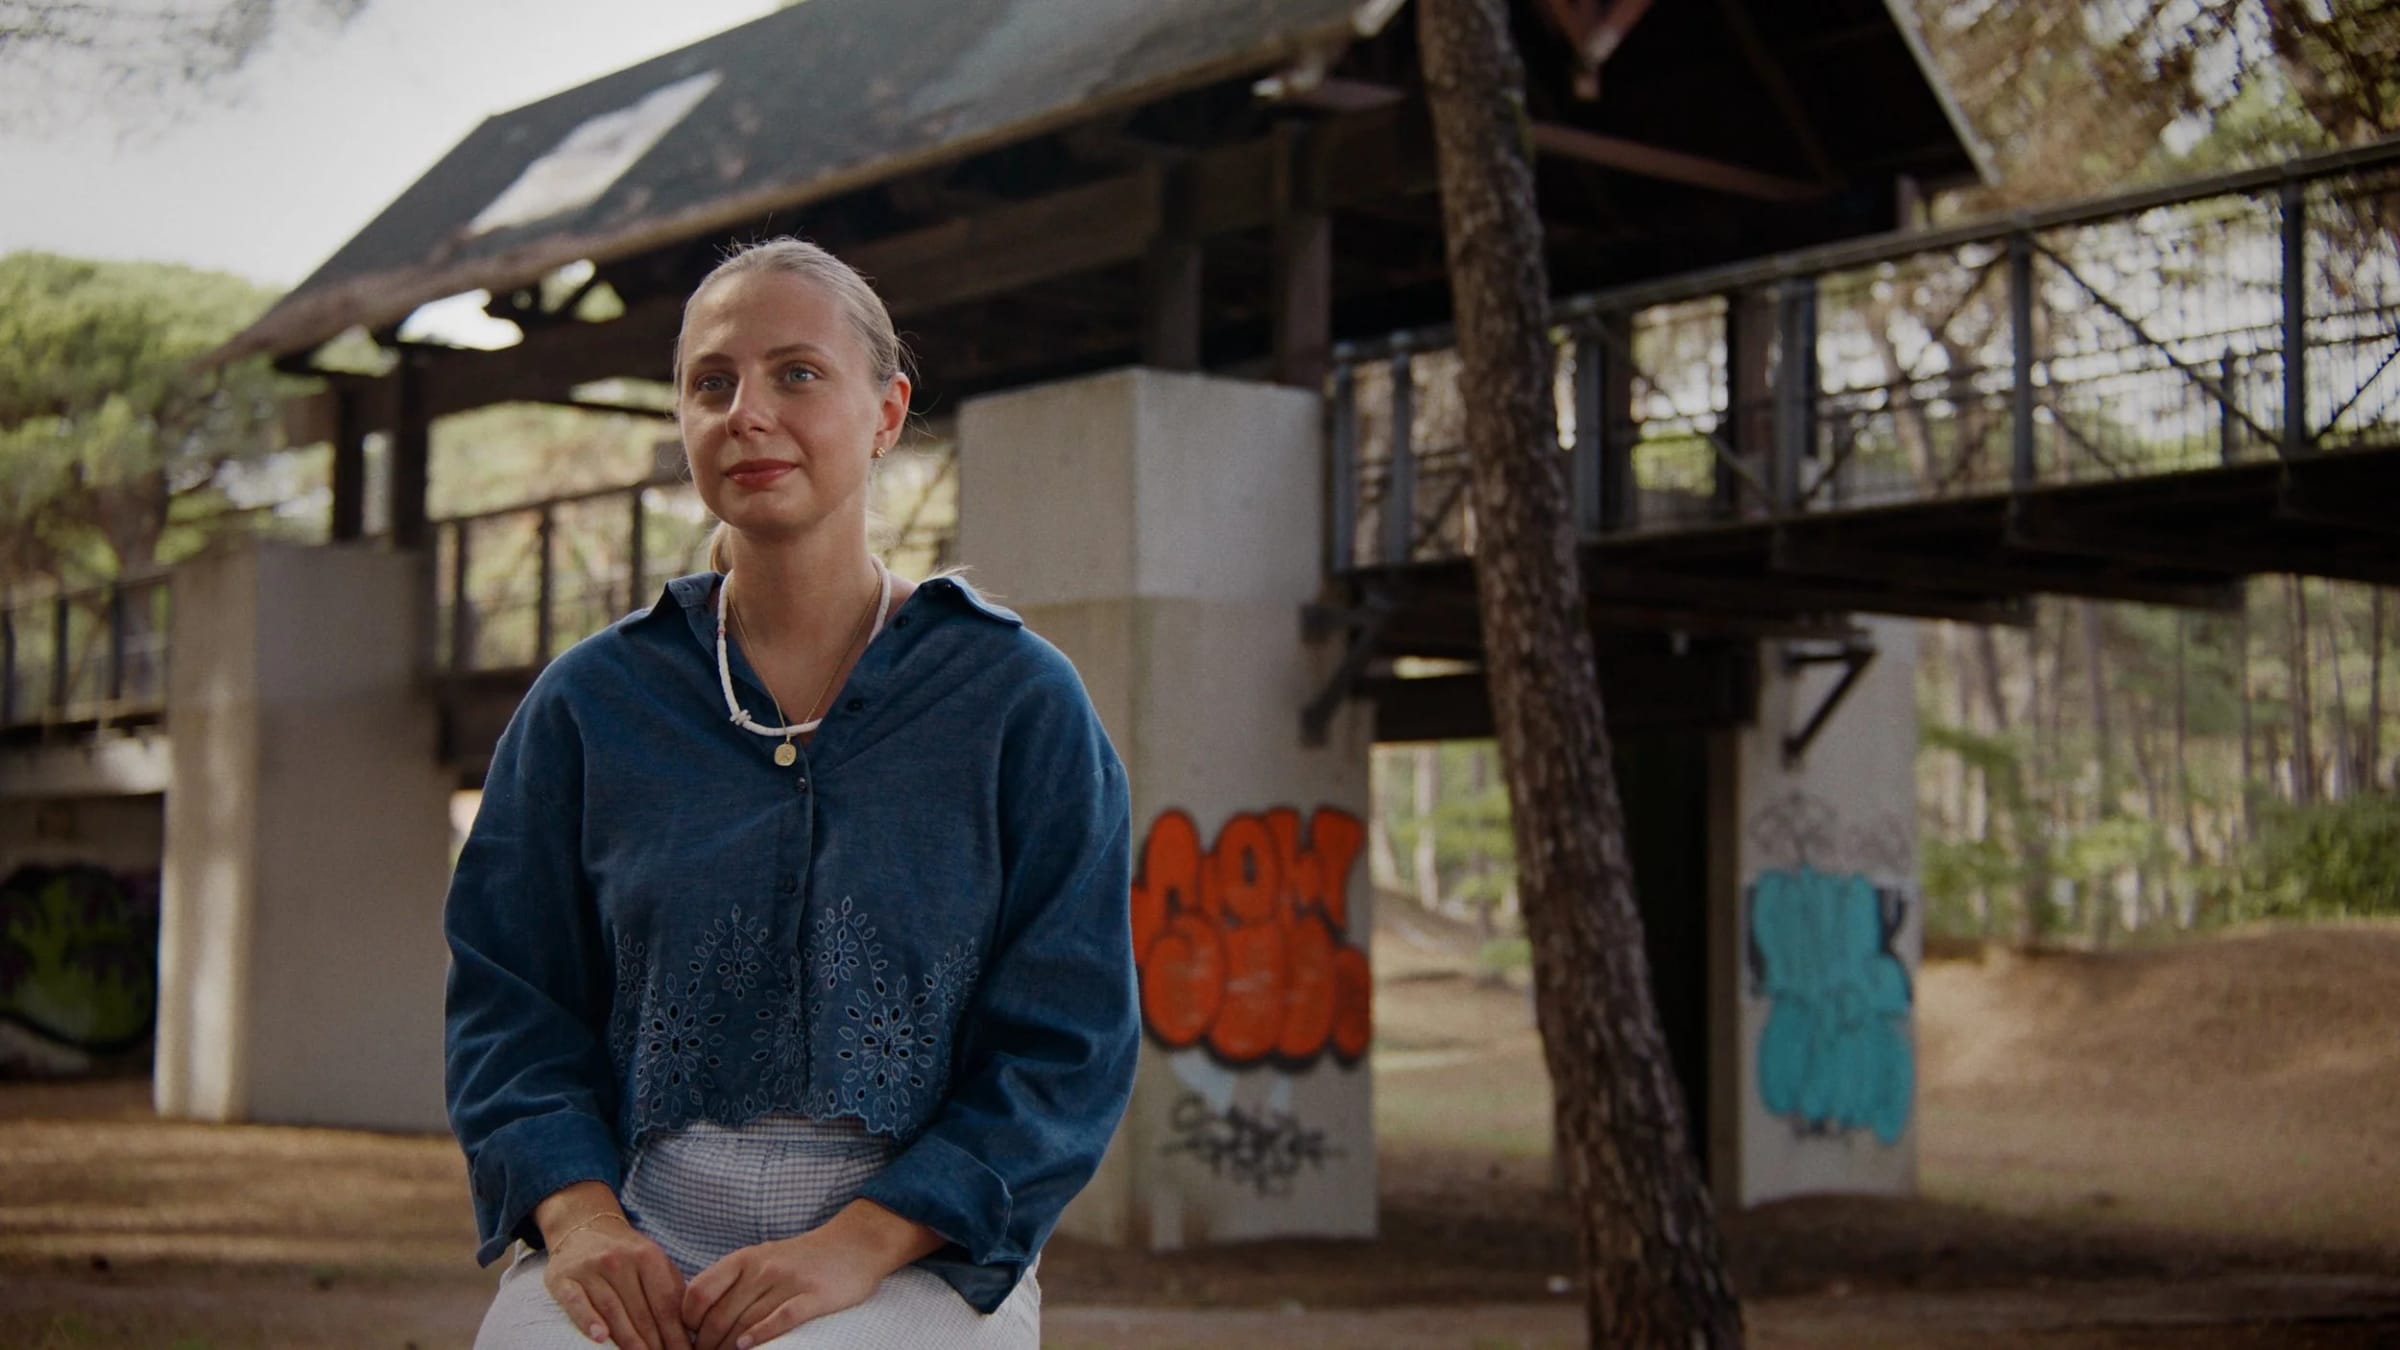
The subject should be as separated as possible from the background. Seeing some space behind them tells us that they are in a real place. It allows our eyes to look at the environment and learn something about them.
Over the years I’ve settled on a proportion that works for me: the subject at about 30% of the depth, and 70% of the space left behind them. It’s not a rule you’ll find in a book, it’s just what I aim for.
So, how do you get there? The solution is to turn the camera towards the part of the location where there is more space in the back. If you have a lot of space available, don’t put yourself in a closed spot.
If you’re in a closed location, shoot on a diagonal, by placing the camera in the darkest corner of the room. The diagonal is the longest line you have in a room, so that’s where the 30/70 becomes possible. Place the subject as close as possible to the camera, leaving as much space behind as possible.
This leads to our second issue with this framing, which is…
2. Having the person look at the wrong side of the screen
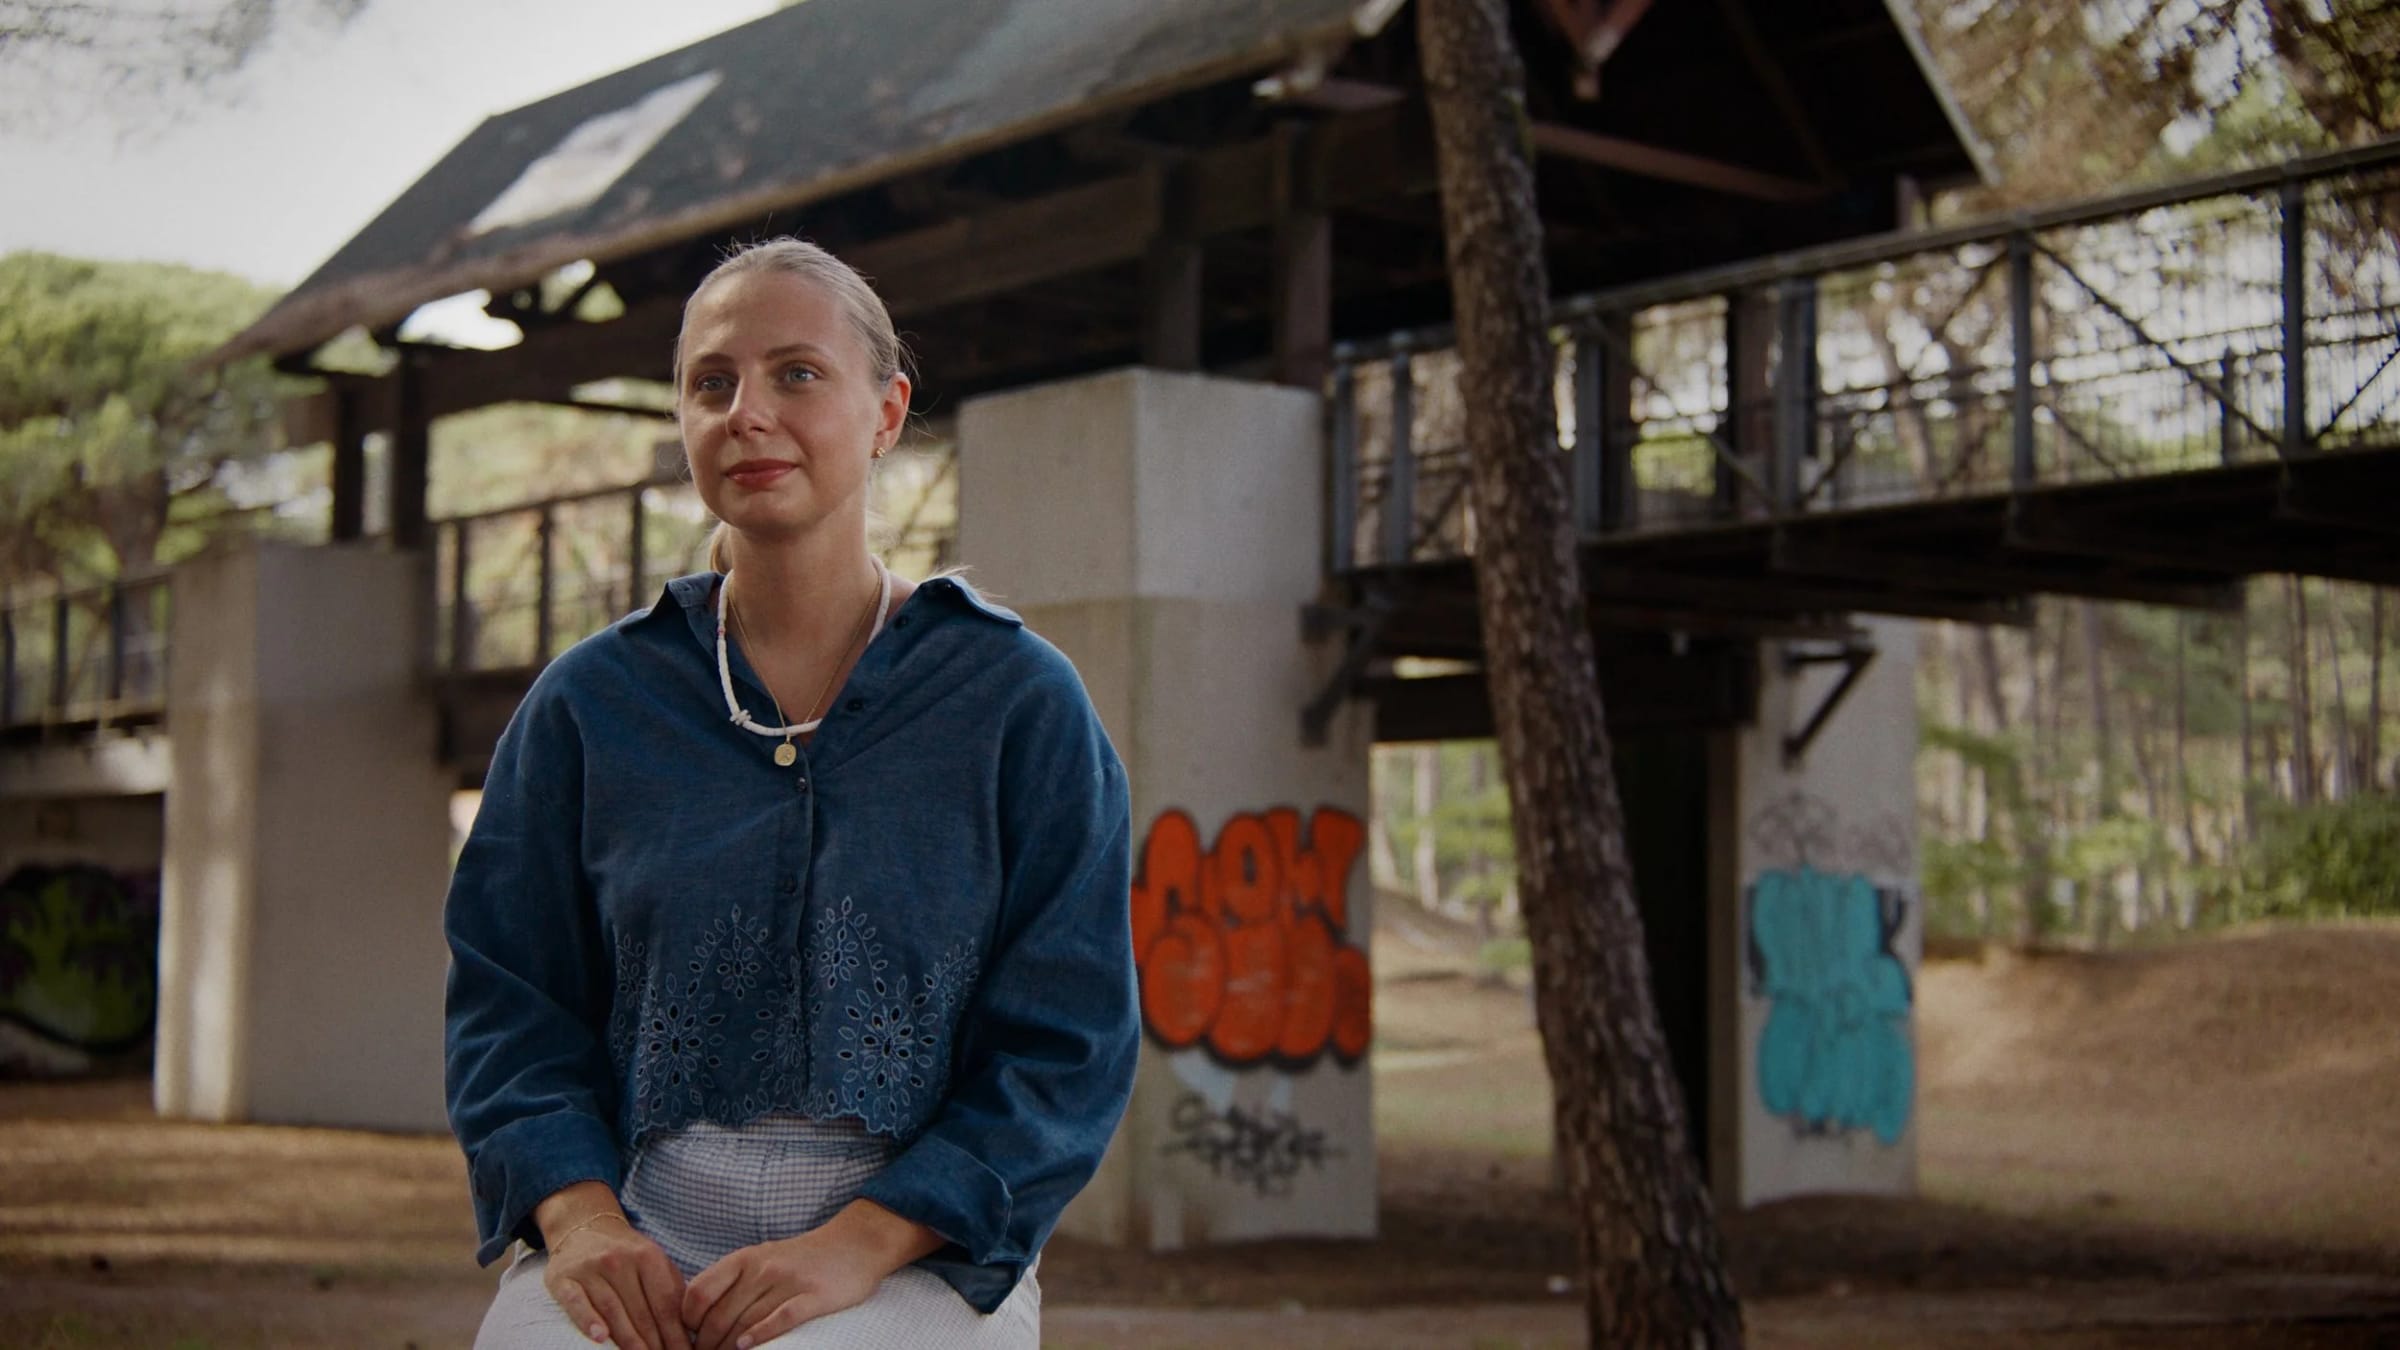
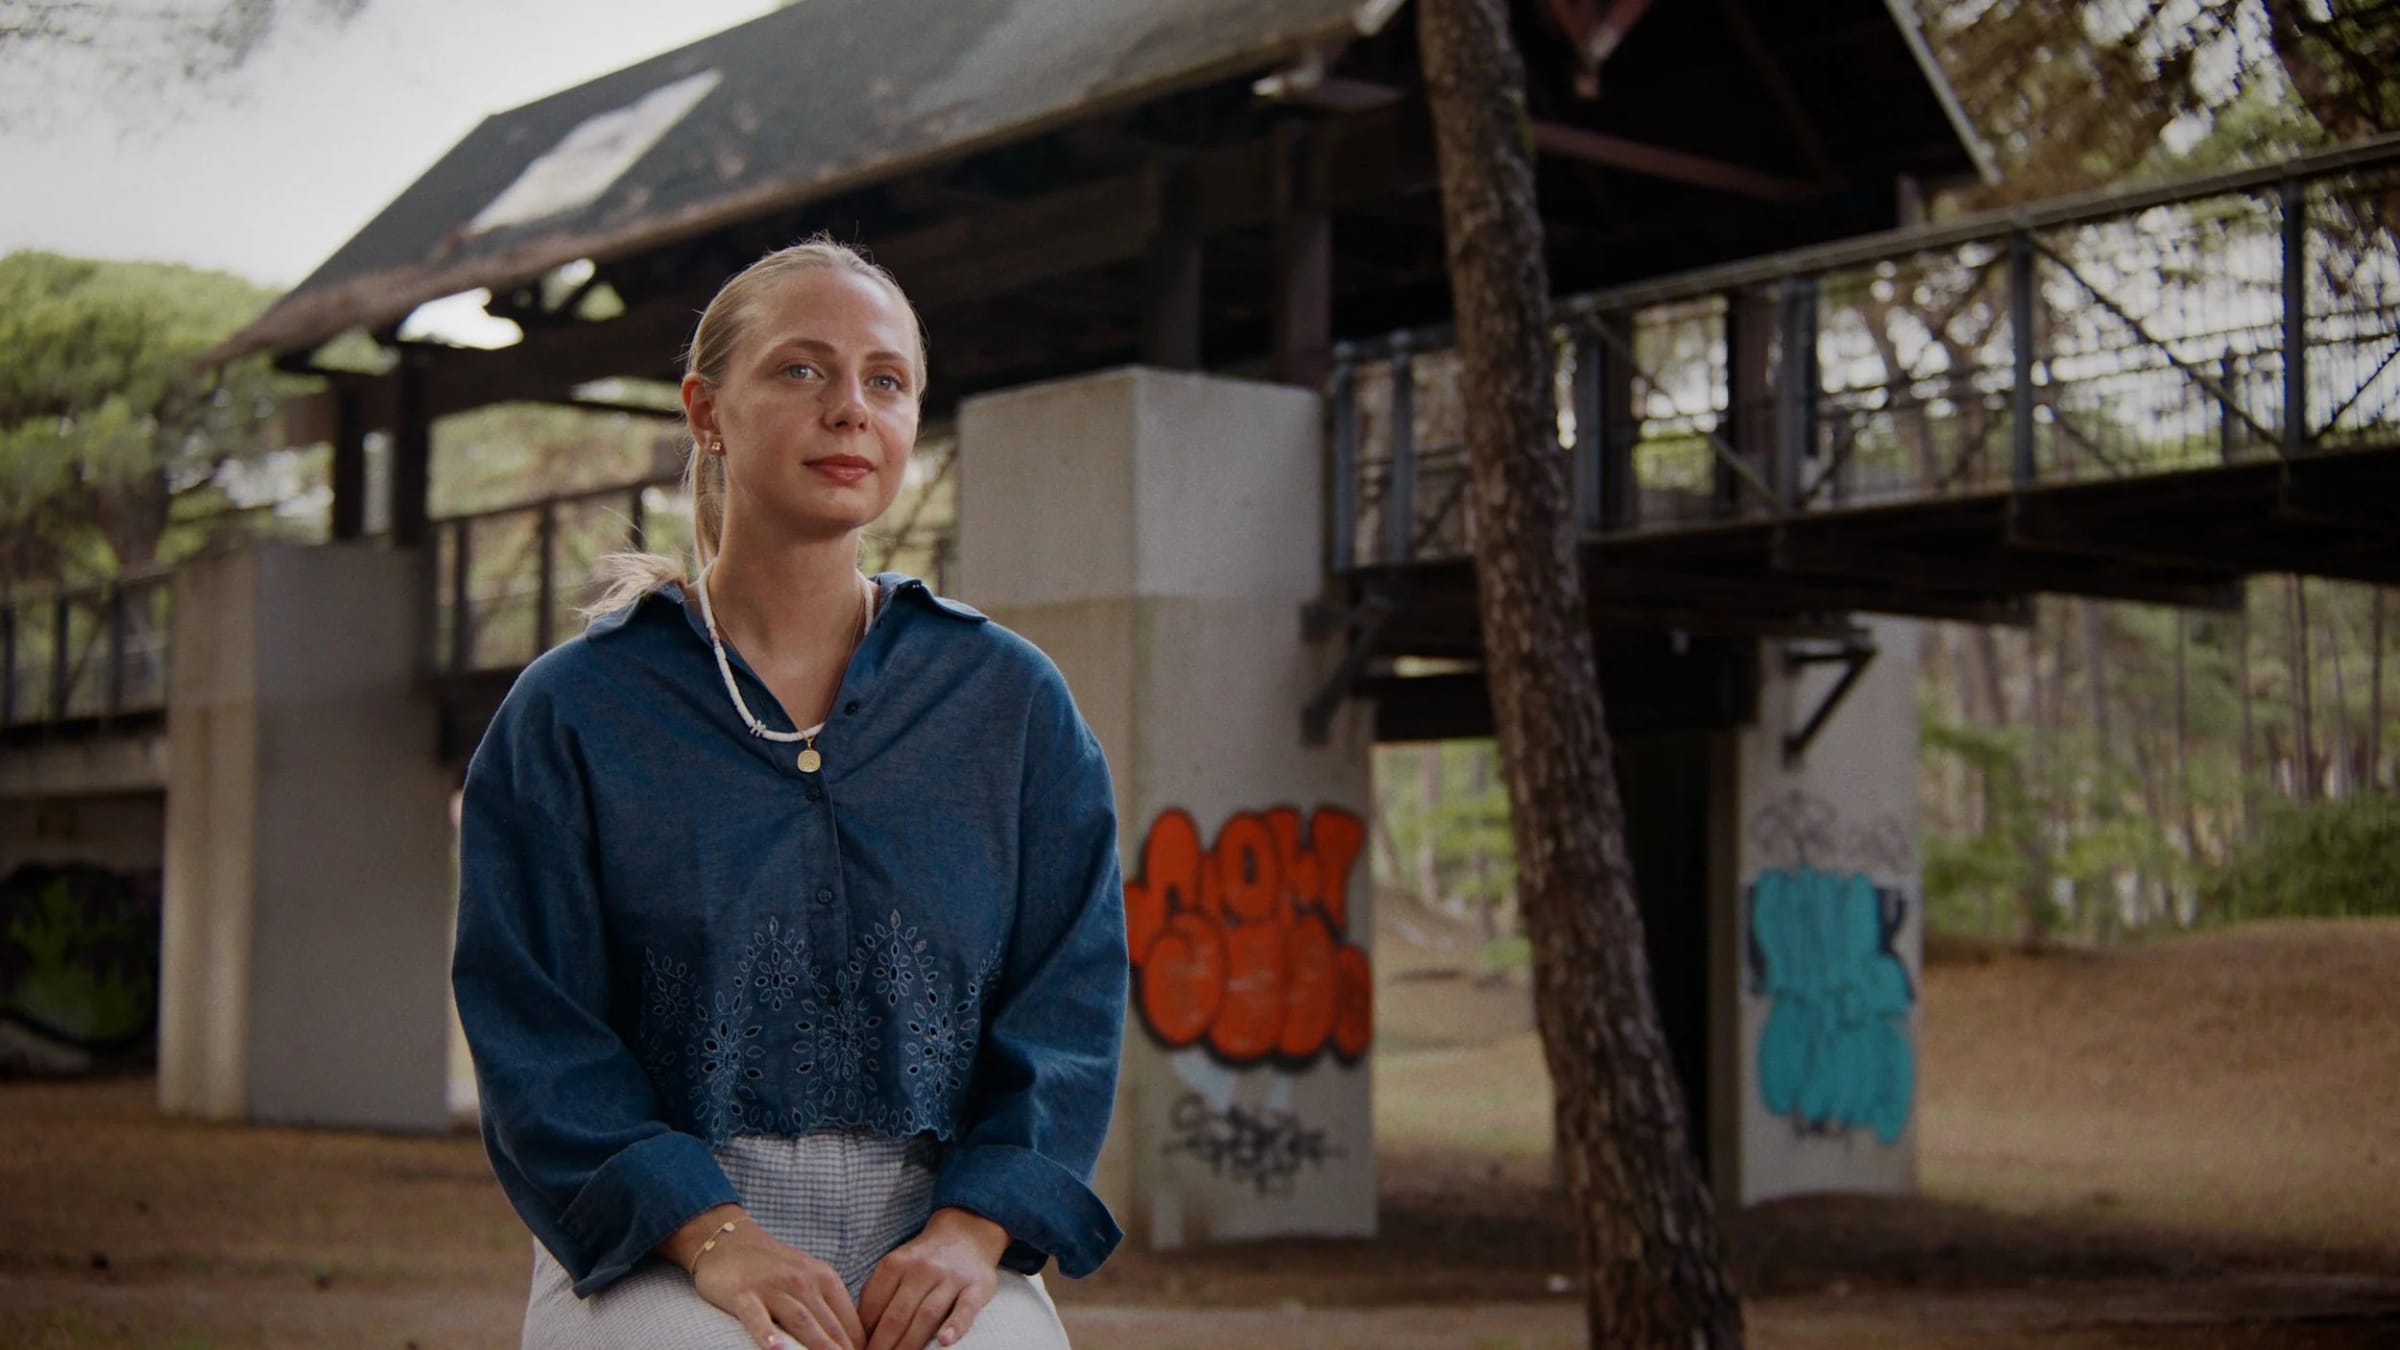
When someone looks toward the edge of the frame, whatever they’re looking at is outside the frame and the viewer can’t have it. Give them the room to look into, and we look with them.
This is something I’ve also been guilty of. Look at this image, for example. This is from a documentary I shot back in 2012. Here, I placed the interviewee too close to a wall and had them look at the short side of the screen, turned away from the light.
So here’s how to avoid this issue: The person should look at the empty part of the frame. You divide the screen into three columns, place the subject at about one third of the frame, then have them look towards the remaining two thirds of the screen. This is also where the lighting should come from, which is outside the scope of this video, but still worth pointing out. The darkest part of the face should be in the direction of the camera, not on the other side, as I did here.
Ok now the image looks much more meaningful, so let’s go to the third issue, which is…
3. Placing the camera too low
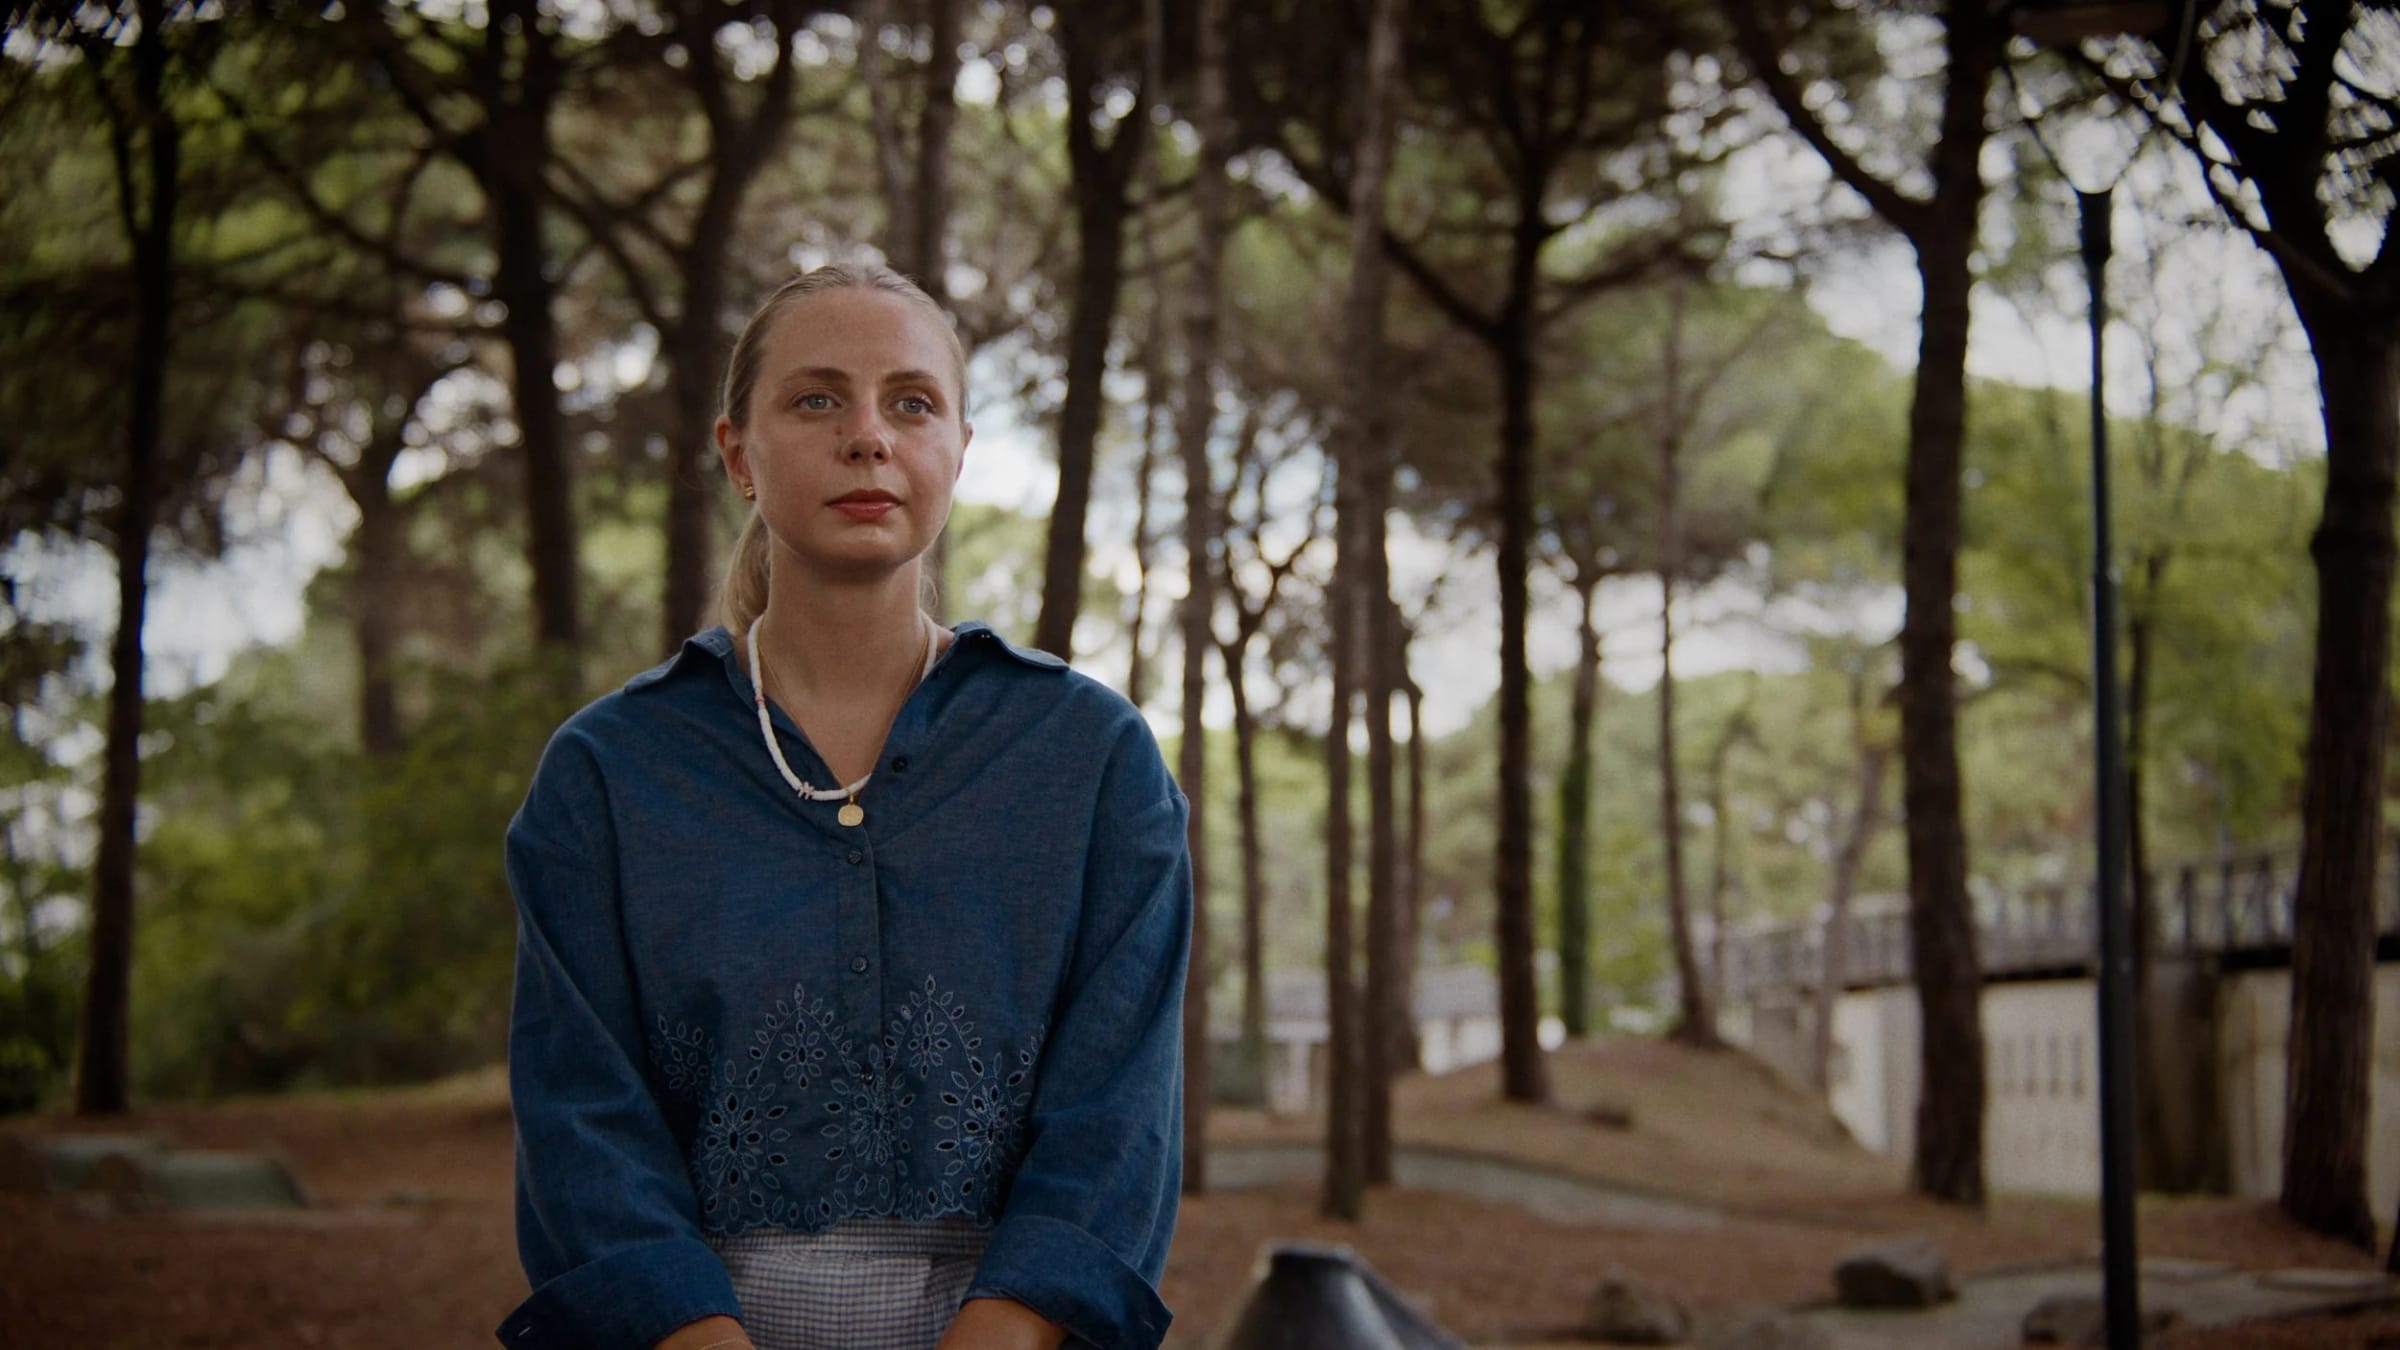
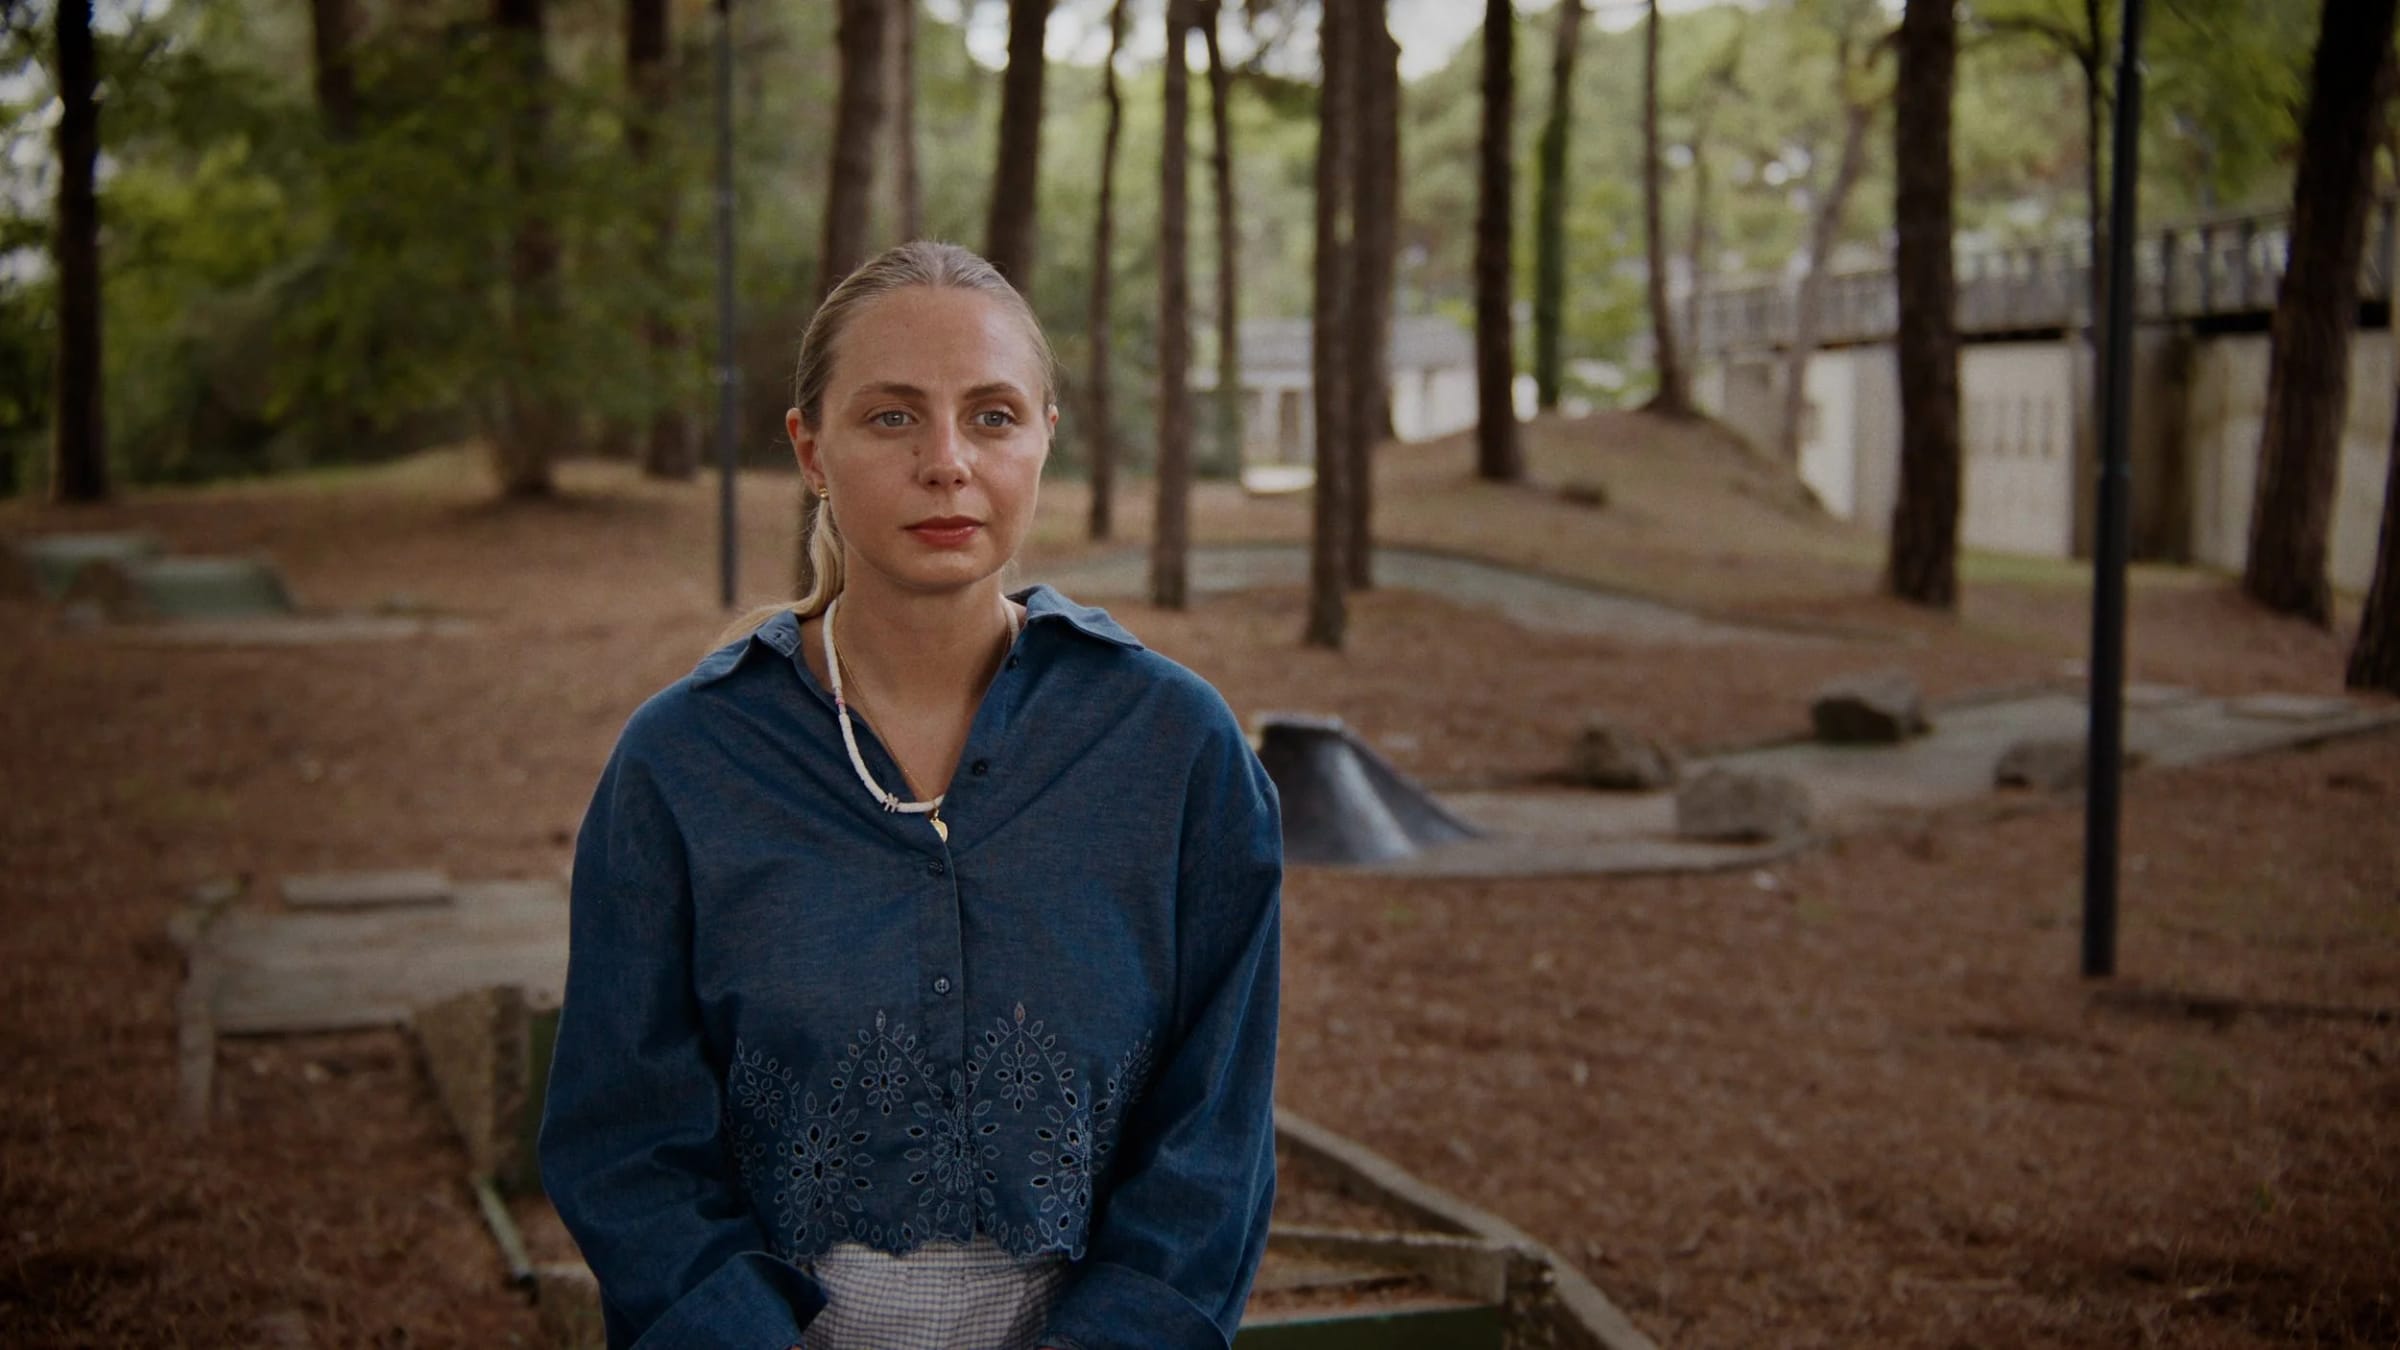
The common practice is to place the camera in the middle of the subject and keep it parallel to the ground and horizon. This works well in most situations, but if a person is sitting, they are usually leaning back a bit too. This tilts the person slightly away from the camera, which makes the lower part of the body look bigger and the head look smaller. It also means that the person will seem to look up, compared to where the camera is aiming. A low camera makes the person loom over us. A high one puts us above them. Eye height means we’re at the same level.
So, here’s the workaround. Place the camera at the same height as the eyes, not in the middle of the body. You know you’re in the right spot when the camera is slightly tilted towards the ground. You can also go higher, as faces usually look more pleasing when you shoot them from above.
That said, there can be exceptions. If you want your interview to feel a little detached from the character, you can place the camera lower, or higher. At times you also want to make the environment part of the image, so you show more background and less person. This is fine, but just be aware of what you’re doing. The further you move from eye height, the less the viewer feels they’re meeting the subject, and the more they feel they’re observing them.
Ok, so we’ve fixed our main camera. Let’s now turn to our second camera.
4. Crossing A cam and B cam
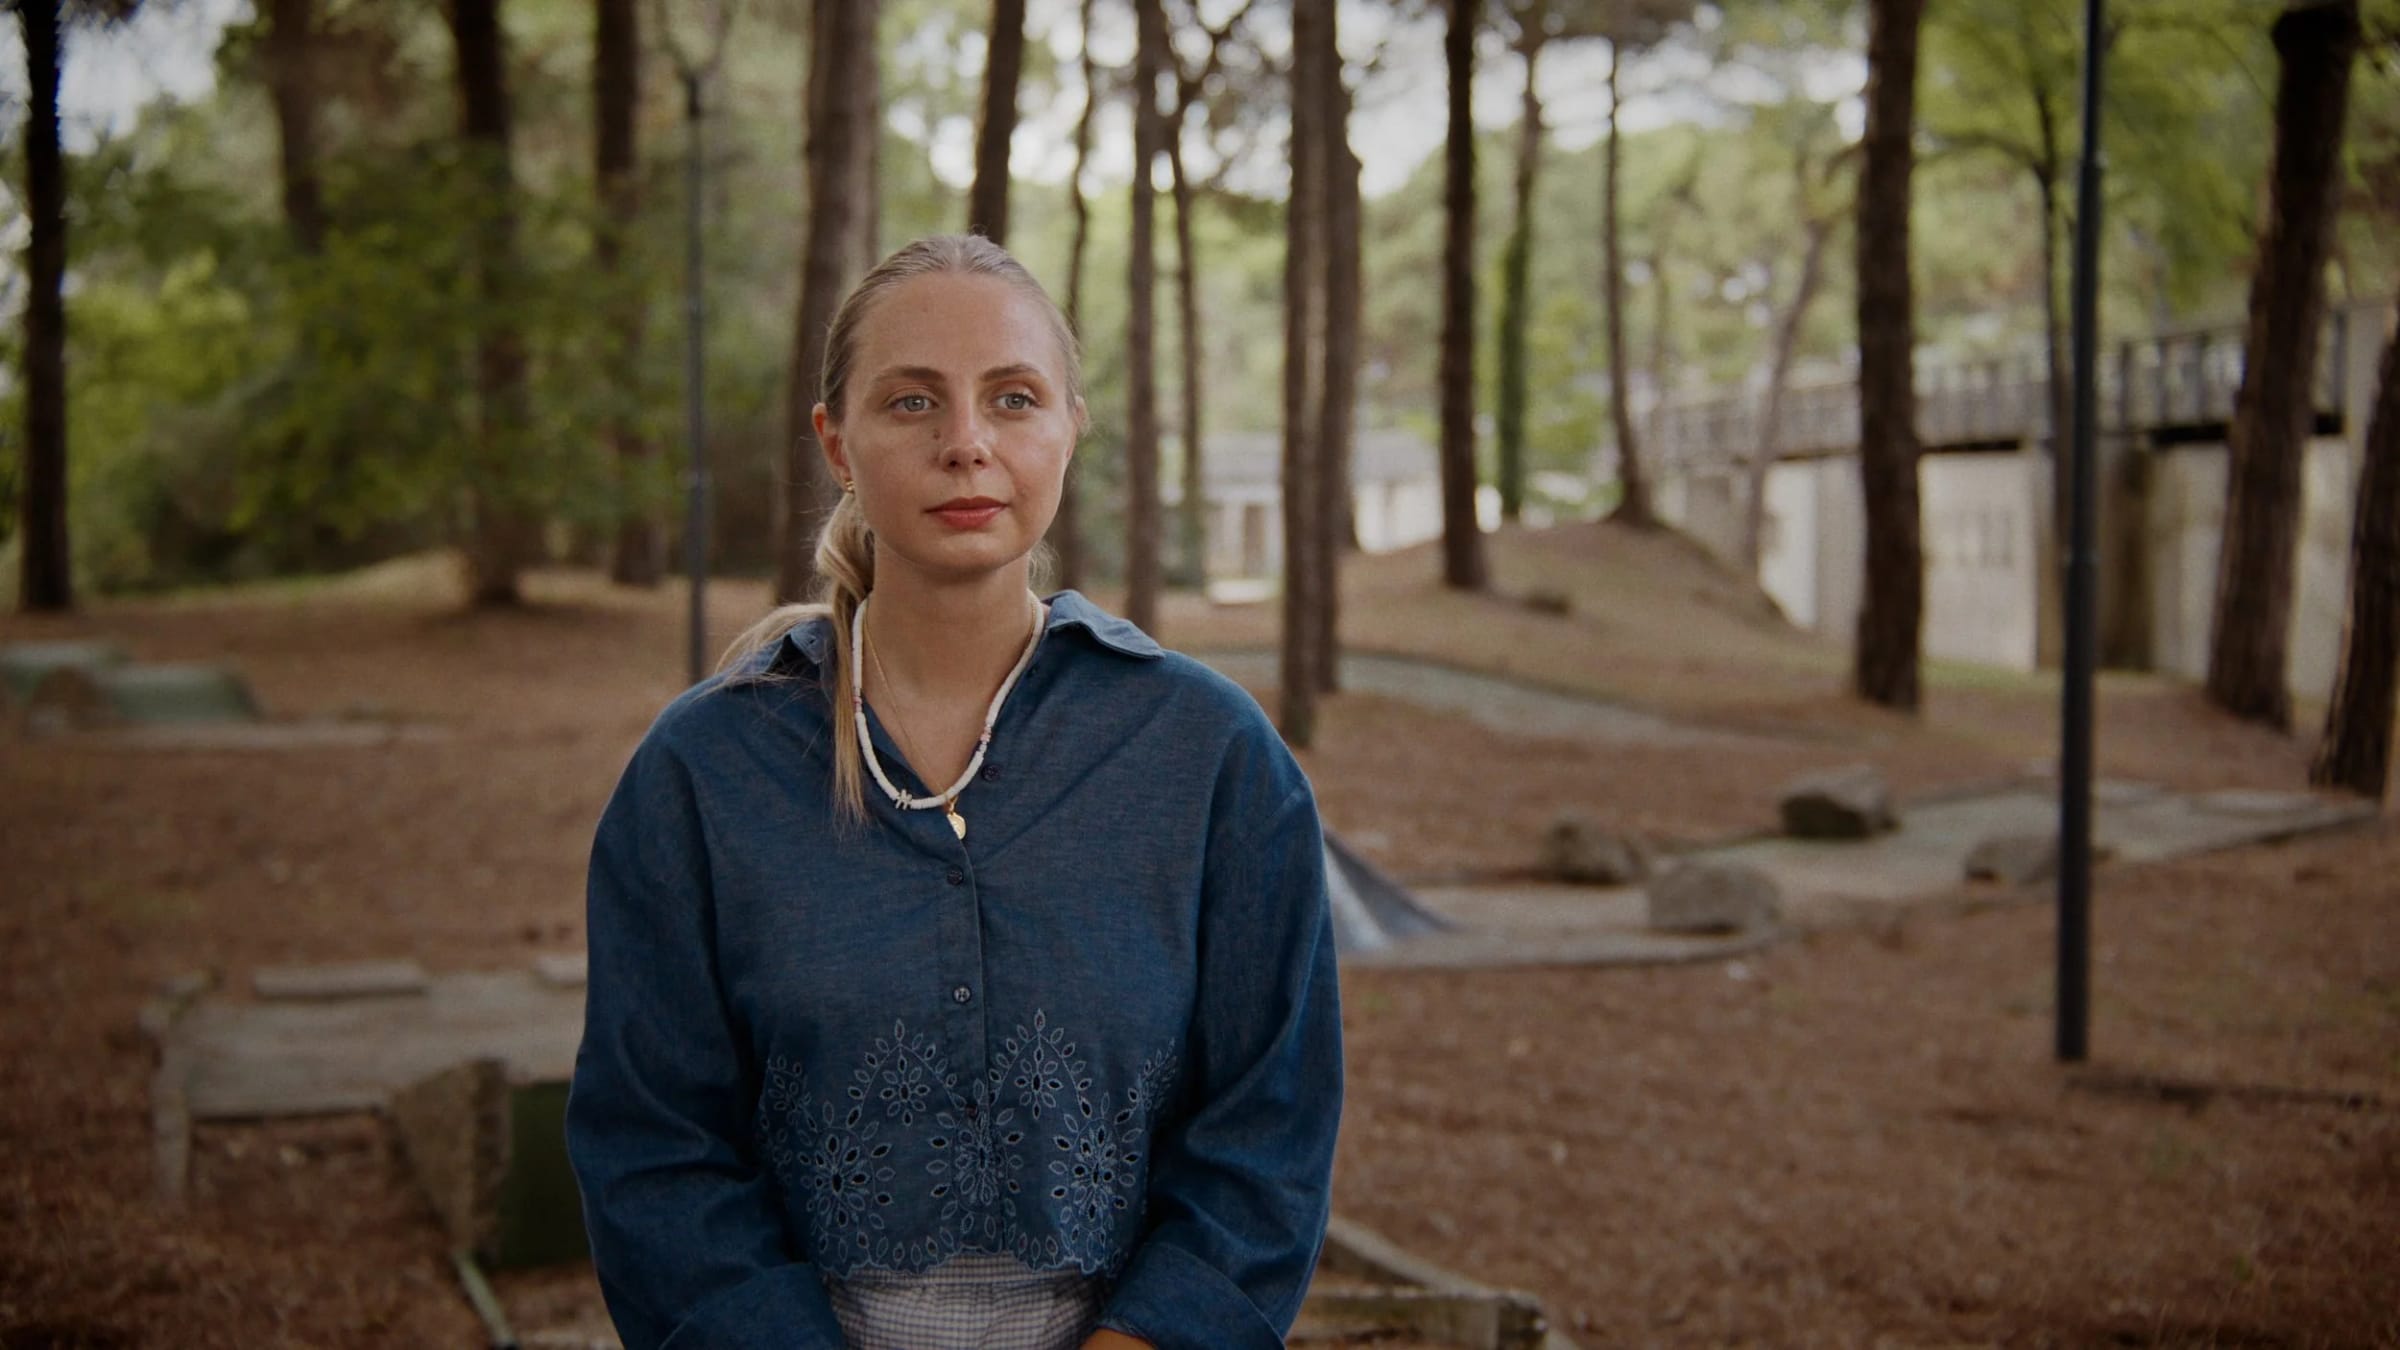
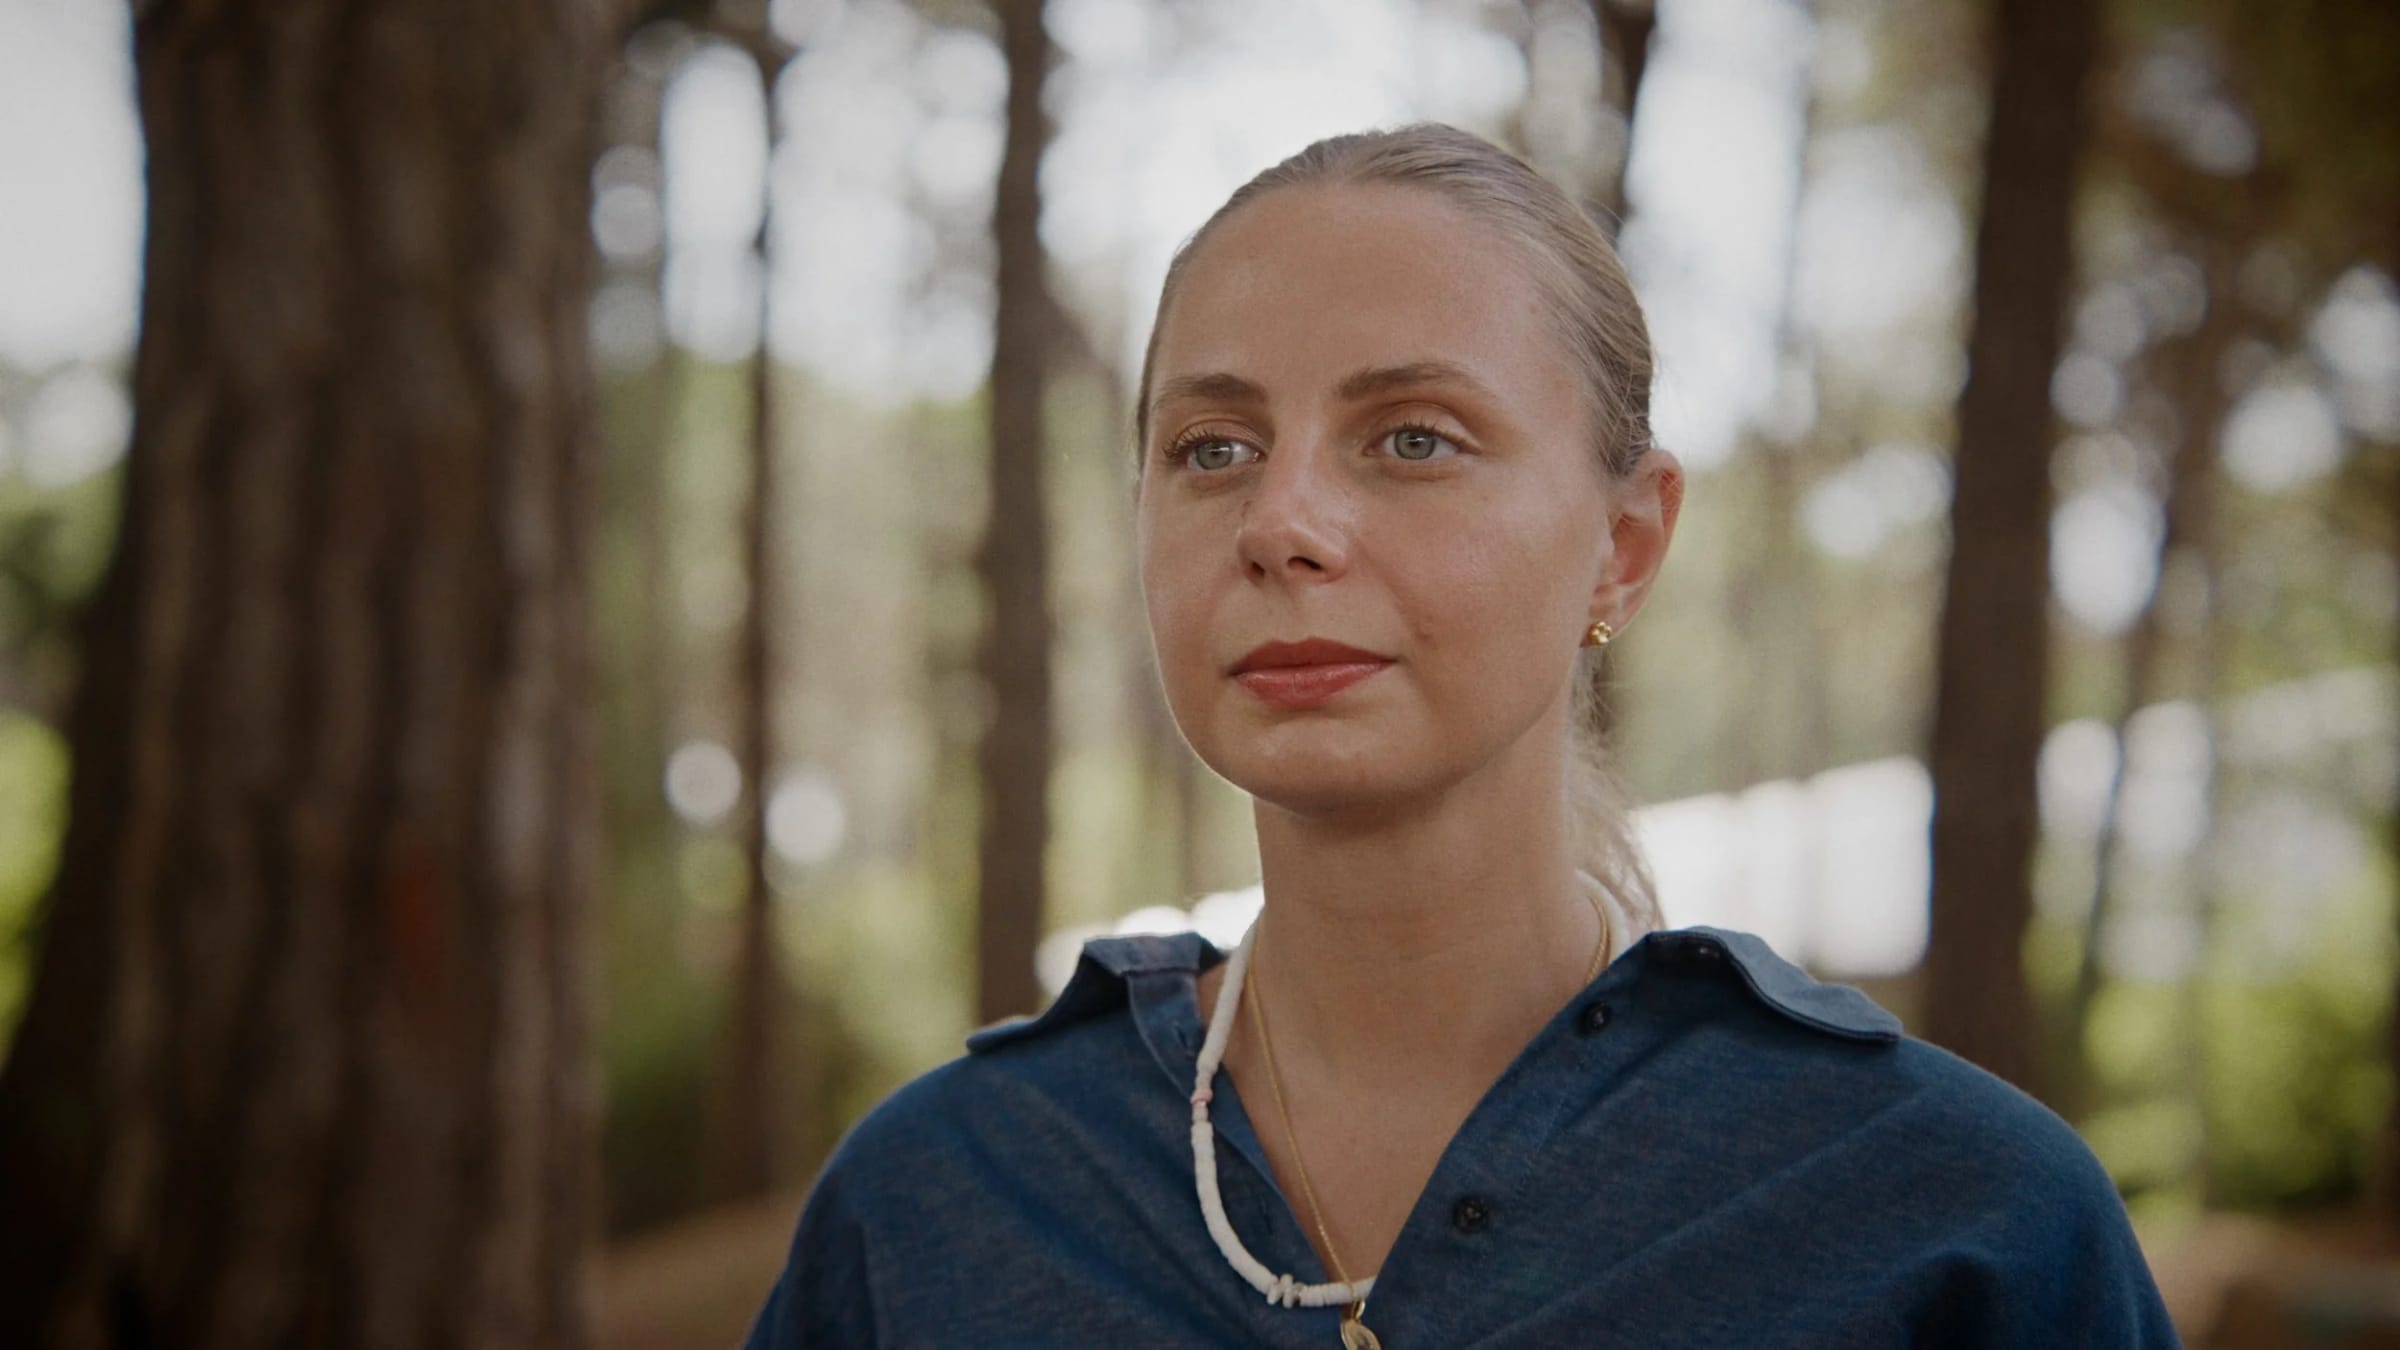
When you cross the two cameras, the eyes look in different directions from A to B camera, as if the subject is having a conversation with themselves. When the eyes jump sides on the cut, the viewer stops listening for a second and works out where the person is. That second can cost you whatever they were saying.
This is a very rookie mistake that, for some reason, I keep seeing in high-end productions lately.
So, here’s how to avoid this mistake. When you’ve placed your main camera and your subject, draw an imaginary line that follows the eyes. All cameras should be on the same side of the line, and all the lights should be on the opposite side.
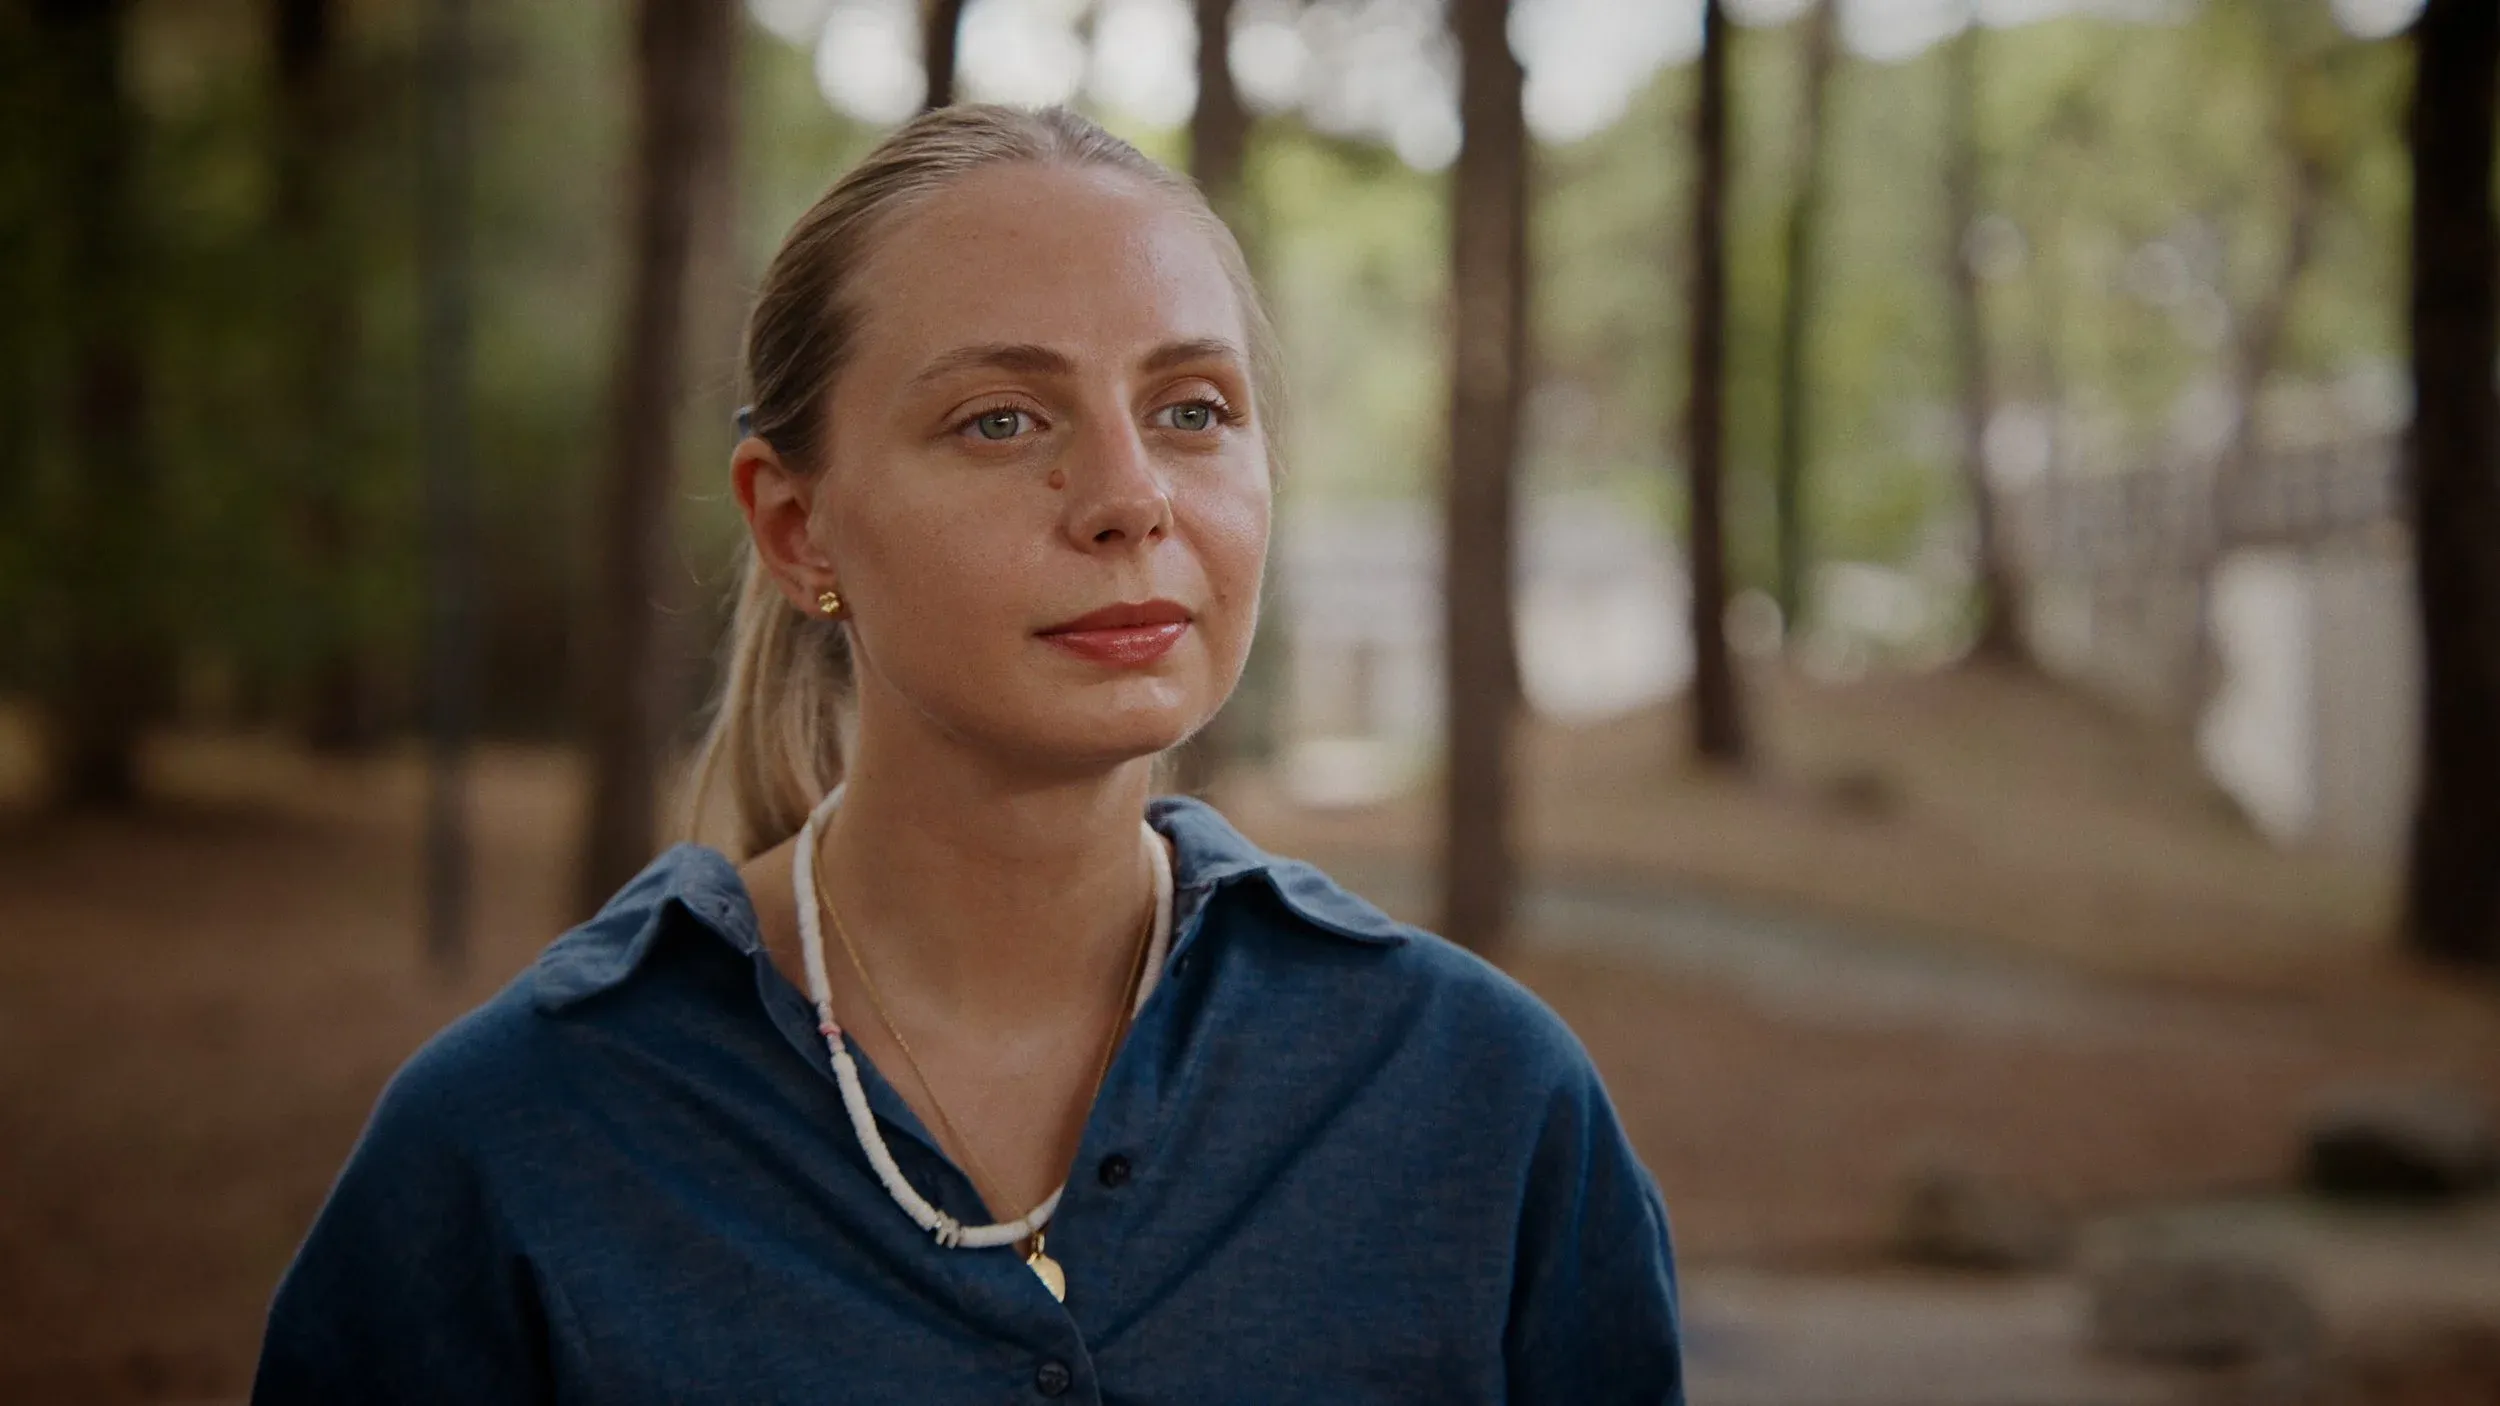
Correct second camera placement.
Another tip. The cameras should either be very close to each other, so the angle looks the same but with very different lens lengths, or quite far apart from each other. This makes the cutting between cameras smoother.
Now that we’ve fixed the bigger issues, let’s look at a more subtle problem, which is…
5. Having the cameras too far on the side
This is a deeper problem, and one that is linked more to directing emotions than to visual framing. I’ll go into more depth in another video, but here’s the short version.
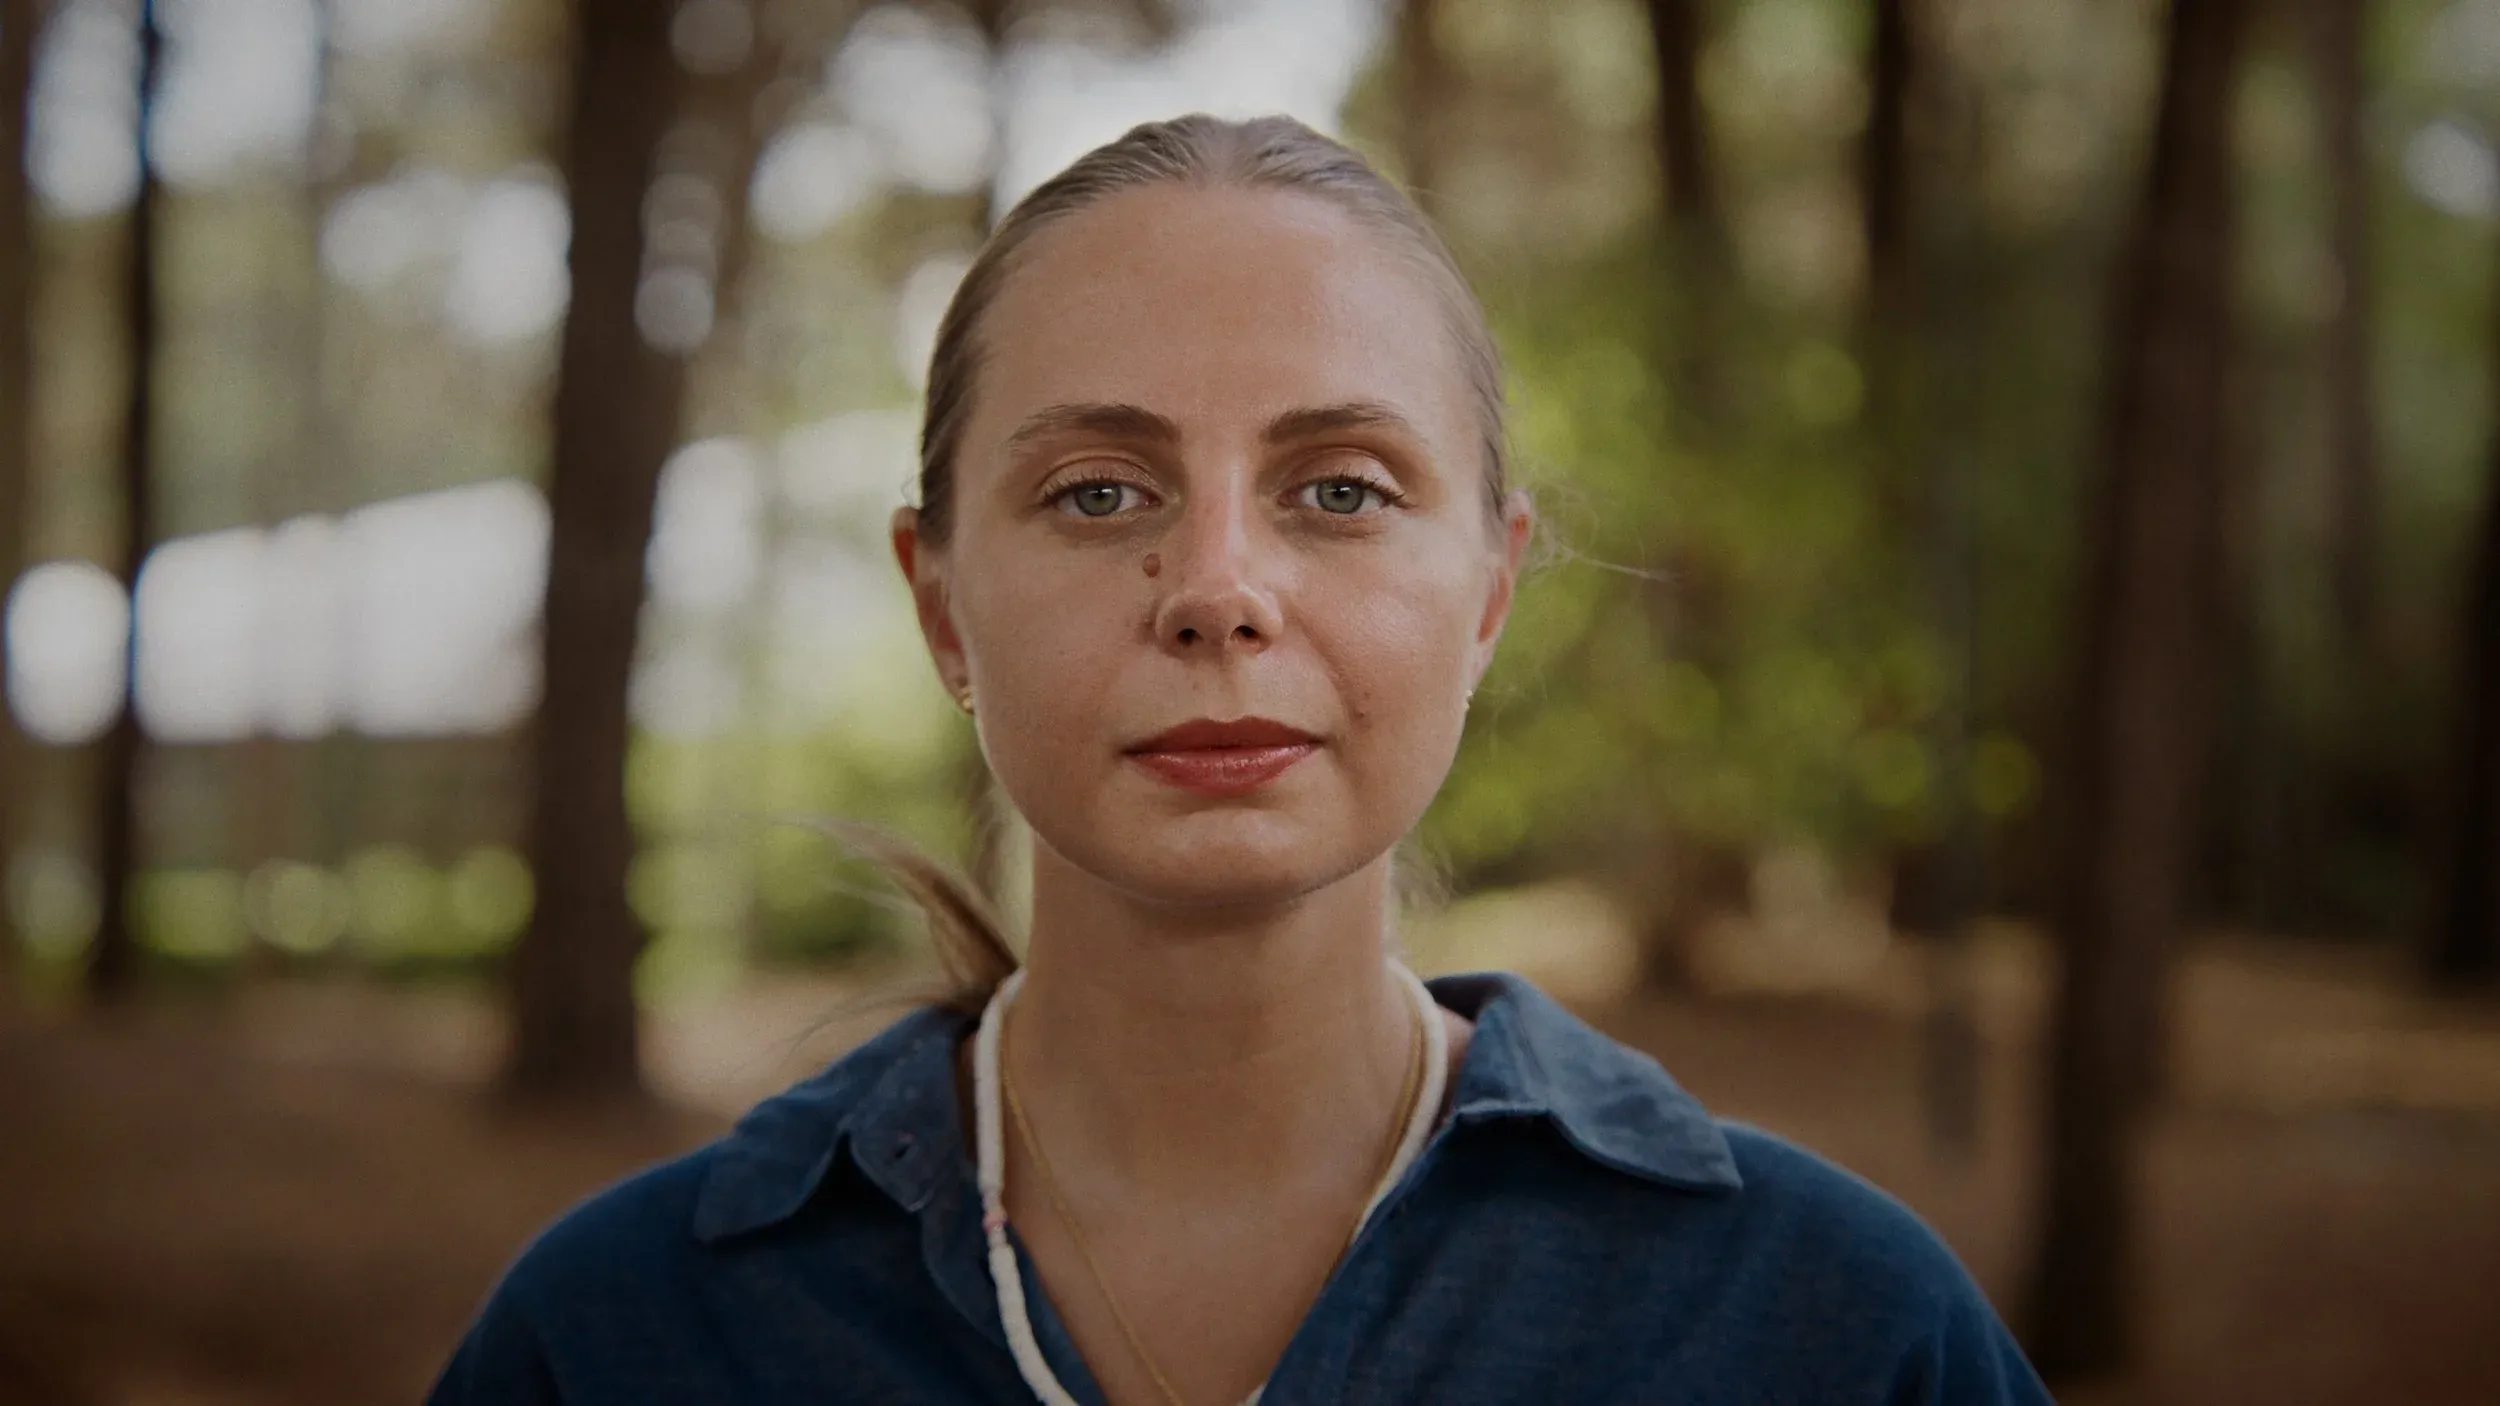
When you want to carry through emotion, you want the face to be as visible and central as possible. People can read faces very well, so if you allow them to see the face more clearly, they will feel the emotions more strongly.
The more you move the camera to the side, the less readable the face becomes, and the weaker the final effect. Generally, this is called a weak angle. Weak angles start when the second eye starts to disappear behind the nose, and continue all the way to the back of the head.
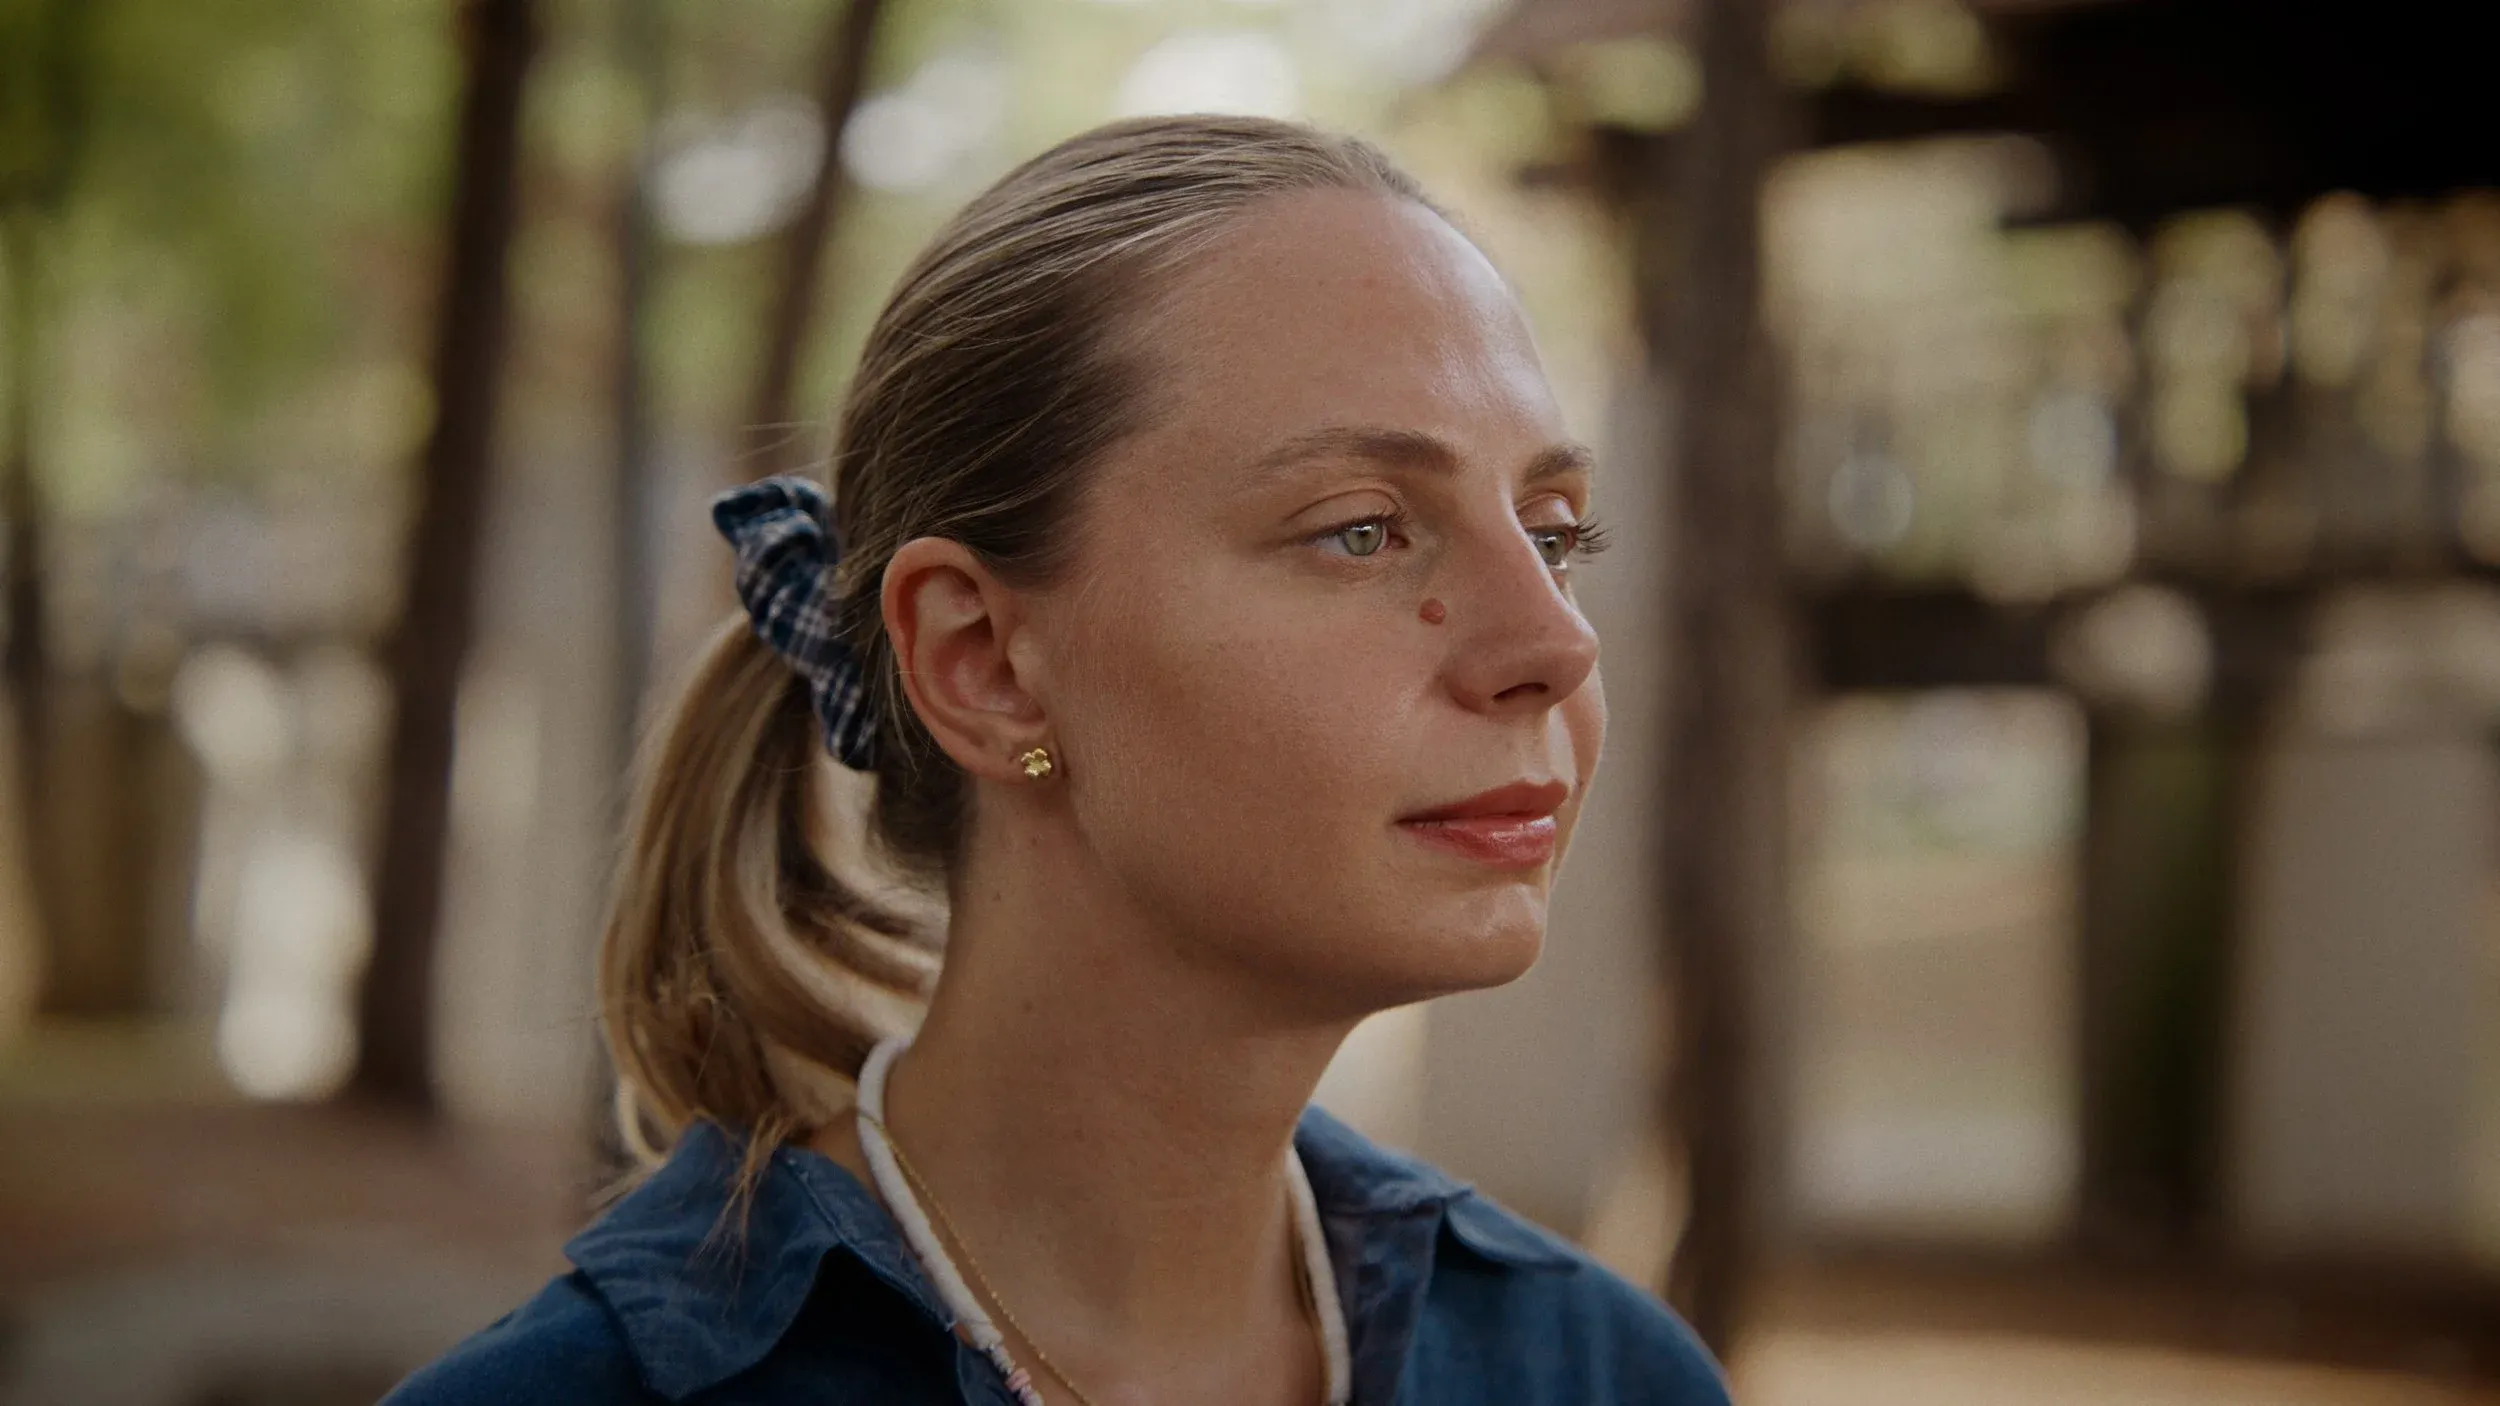
Beginning of weak angles.
So, if you want to carry emotion, you want a strong angle.
So here’s a simple rule: You should always have both eyes clearly visible in both cameras.
If you have two cameras and you want to be sure, place the second one — the one with the tele lens — closer to our imaginary line, and the other camera further away. This ensures you get the strongest possible close-up. When editing, you’ll see you’ll mostly end up using the closer of the two camera frames.
If you have more than two cameras, then you can play with weak and strong angles. You can edit your whole interview using a weaker close up, and then, just when you need to carry an extra punch, use the strong angle. The audience will notice the difference.
9/11 - One Day in America
Recently I’ve been rewatching “9/11: One Day in America”, which is a National Geographic documentary that applies this logic very well, in an extremely intense and emotional documentary.
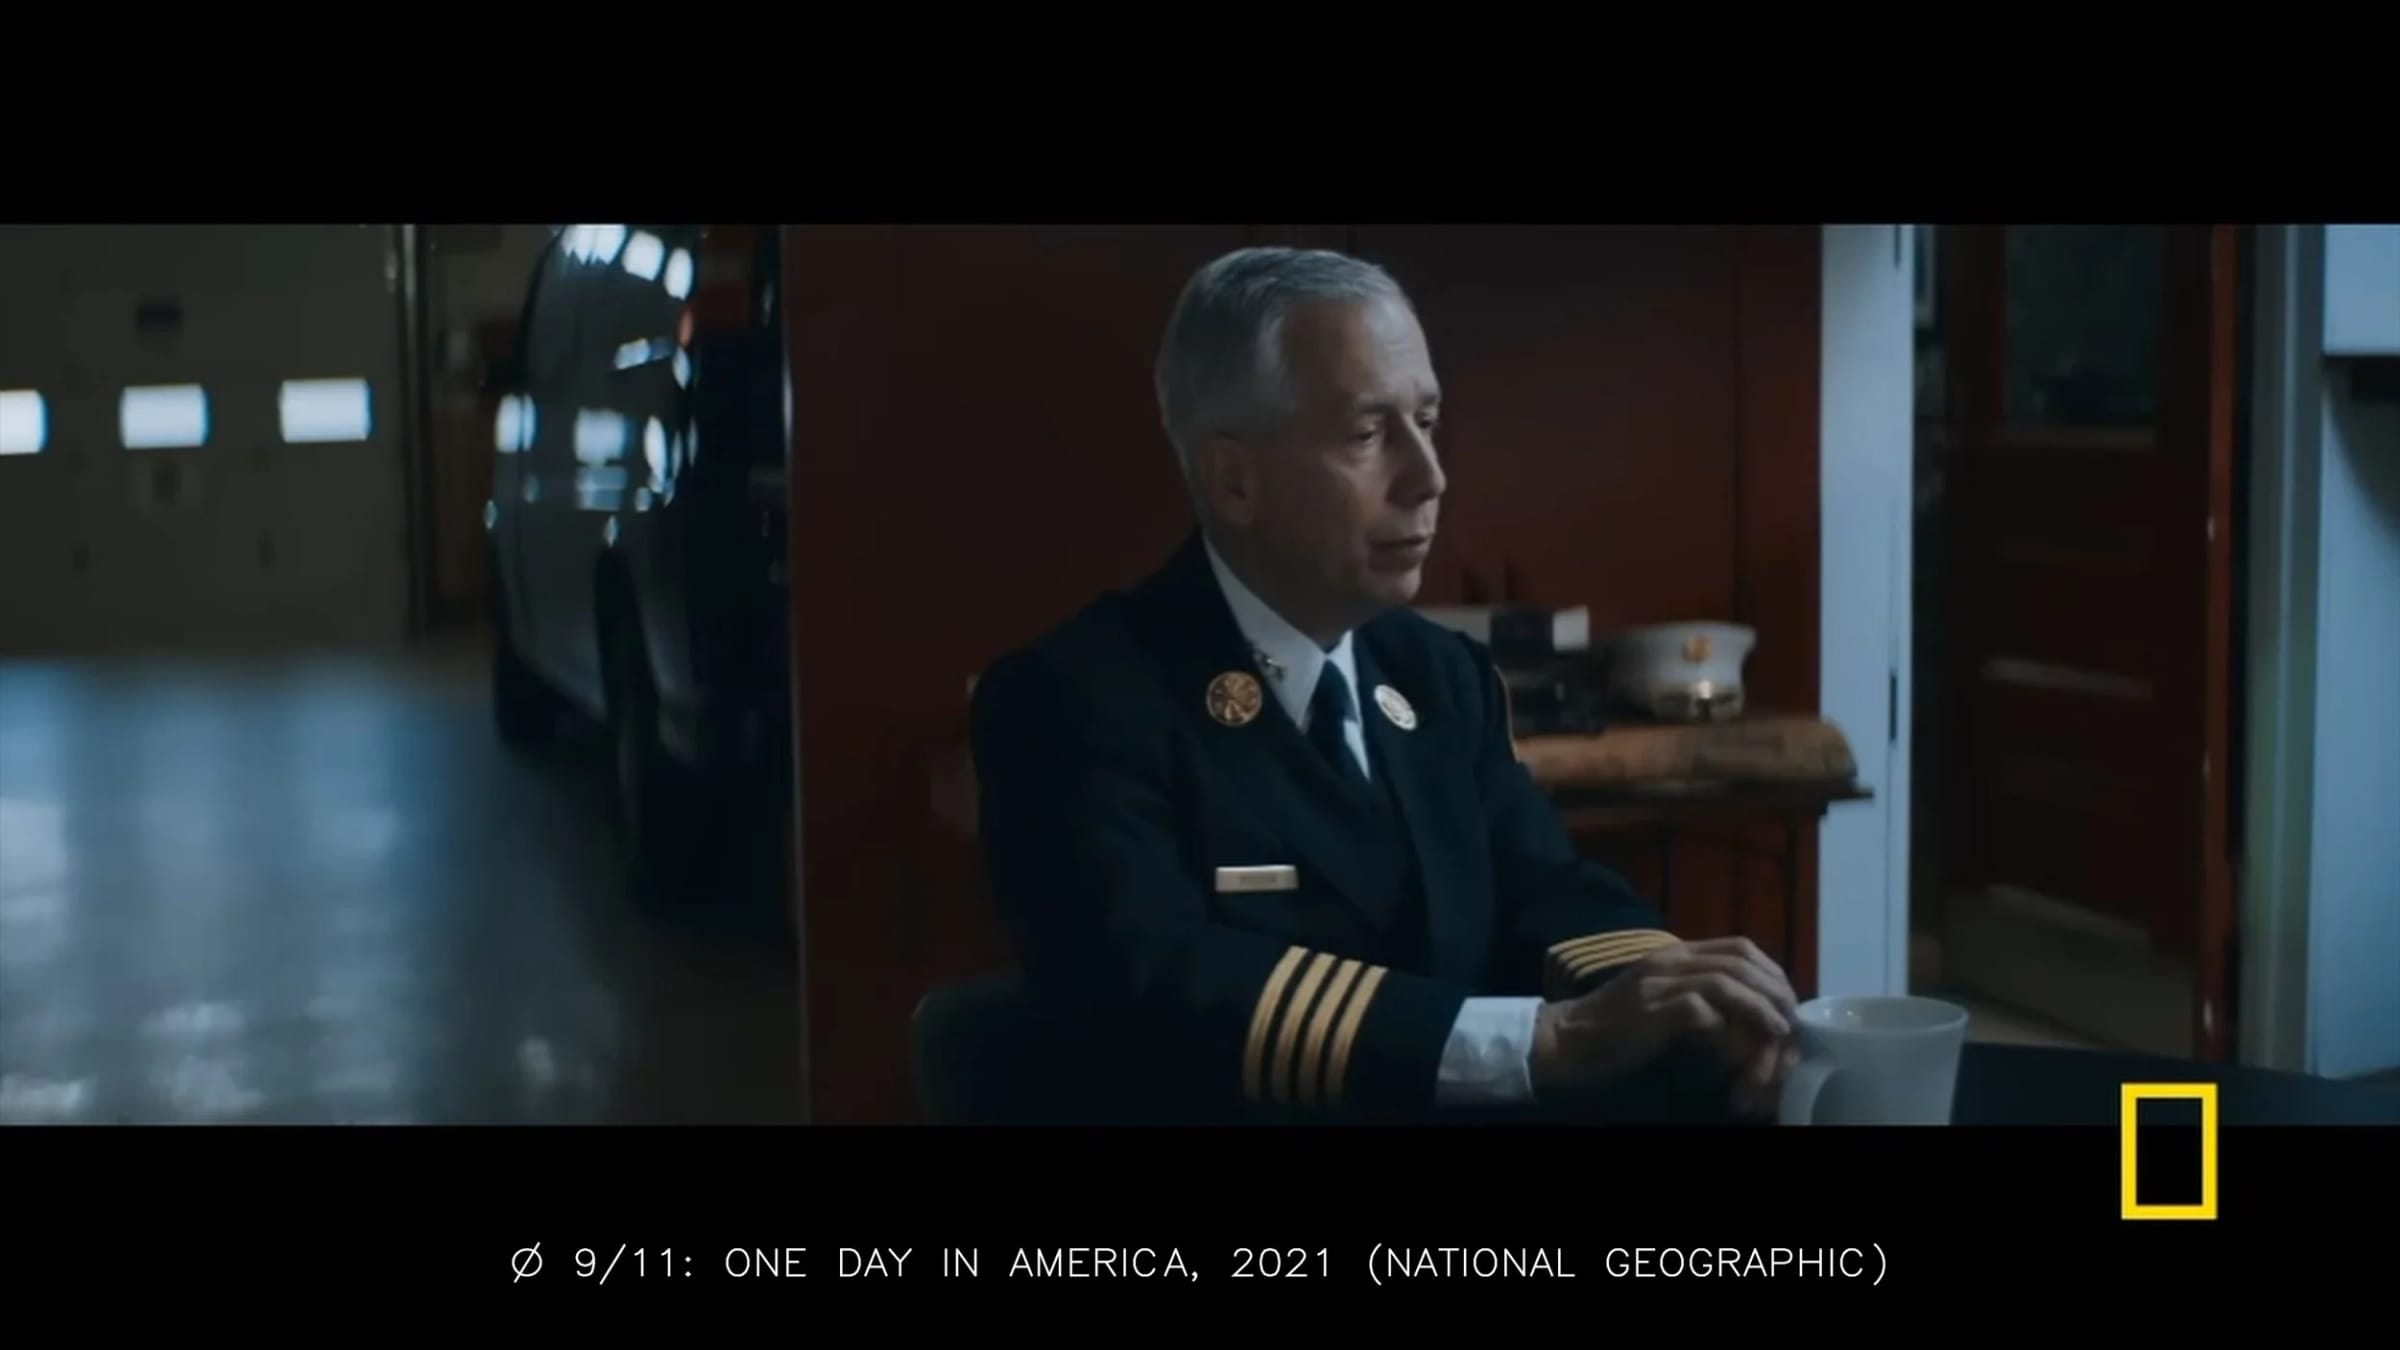
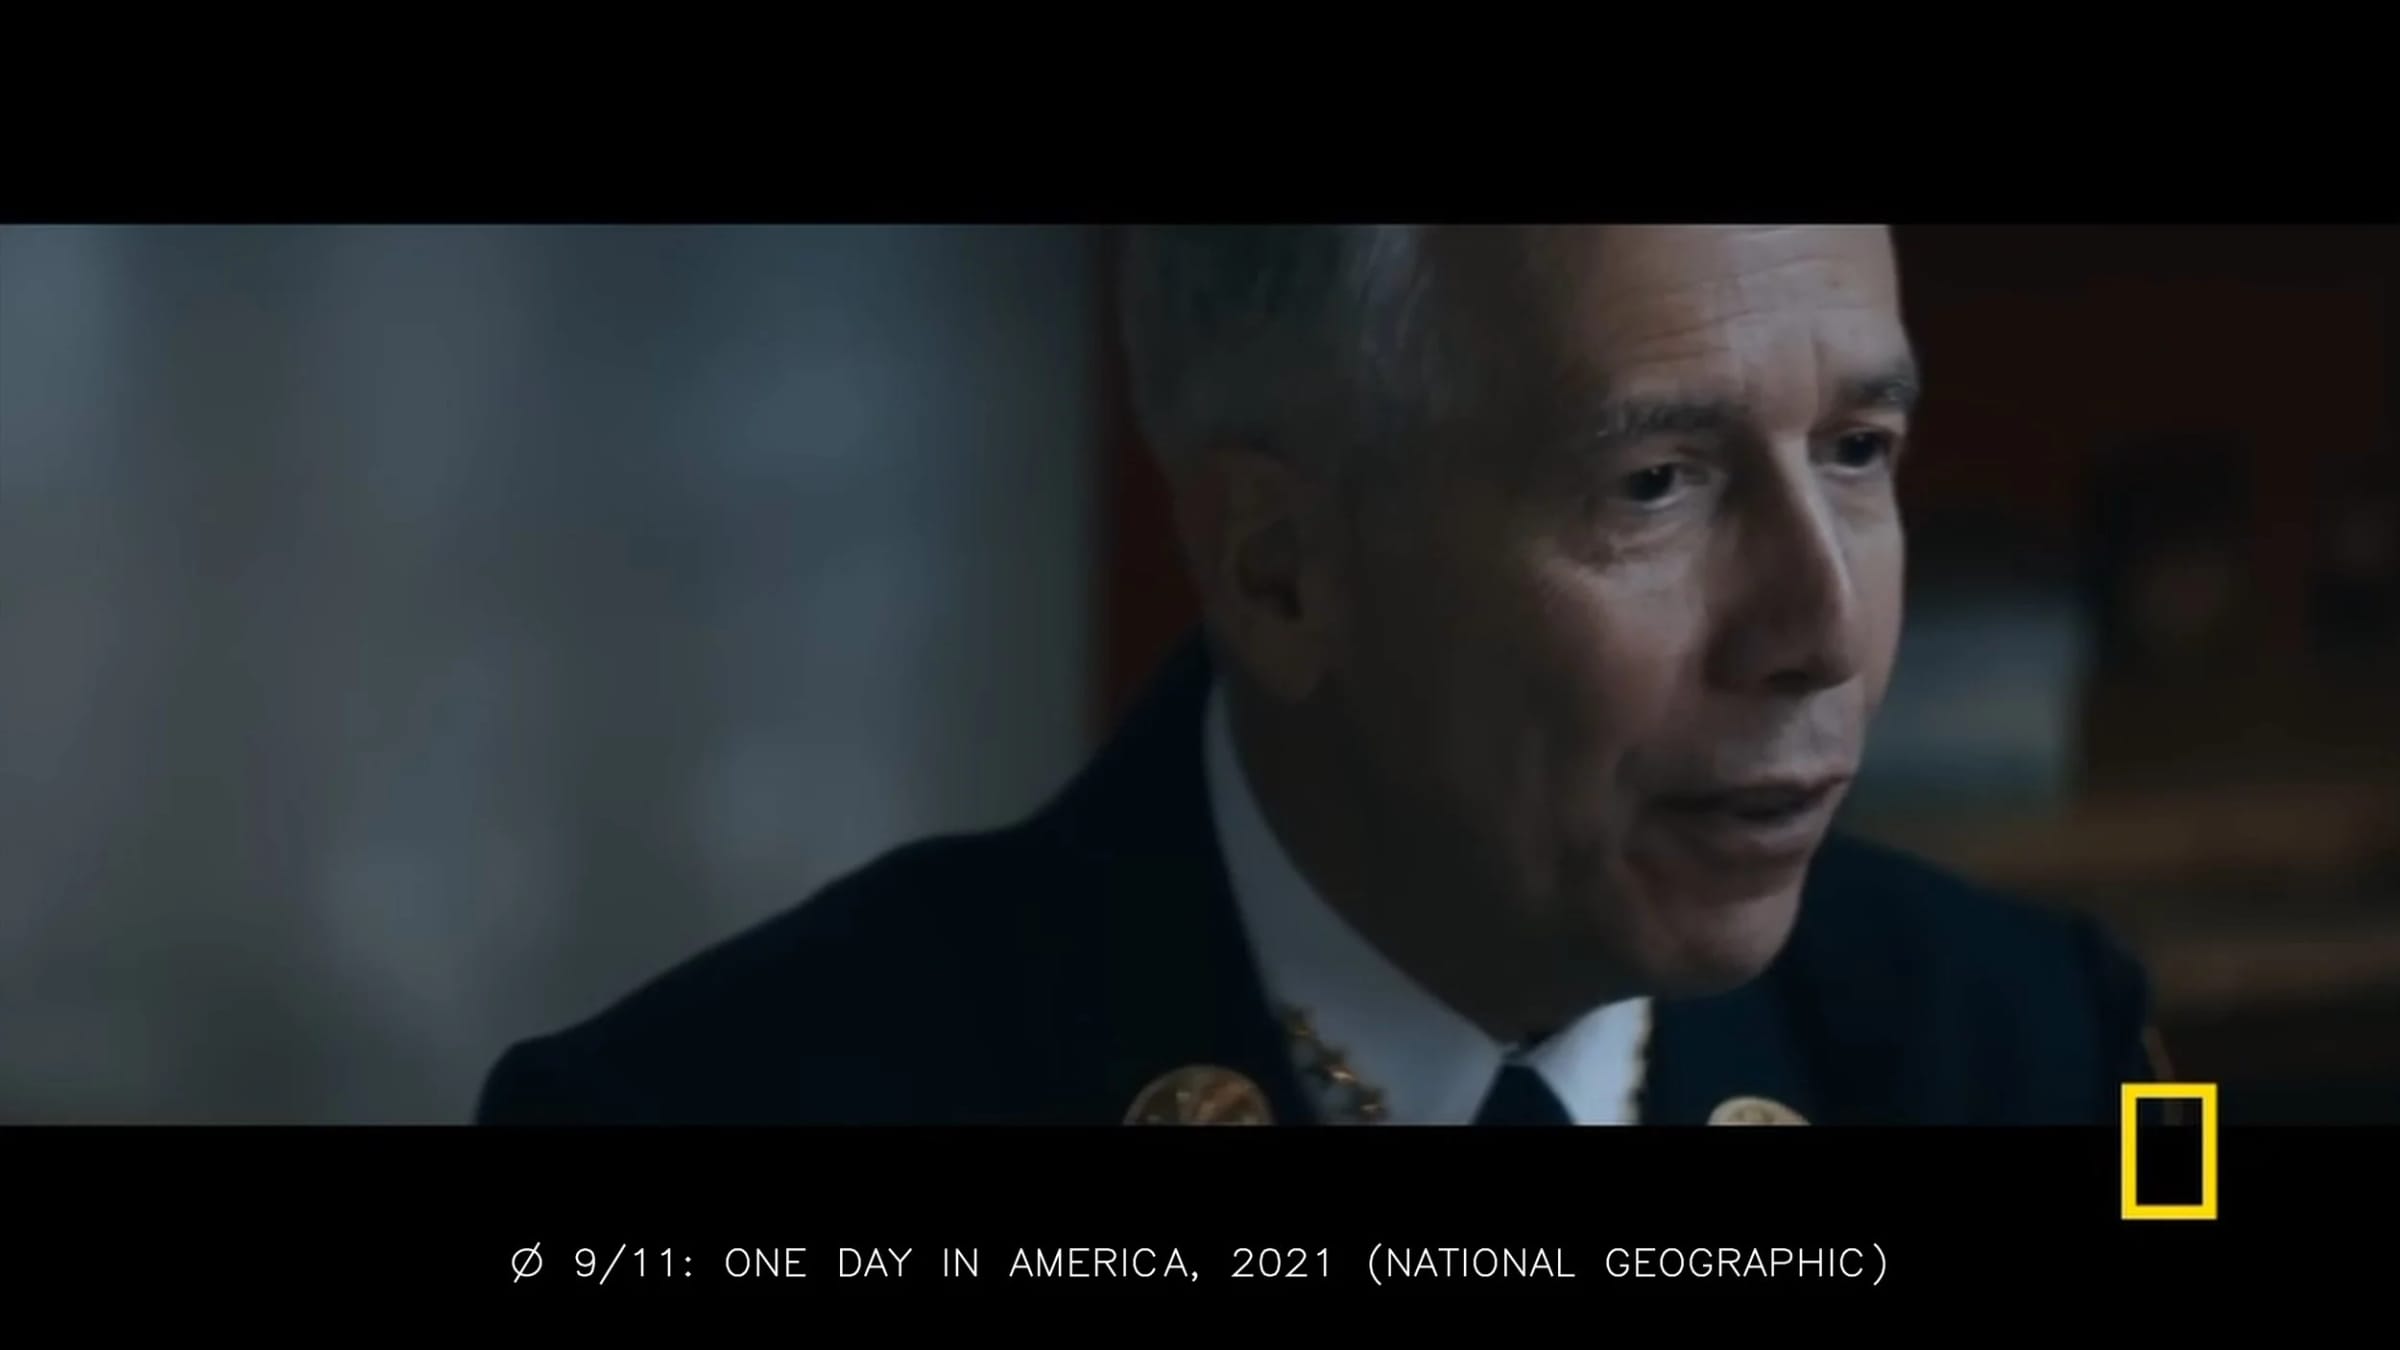
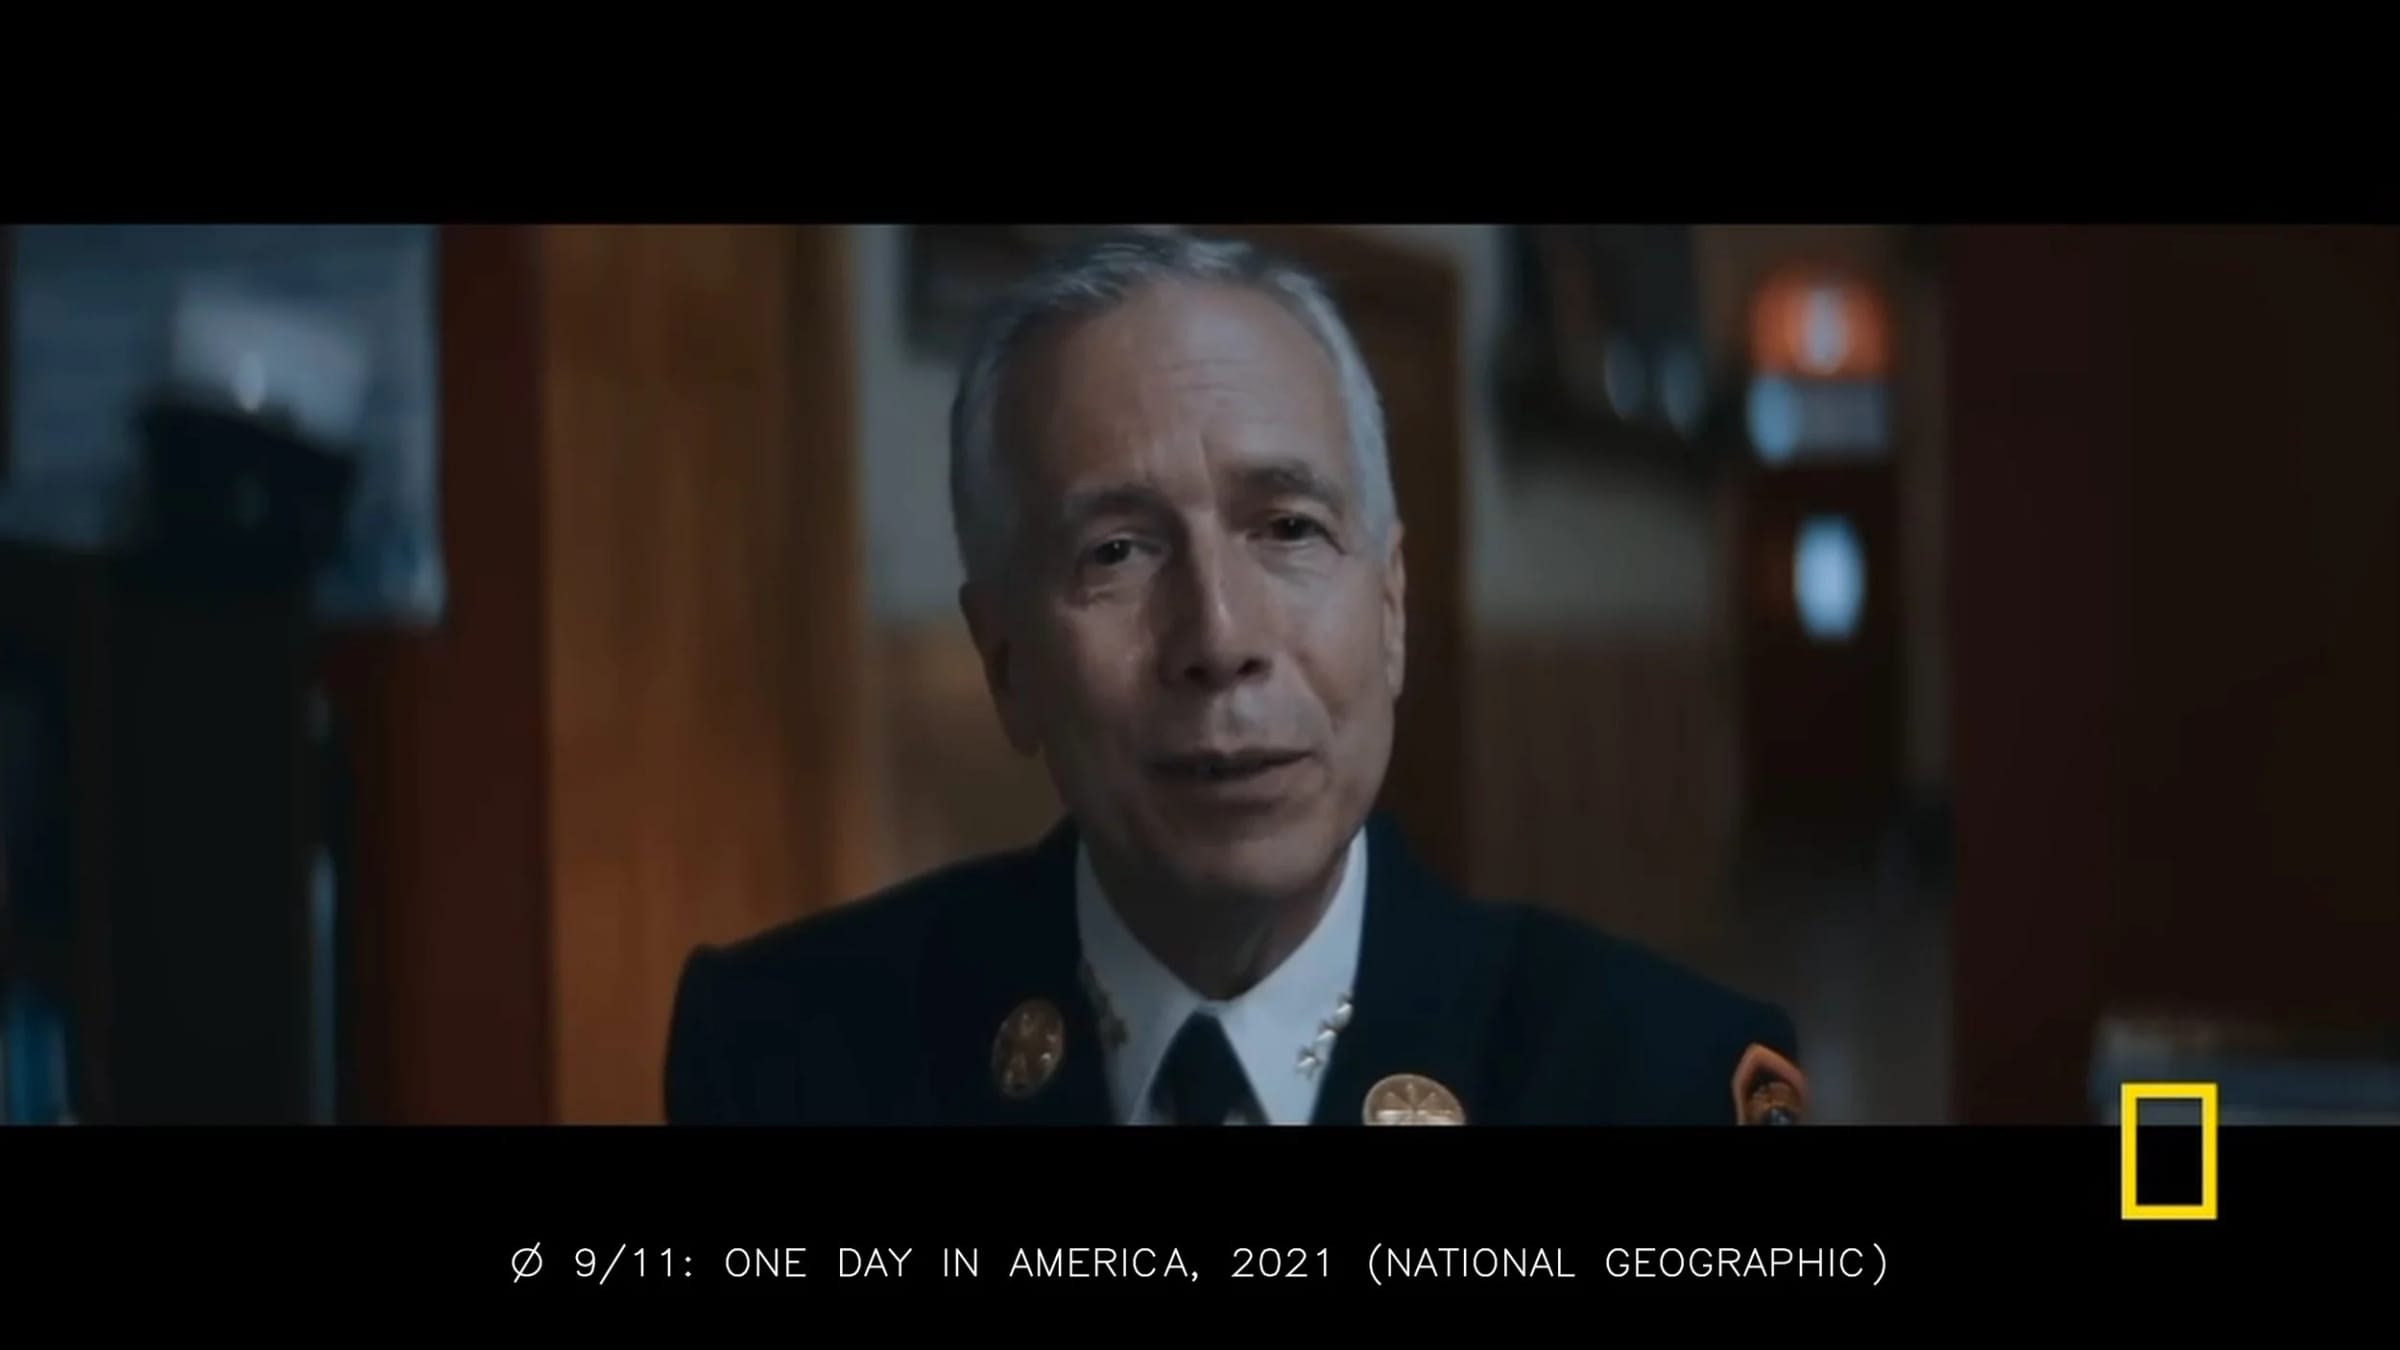
The interviews are shot with three cameras. You have a weaker wide angle on the side, a second camera with an extreme close up that is more central and higher, and a close up exactly in the middle, with the subject looking straight at it. Every time the documentary need it, the editor goes to the extreme close up.
This documentary breaks many of my rules, but as I said at the beginning, you can do so. If you have many cameras, you can place the subject looking at the short side, or place a camera from above. The important thing is that, when you need emotion, you have one camera that delivers it.
You can watch the full documentary for free on Youtube: