How the cove technique performs on real interview setups and how it compares to the softbox, the umbrella, and the other methods filmmakers reach for by default.
Is the Cove Light method any good? And, more importantly, can it work as a tool for a small-sized crew? If you shoot in tiny rooms, with a small team, and you need a setup that’s fast to build and easy to replicate, this is exactly the kind of question that matters. So we put the Cove to the test, tried a bunch of variations on top of it, and compared it to the methods most people reach for by default. One of them surprised us.
A little about me: I run a production company named CROMO. We do mostly advertising, but we are in the middle of two documentary productions — one is a TV miniseries and the second is a feature film — so we do many interviews and we’re always hunting for setups that are easy to replicate and fit in different spaces, even the tiny ones.
Here you can find the video on the topic, but if you prefer to read, just go ahead below!
What Is the Cove
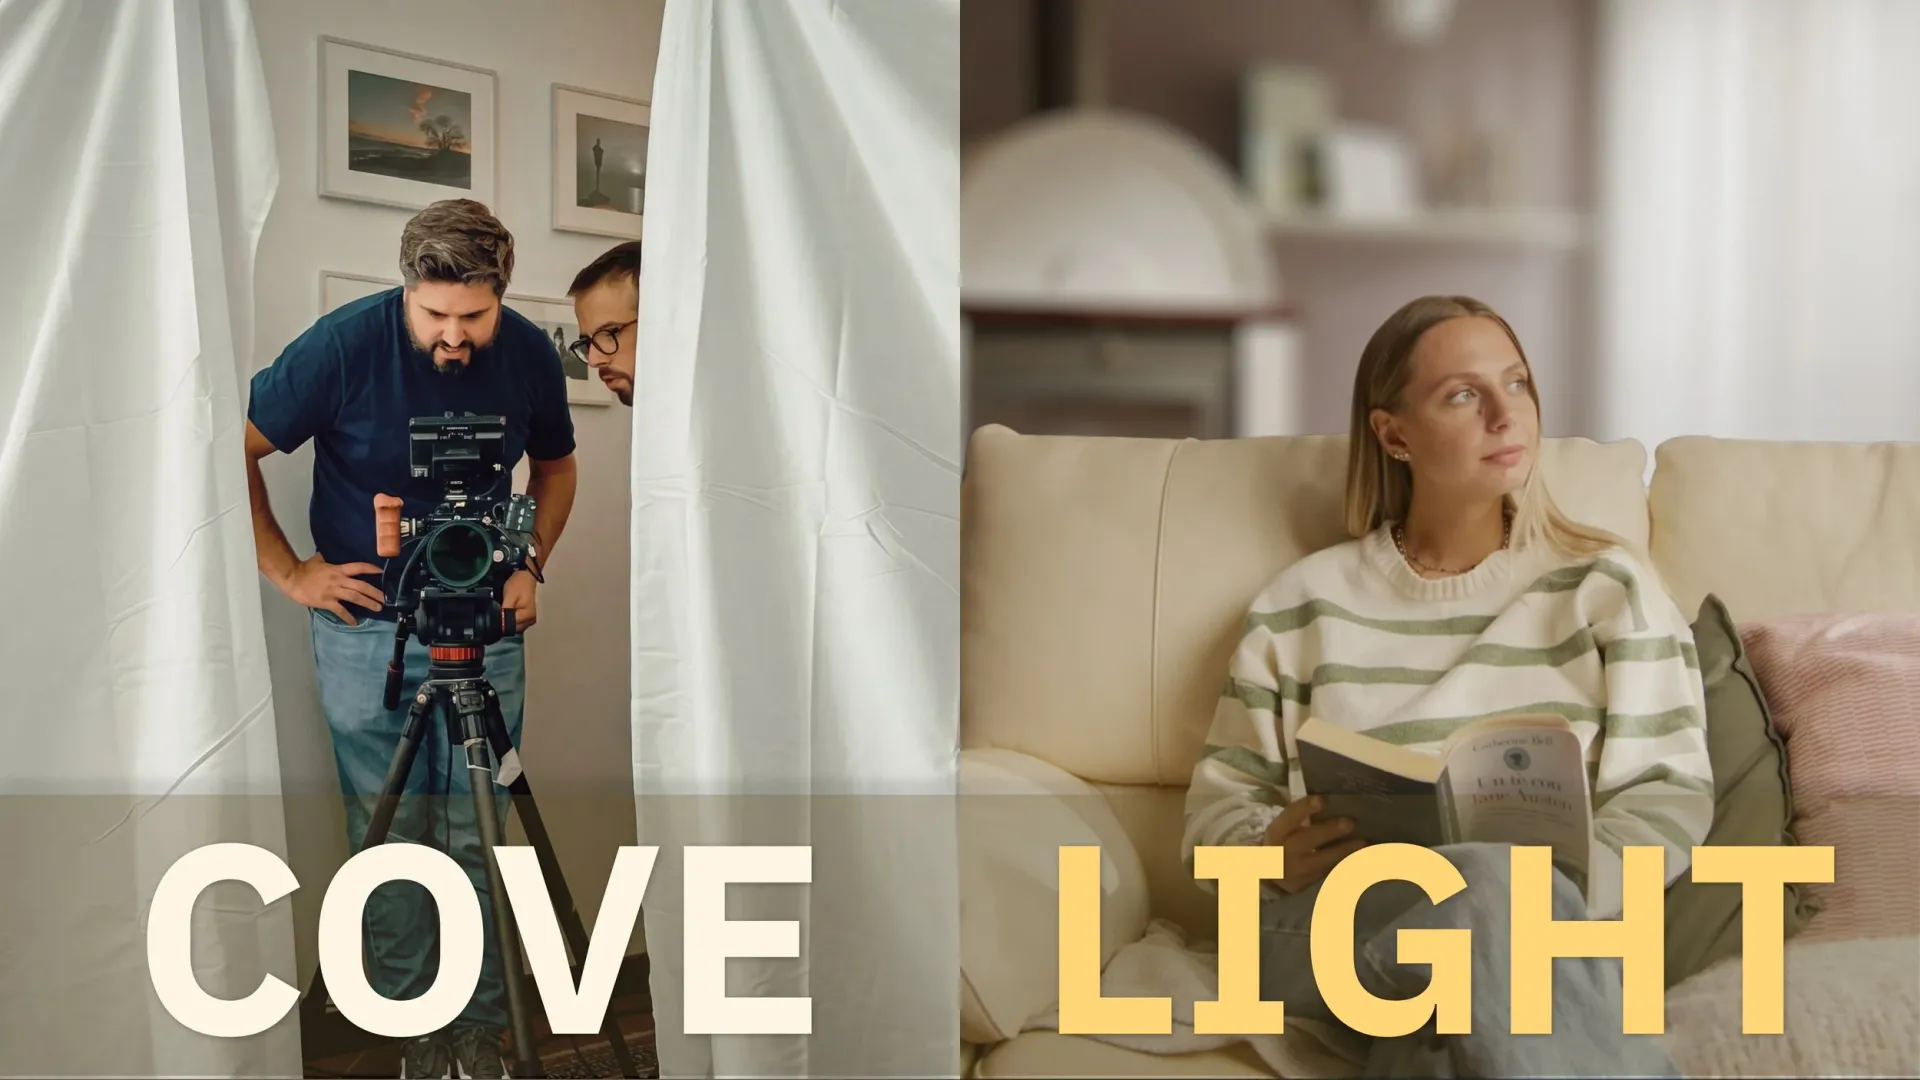
The Cove light is a technique that comes from Roger Deakins, one of the greatest cinematographers alive. When in tight spots, he often bounces light off white or unbleached cloth placed as “walls” on the sides of the camera, creating a white cove that wraps around the actors and allows them to move freely without stepping out of the light. The technique is very effective because it’s easy to set up and doesn’t require heavy rigging — the lights can even be placed directly on the floor. The name “Cove” was apparently coined by others observing his work rather than by Deakins himself; he doesn’t use that specific term, but he does openly discuss the technique and answer questions about it on his website forum. The idea is to create this white wall, then place multiple lights that shoot from the floor upwards towards the cloth, which then bounces the light back, coming slightly from below. The lights are stronger on the side, then become dimmer and dimmer as you move across the length, in a way that recreates some form of shadow on the subject, although very subtle.
The Breakdown
Here, we combined it with a classic lighting trick: Soft on Face, Hard on Body. We started by exposing for the background light, as we couldn’t control it and we wanted it to be properly exposed.
Then we placed a first Fresnel light hitting the subject’s body — Hard on Body — and a second Fresnel with half the power hitting the background through the window to recreate some sunlight, since it was a cloudy day. Then we turned on the first light hitting the cove, the second, and the third.
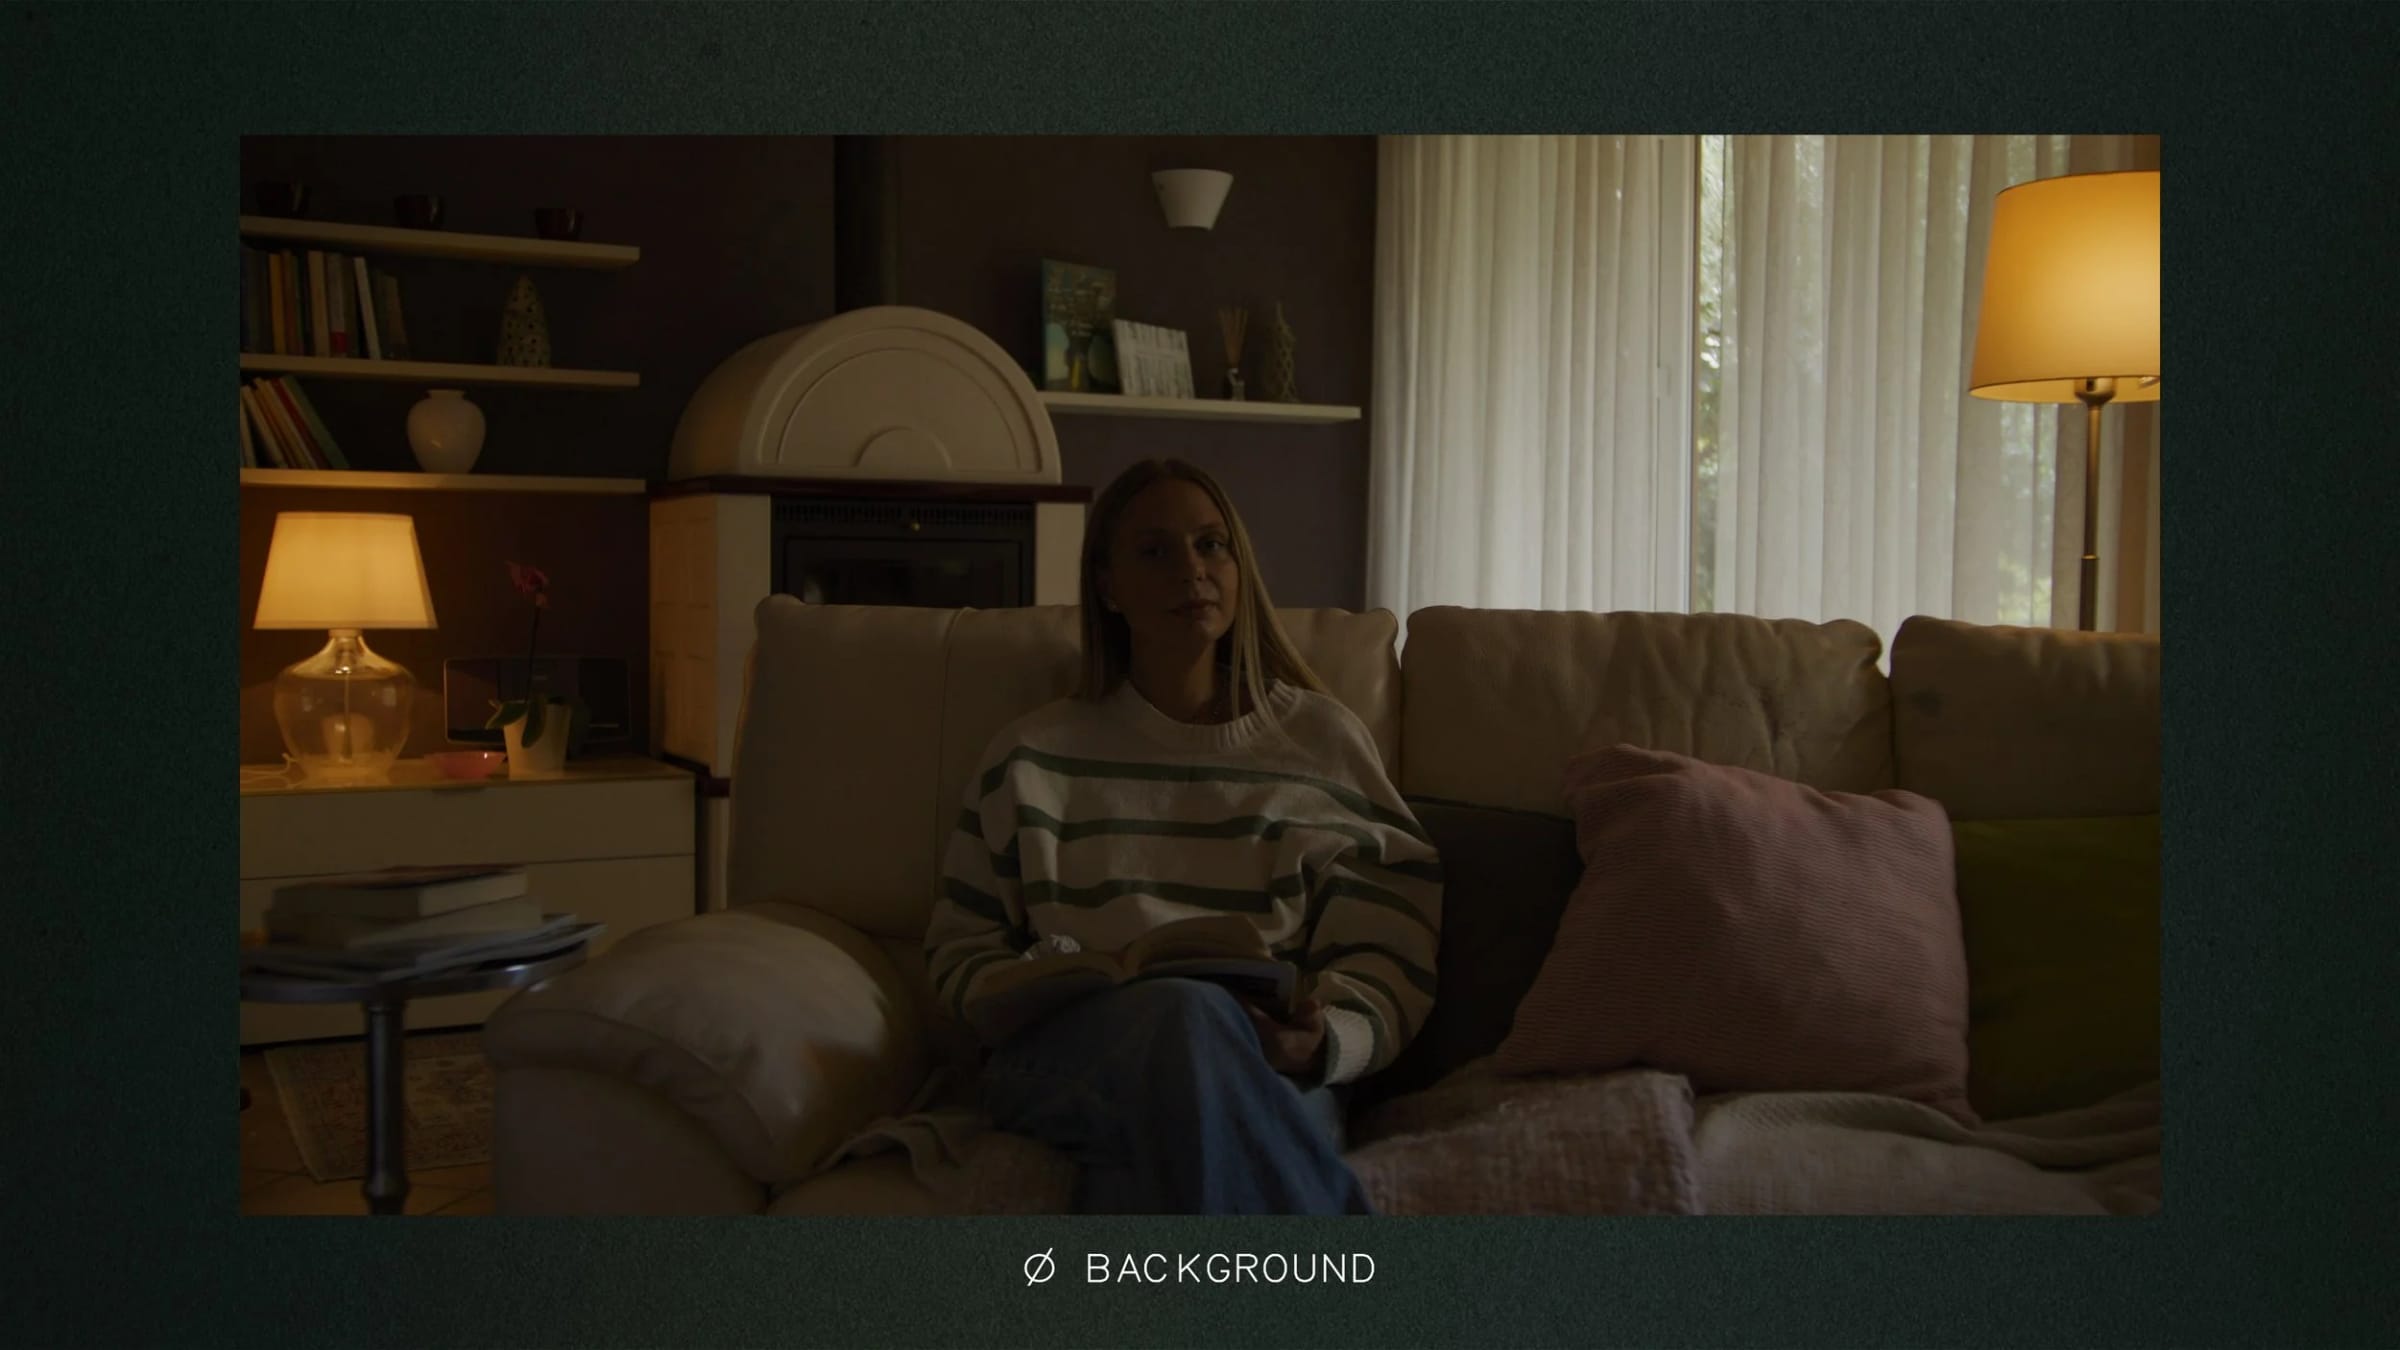
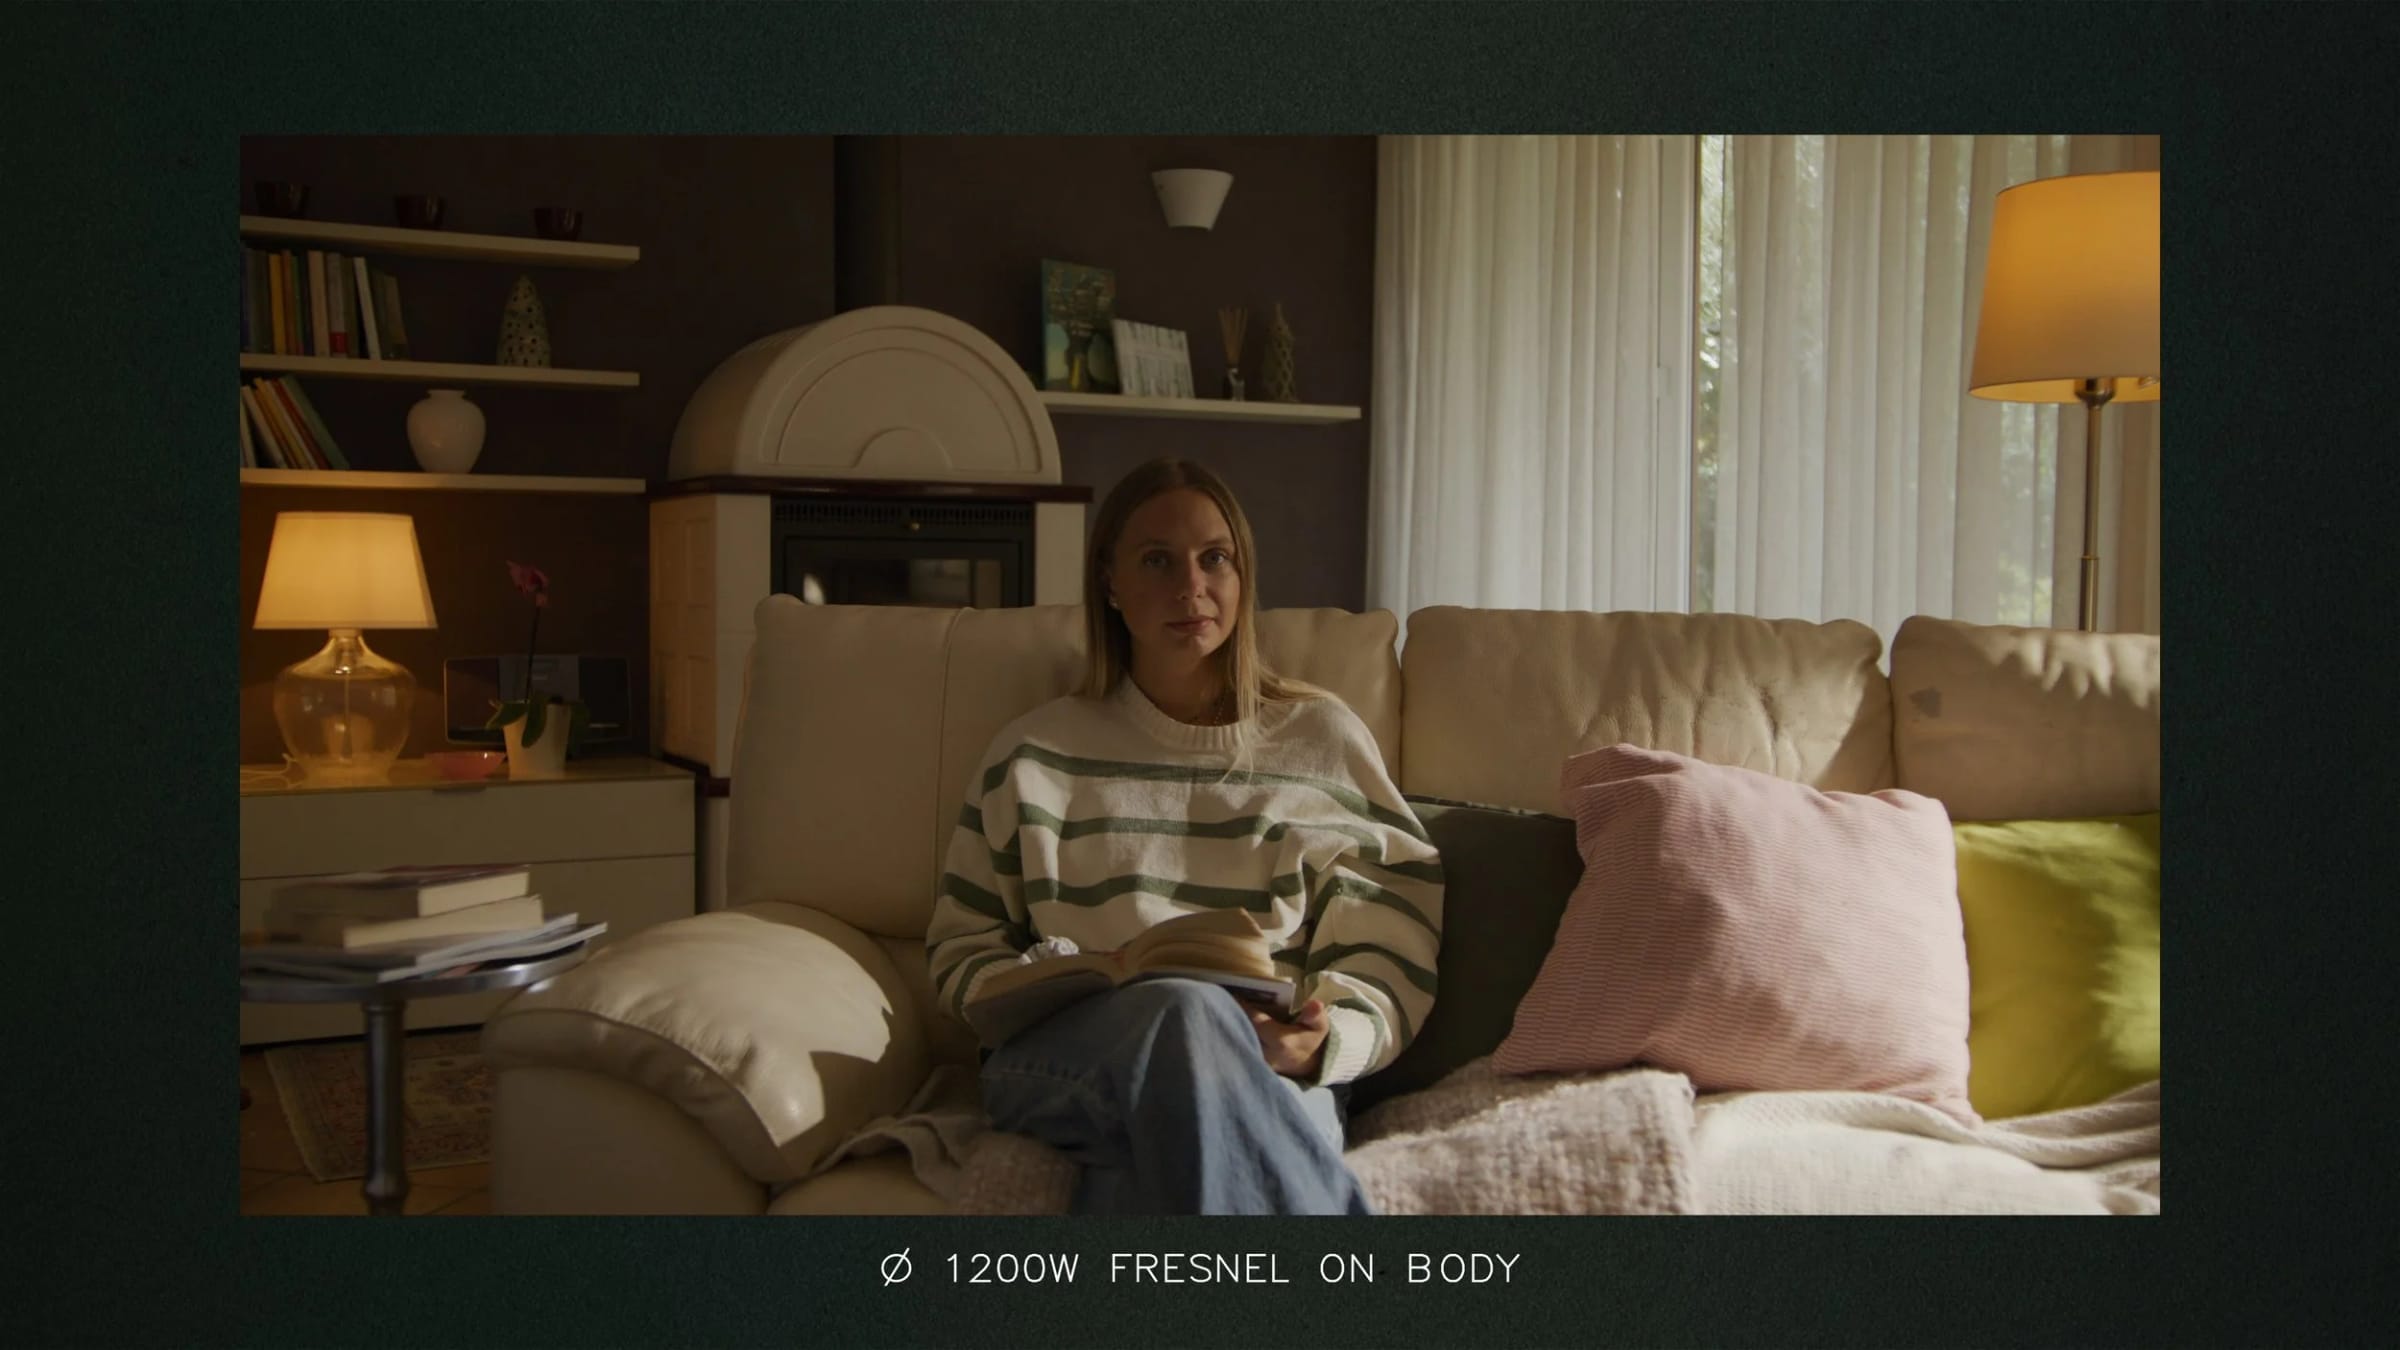
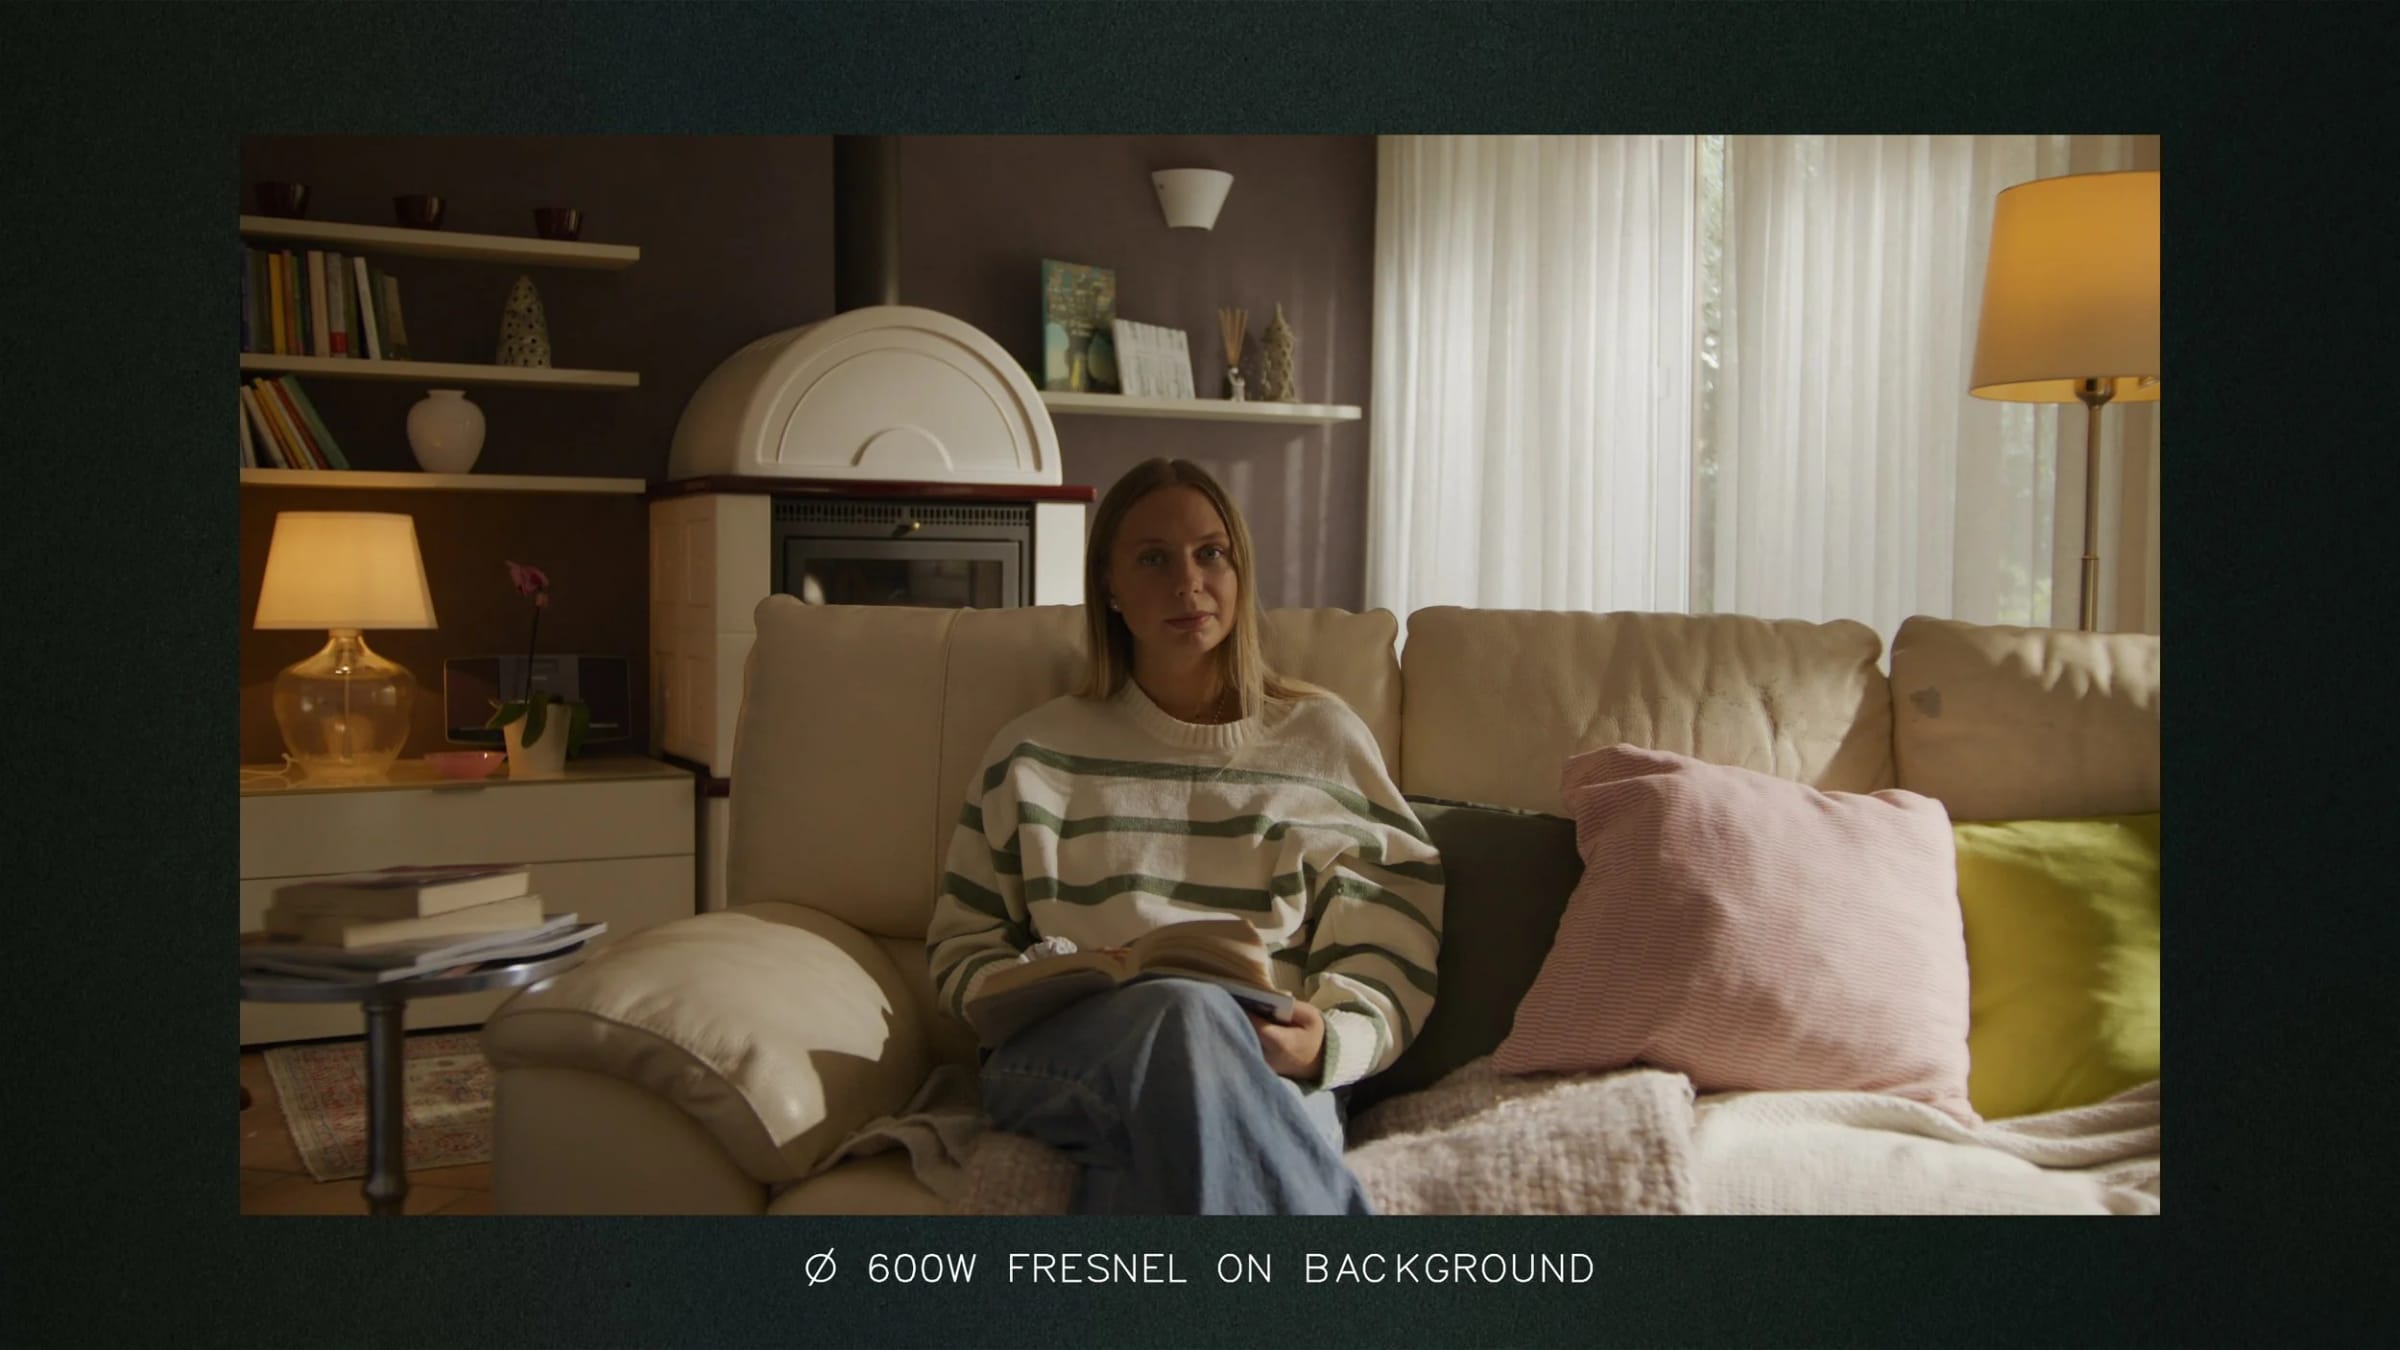
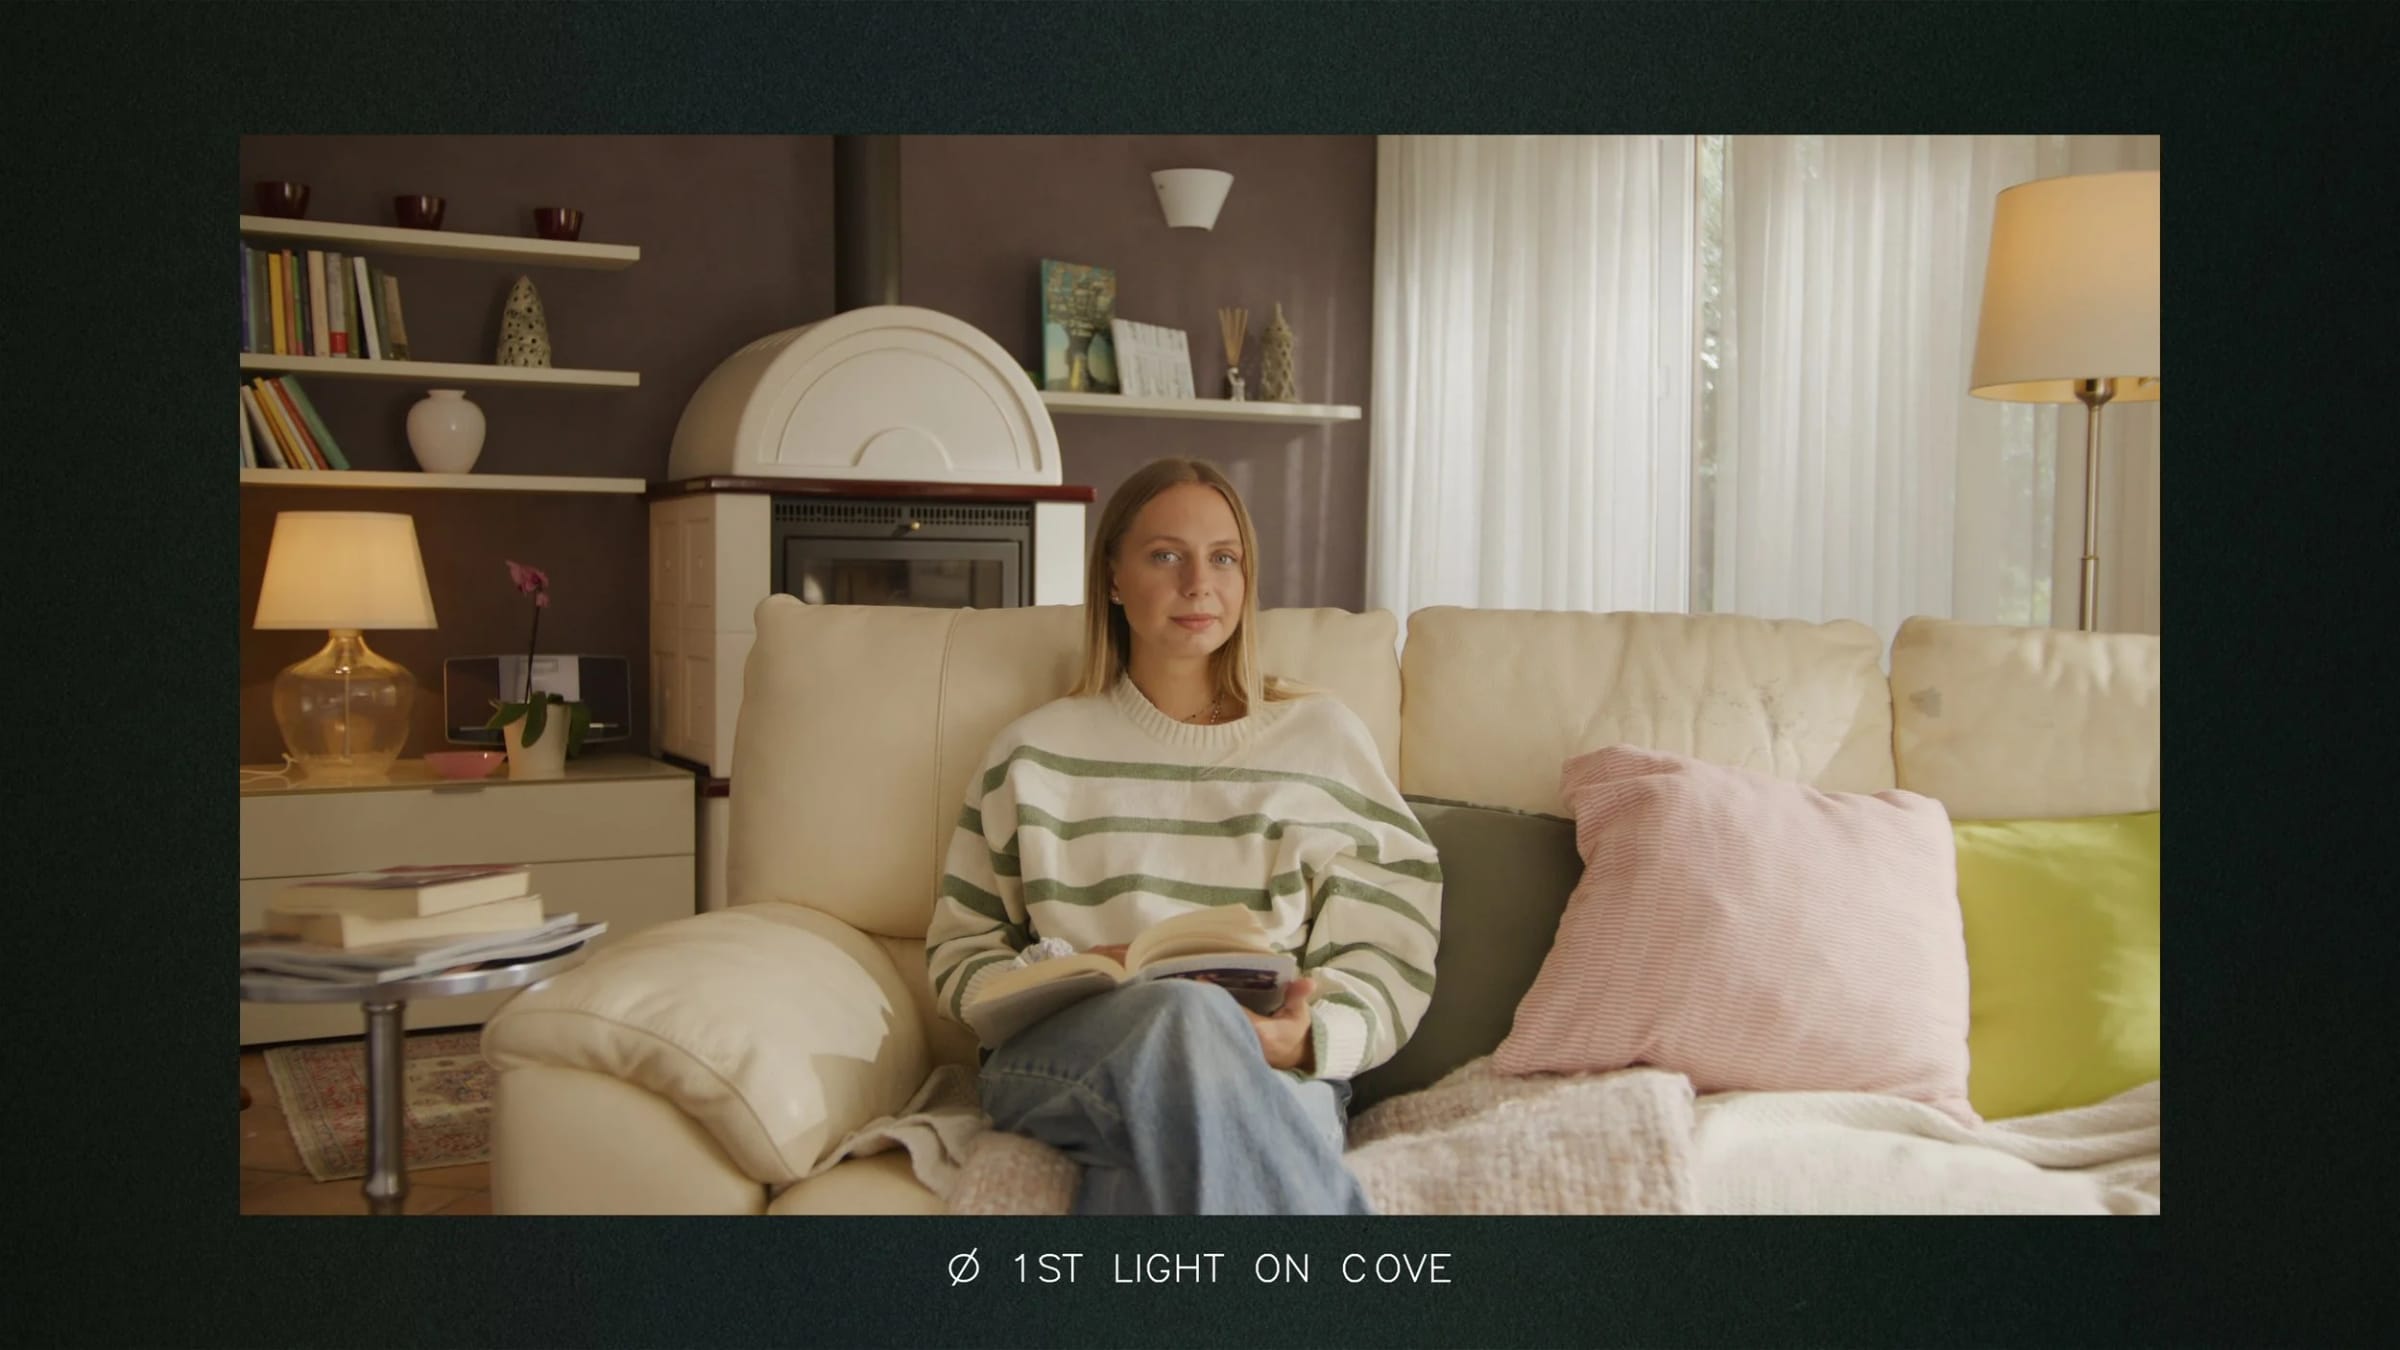
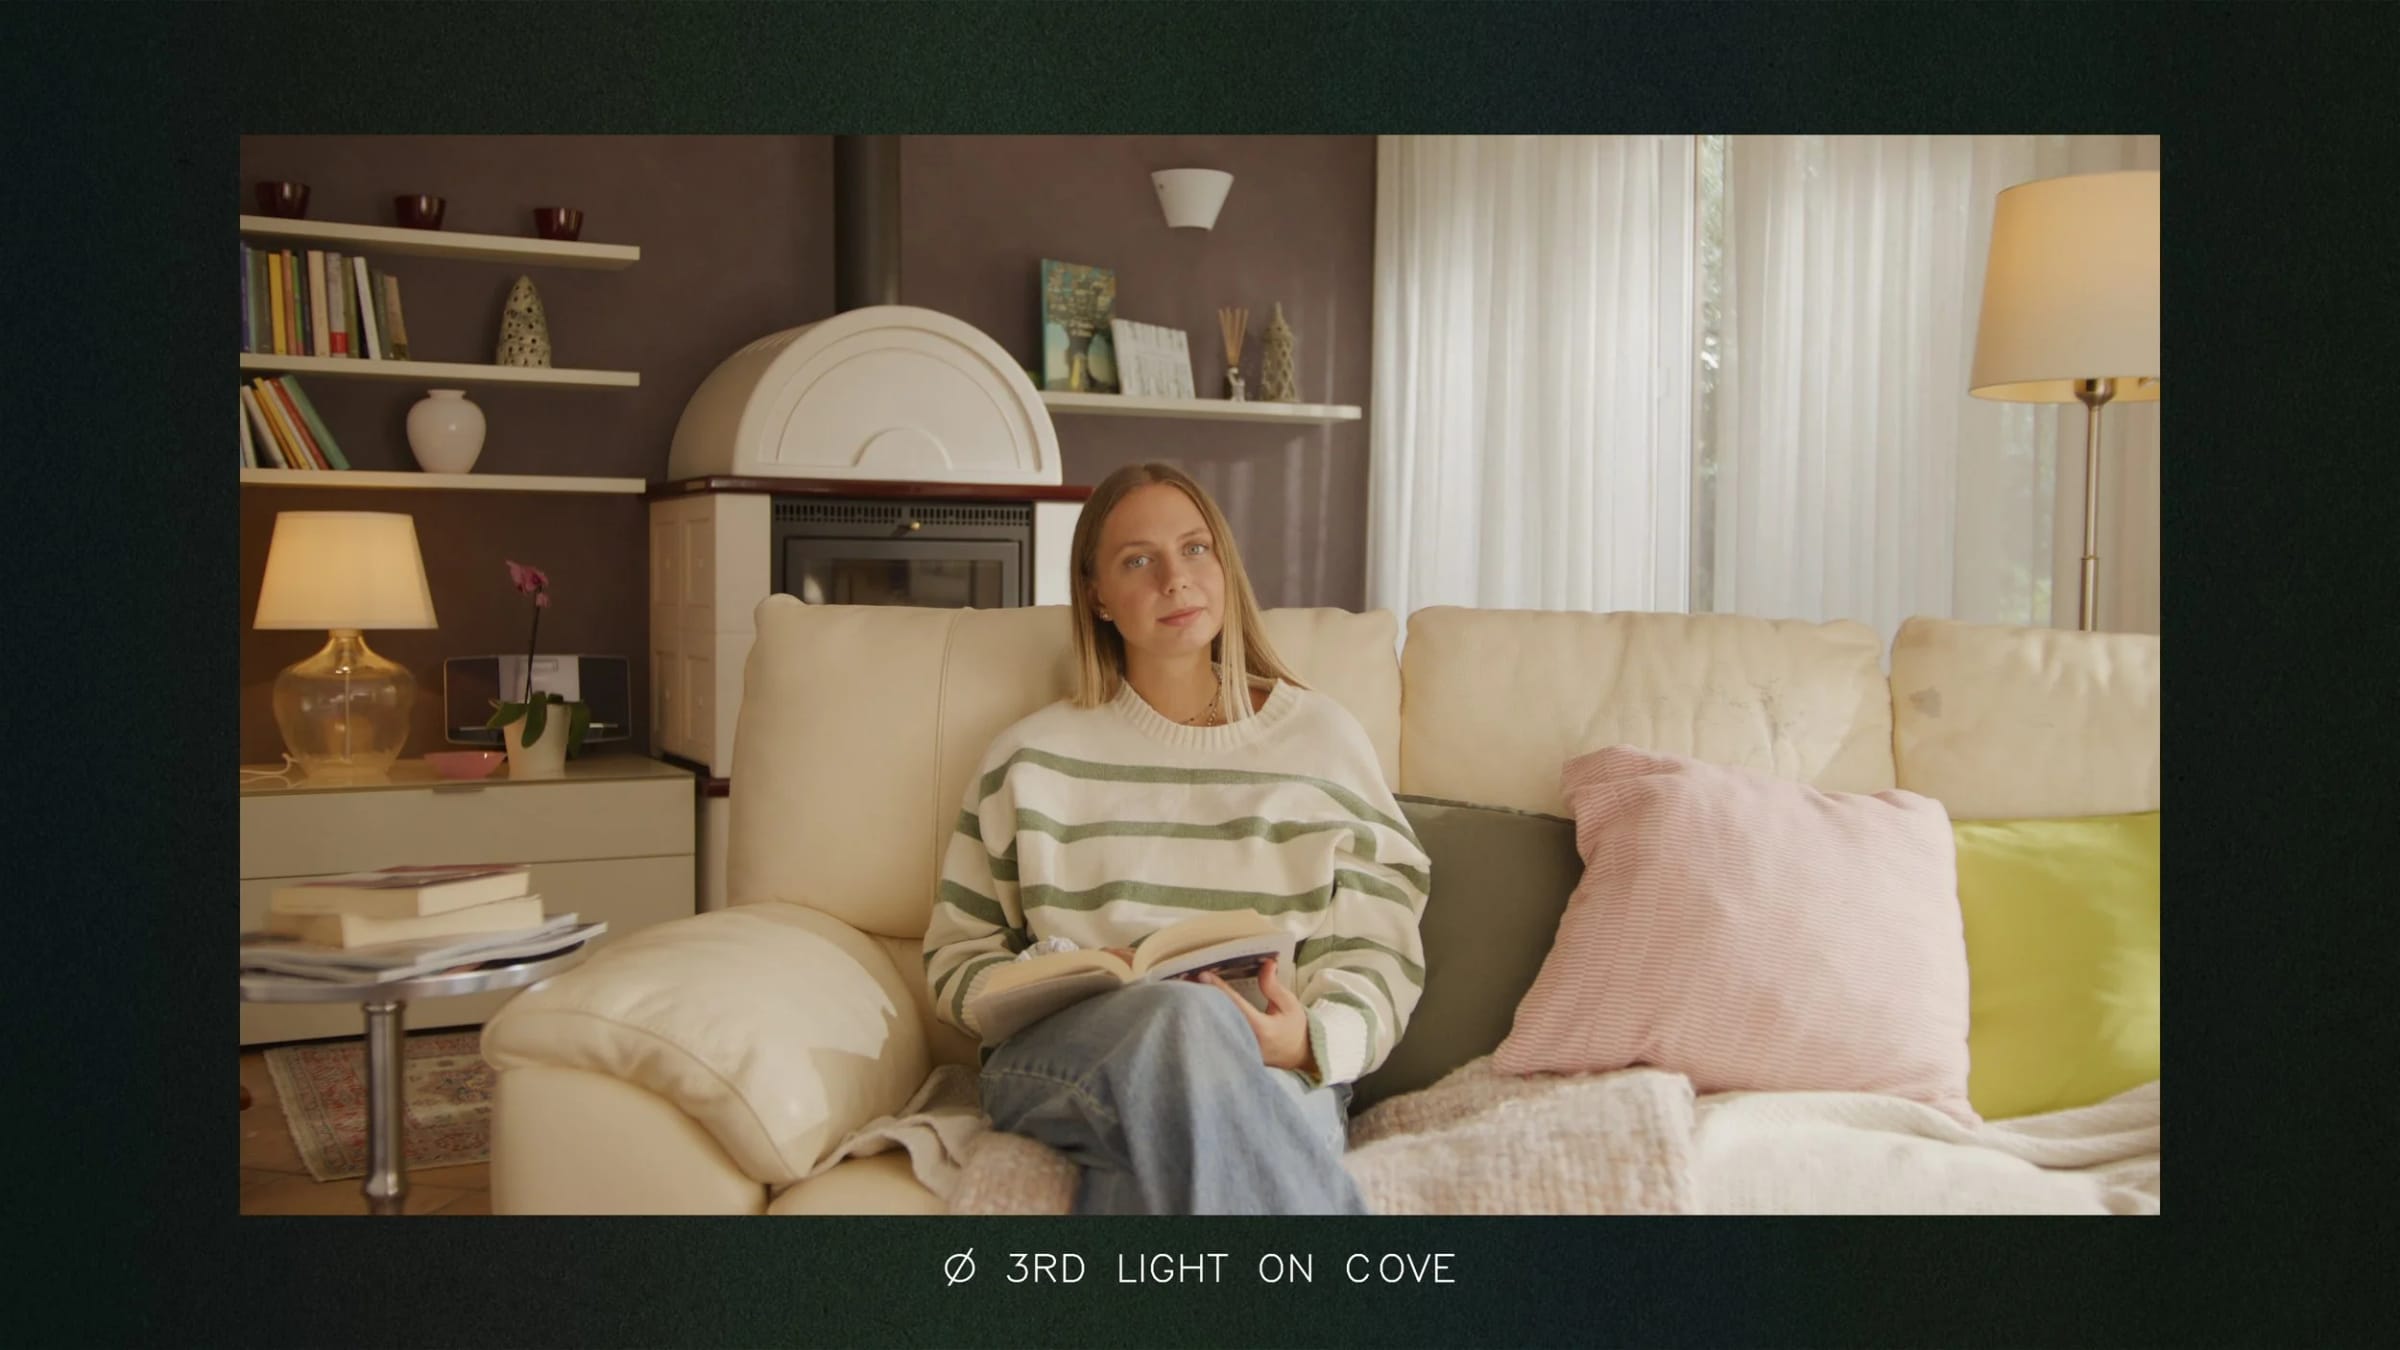
To give you an idea of the proportions: if the first light is at 100% power, the second is at 30%, the third at 5%. This creates a soft falloff across the body: the side closest to the cove is the brightest, and the light gradually dims as it wraps around, giving the subject a subtle three-dimensionality without a hard shadow line.
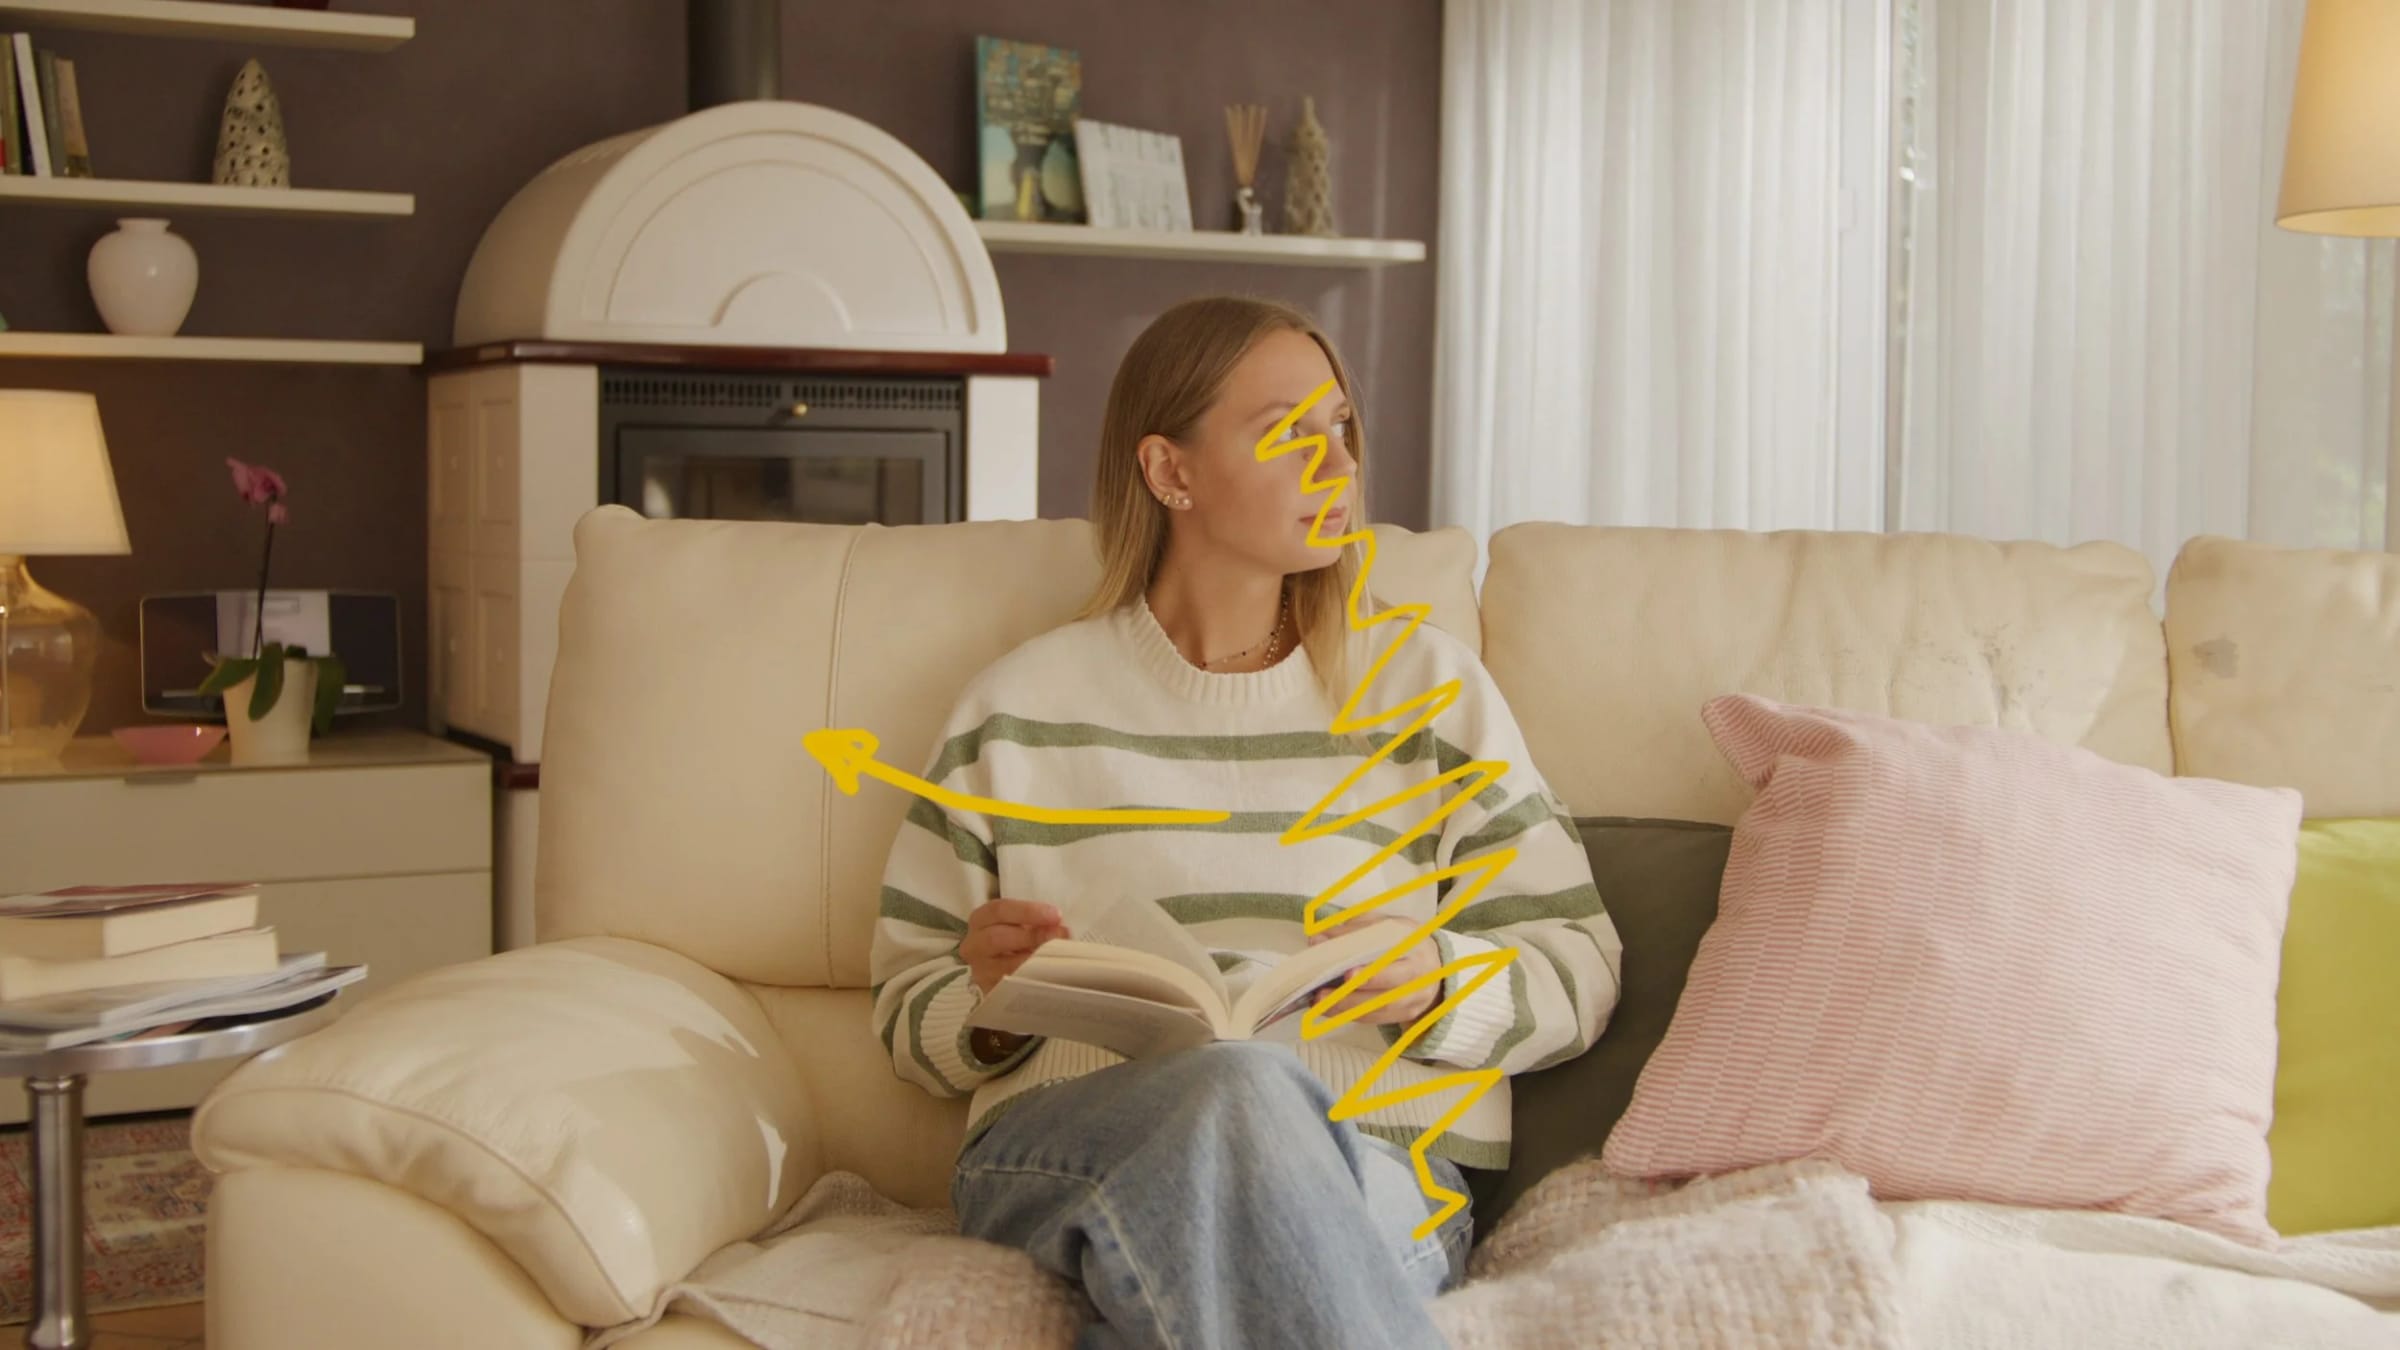
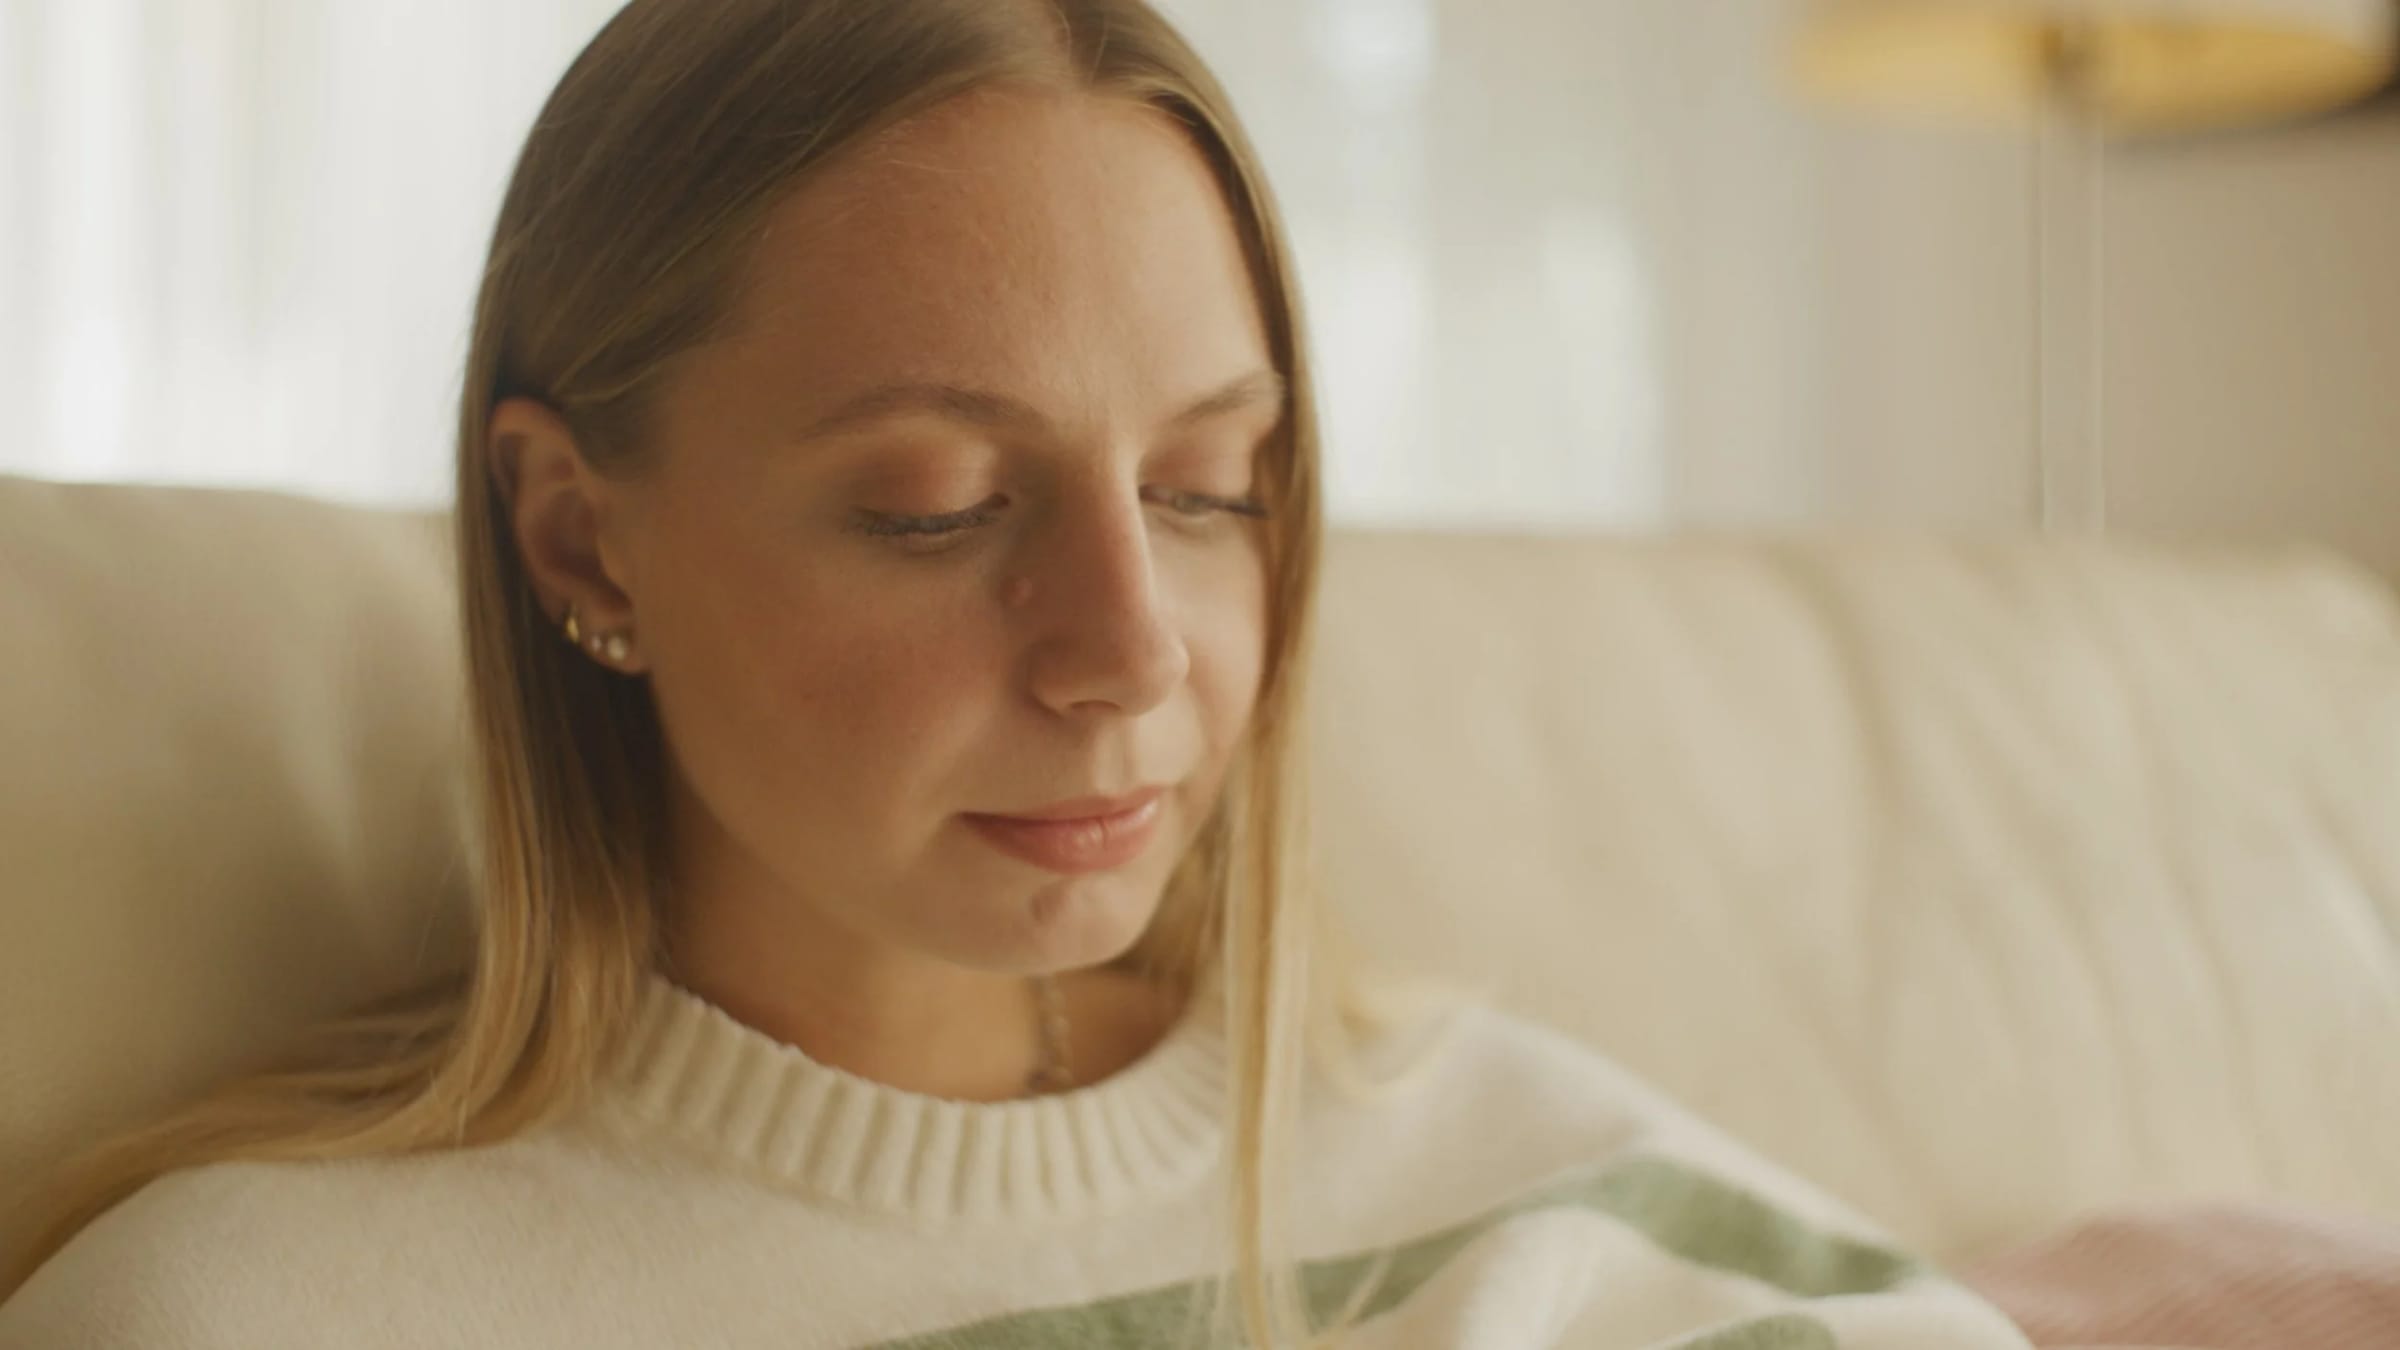
Lighting like this is a very smart choice, as the light is very consistent, it fades smoothly, and it is pleasing from multiple angles, not just from the center. We did it with two stands, a pole, and a few clamps, so it is also very quick to set up. Contrary to normal setups, the light comes from below, so it hits the chin before the rest of the face, but the effect does not look weird at all, it is actually quite natural. I guess most people at home are partly lit by sunlight hitting the floors, so we are used to it. It also helps that the light is bounced, so it has to travel a longer distance to reach the face, which spreads it more evenly. The look is definitely approved.
The Reverse Key
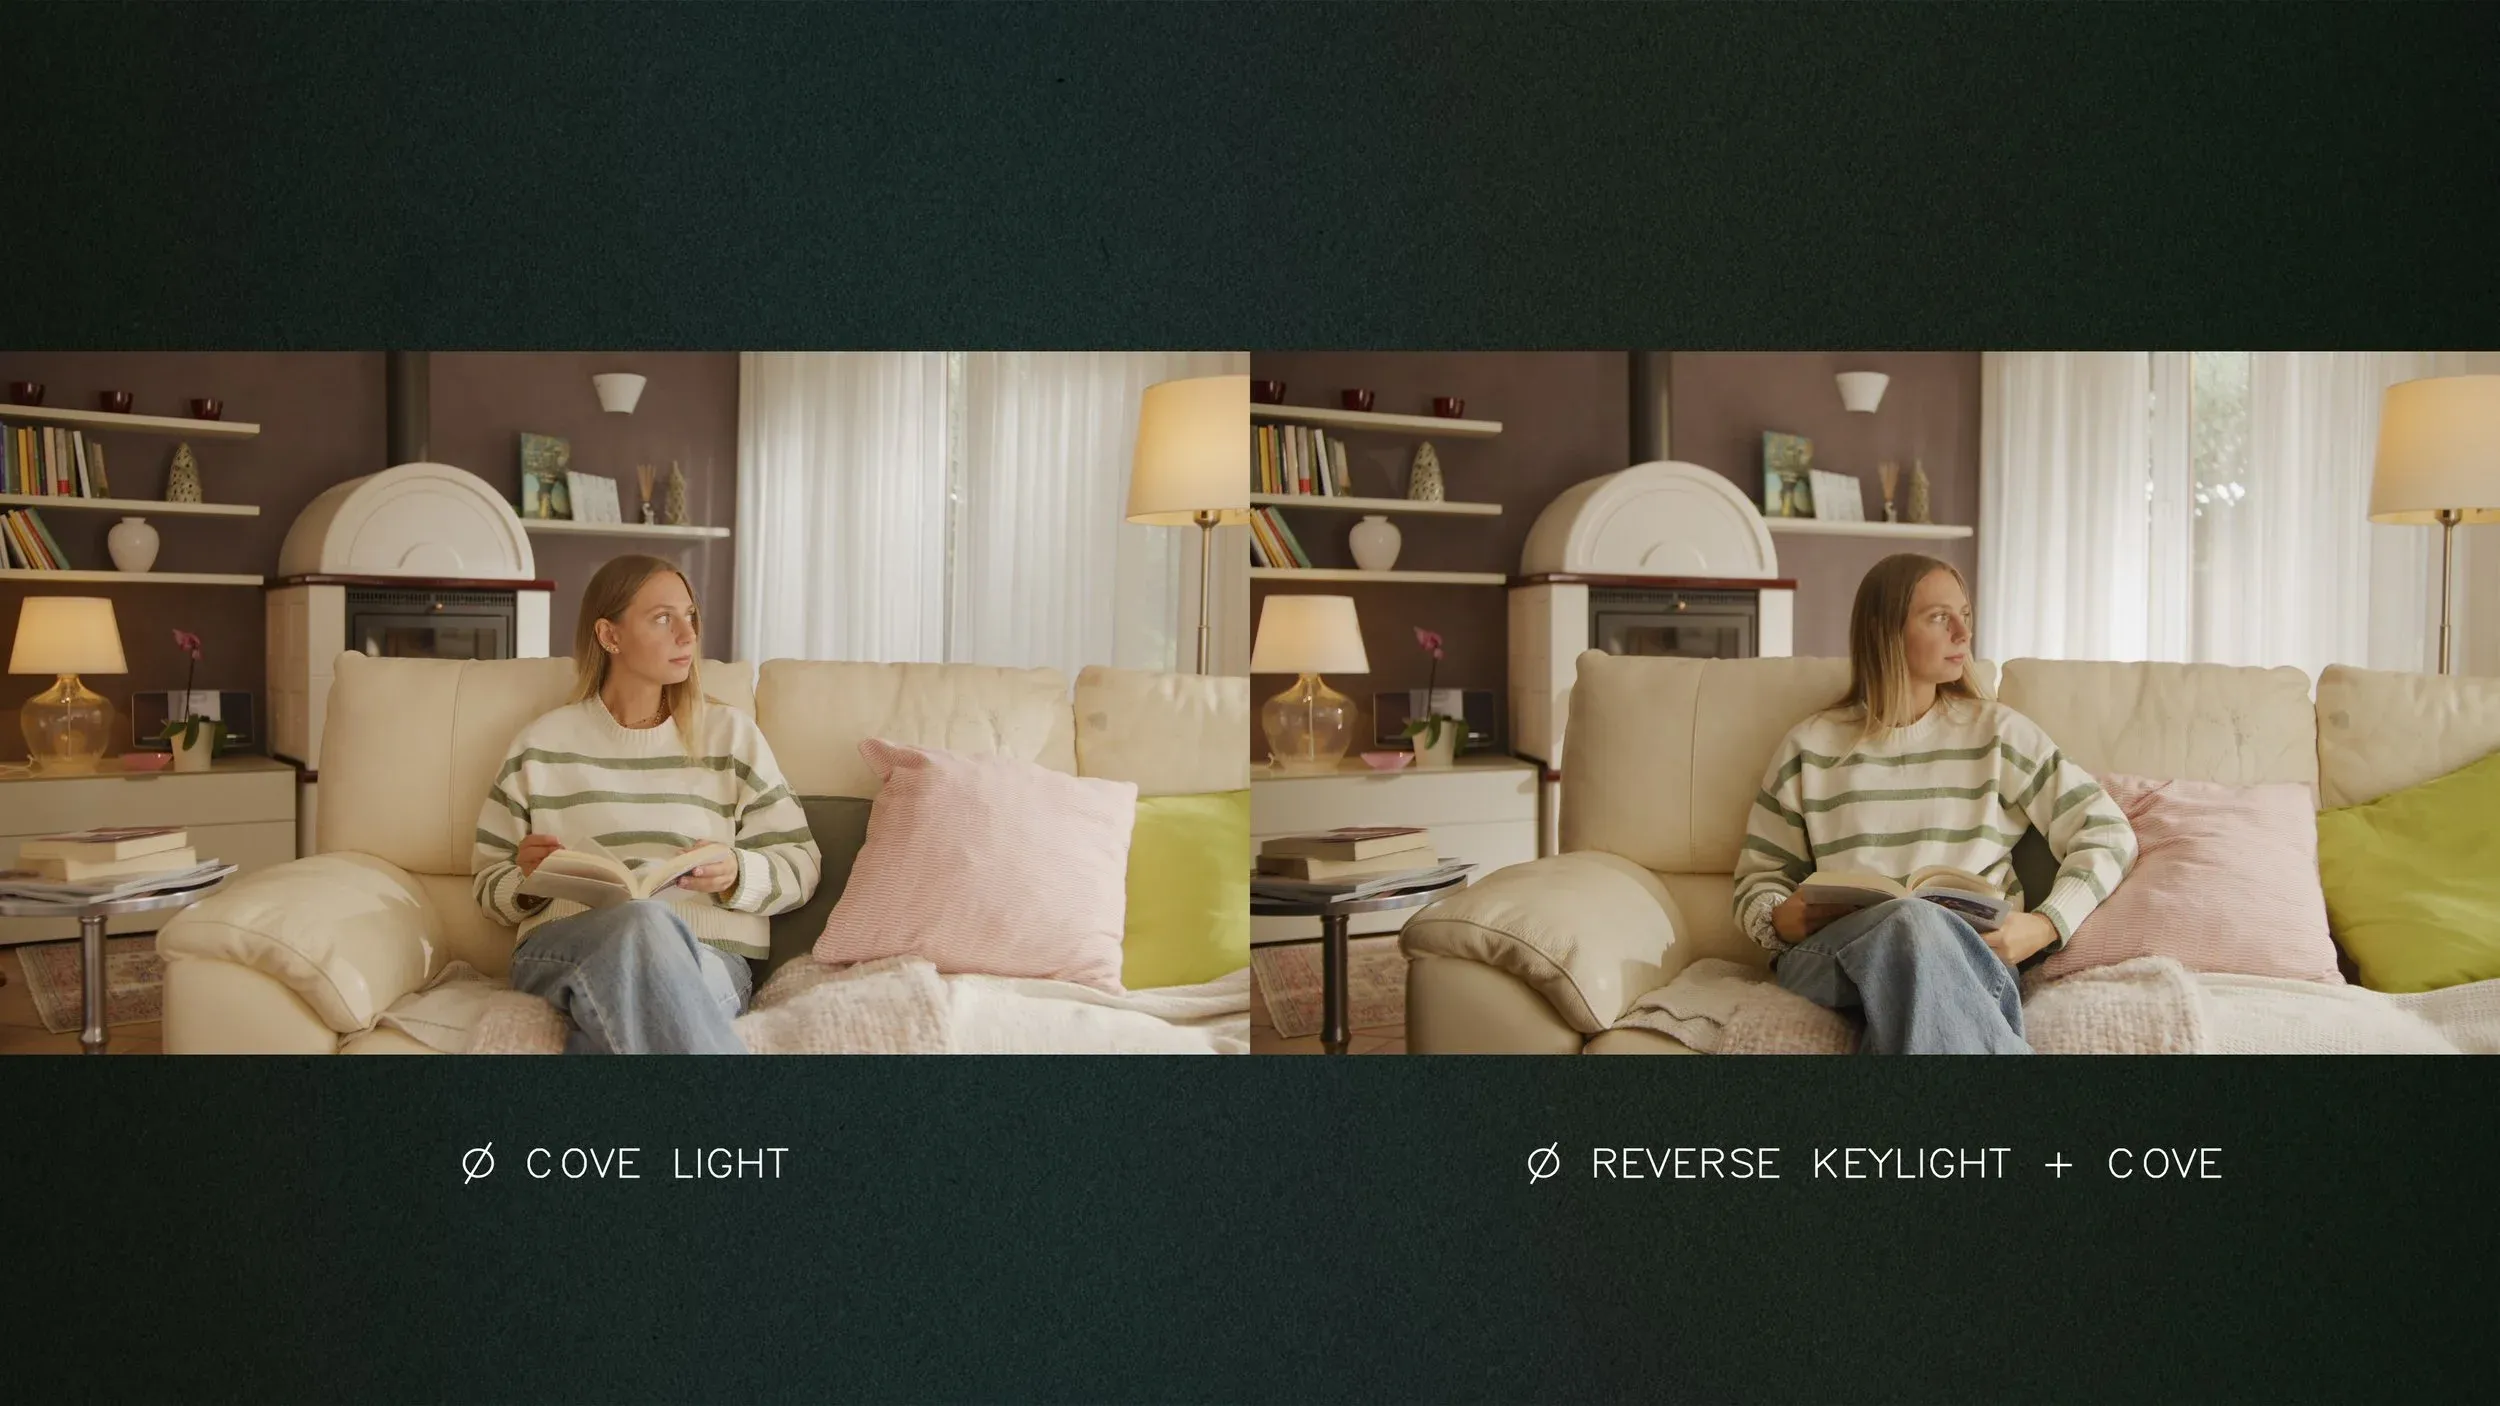
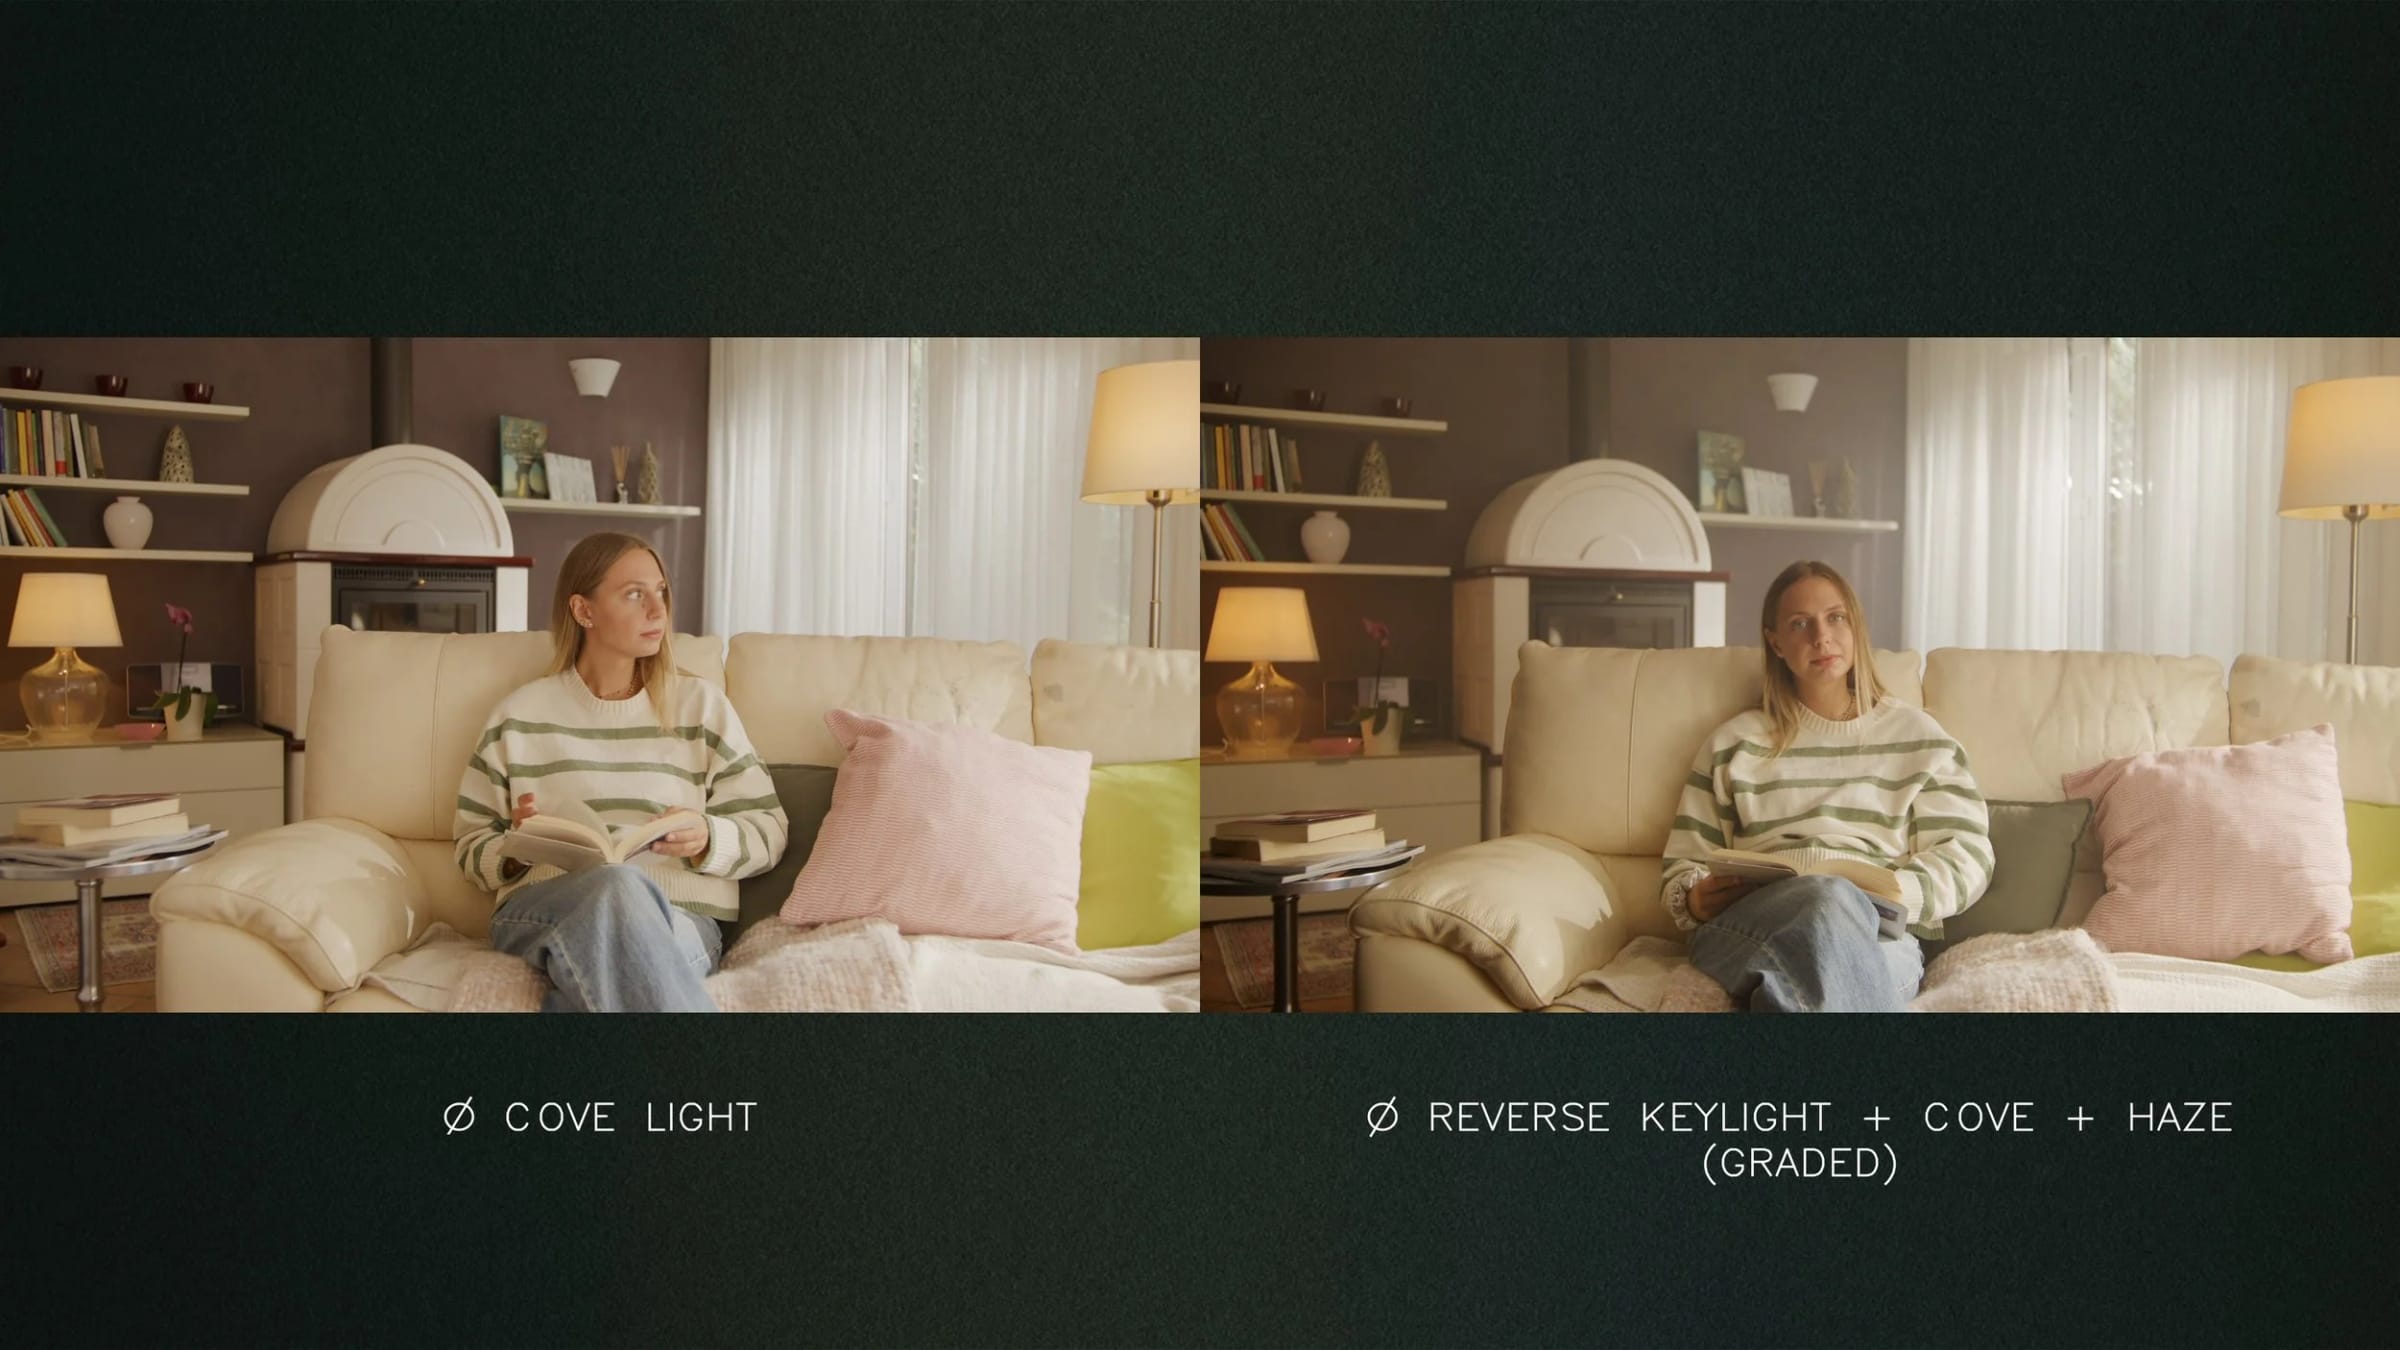
Our second test was to use the cove but reverse it, as is typically done with the Reverse Keylight method. Instead of coming at the subject from a 45-degree angle, we pushed it more to the side, close to 90 degrees.
So now the stronger Fresnel light is pushed to the background, and the second Fresnel — with half the power — is moved to the body, so it is still Hard on Body, but a bit less. Then we switched off the last light on the cove and replaced the white cloth with a black one for negative fill.
It is a more natural-looking setup than the normal Cove, but it also feels a bit less intentional, so less effective overall.
The Experiments
So, what if we add other diffusion on top of the cove light? The first experiment is with a simple Black ProMist filter, which takes out some of the contrast and softens the image. Not a bad look, but not a definitive improvement.
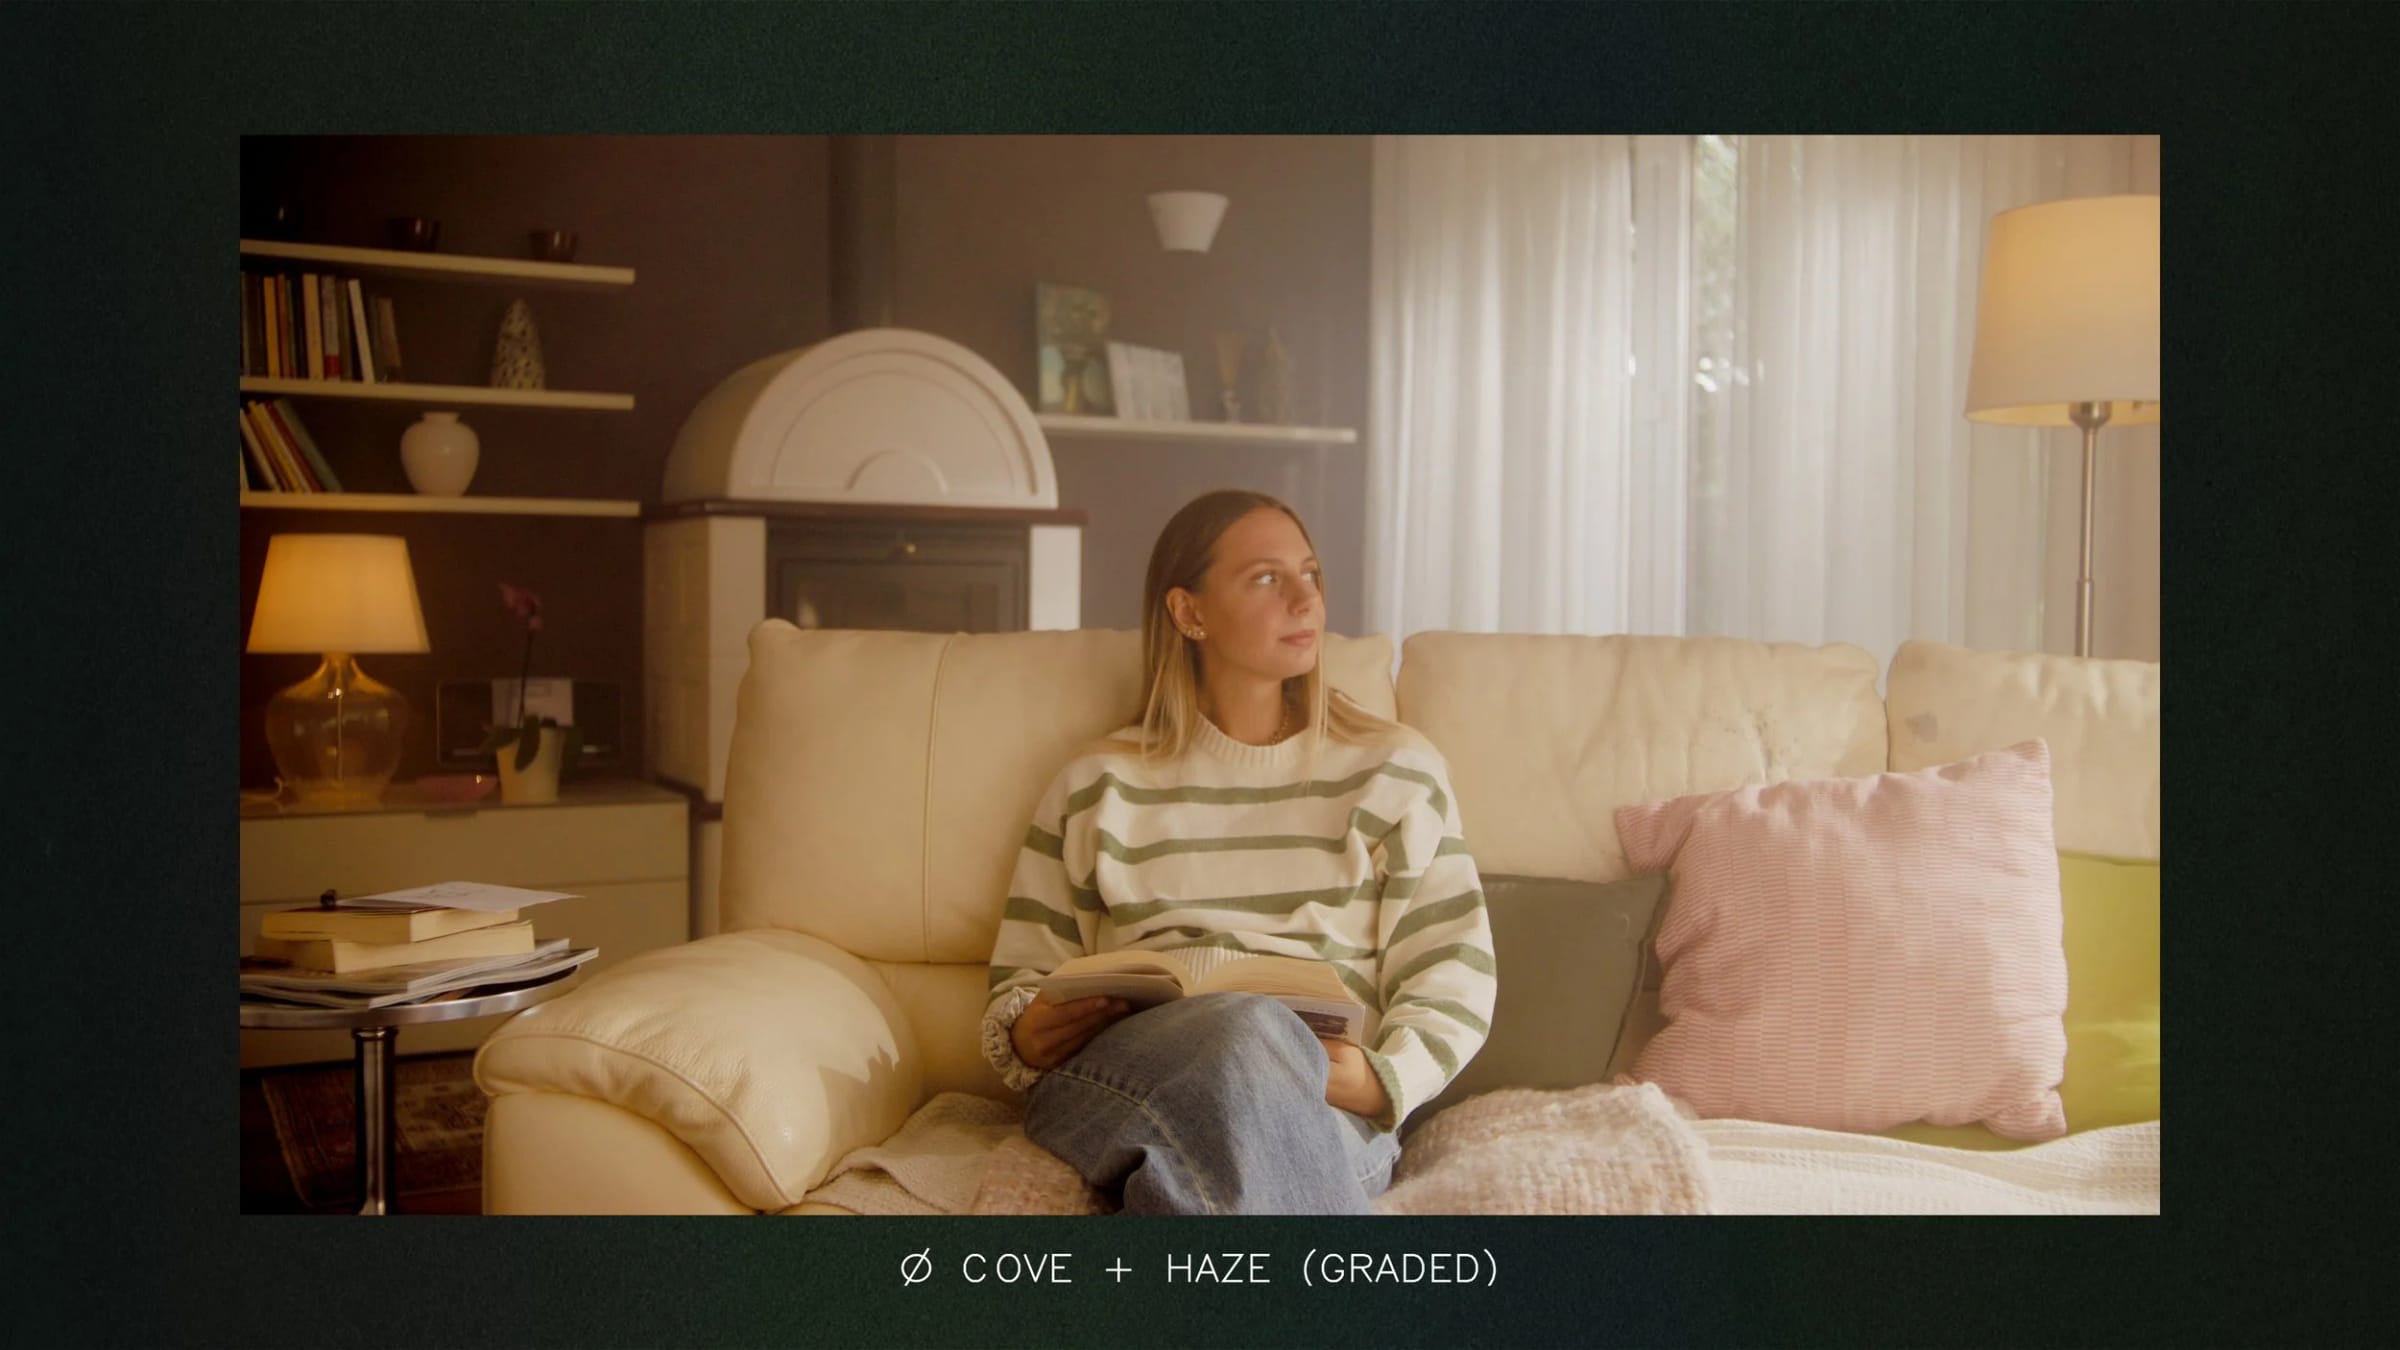
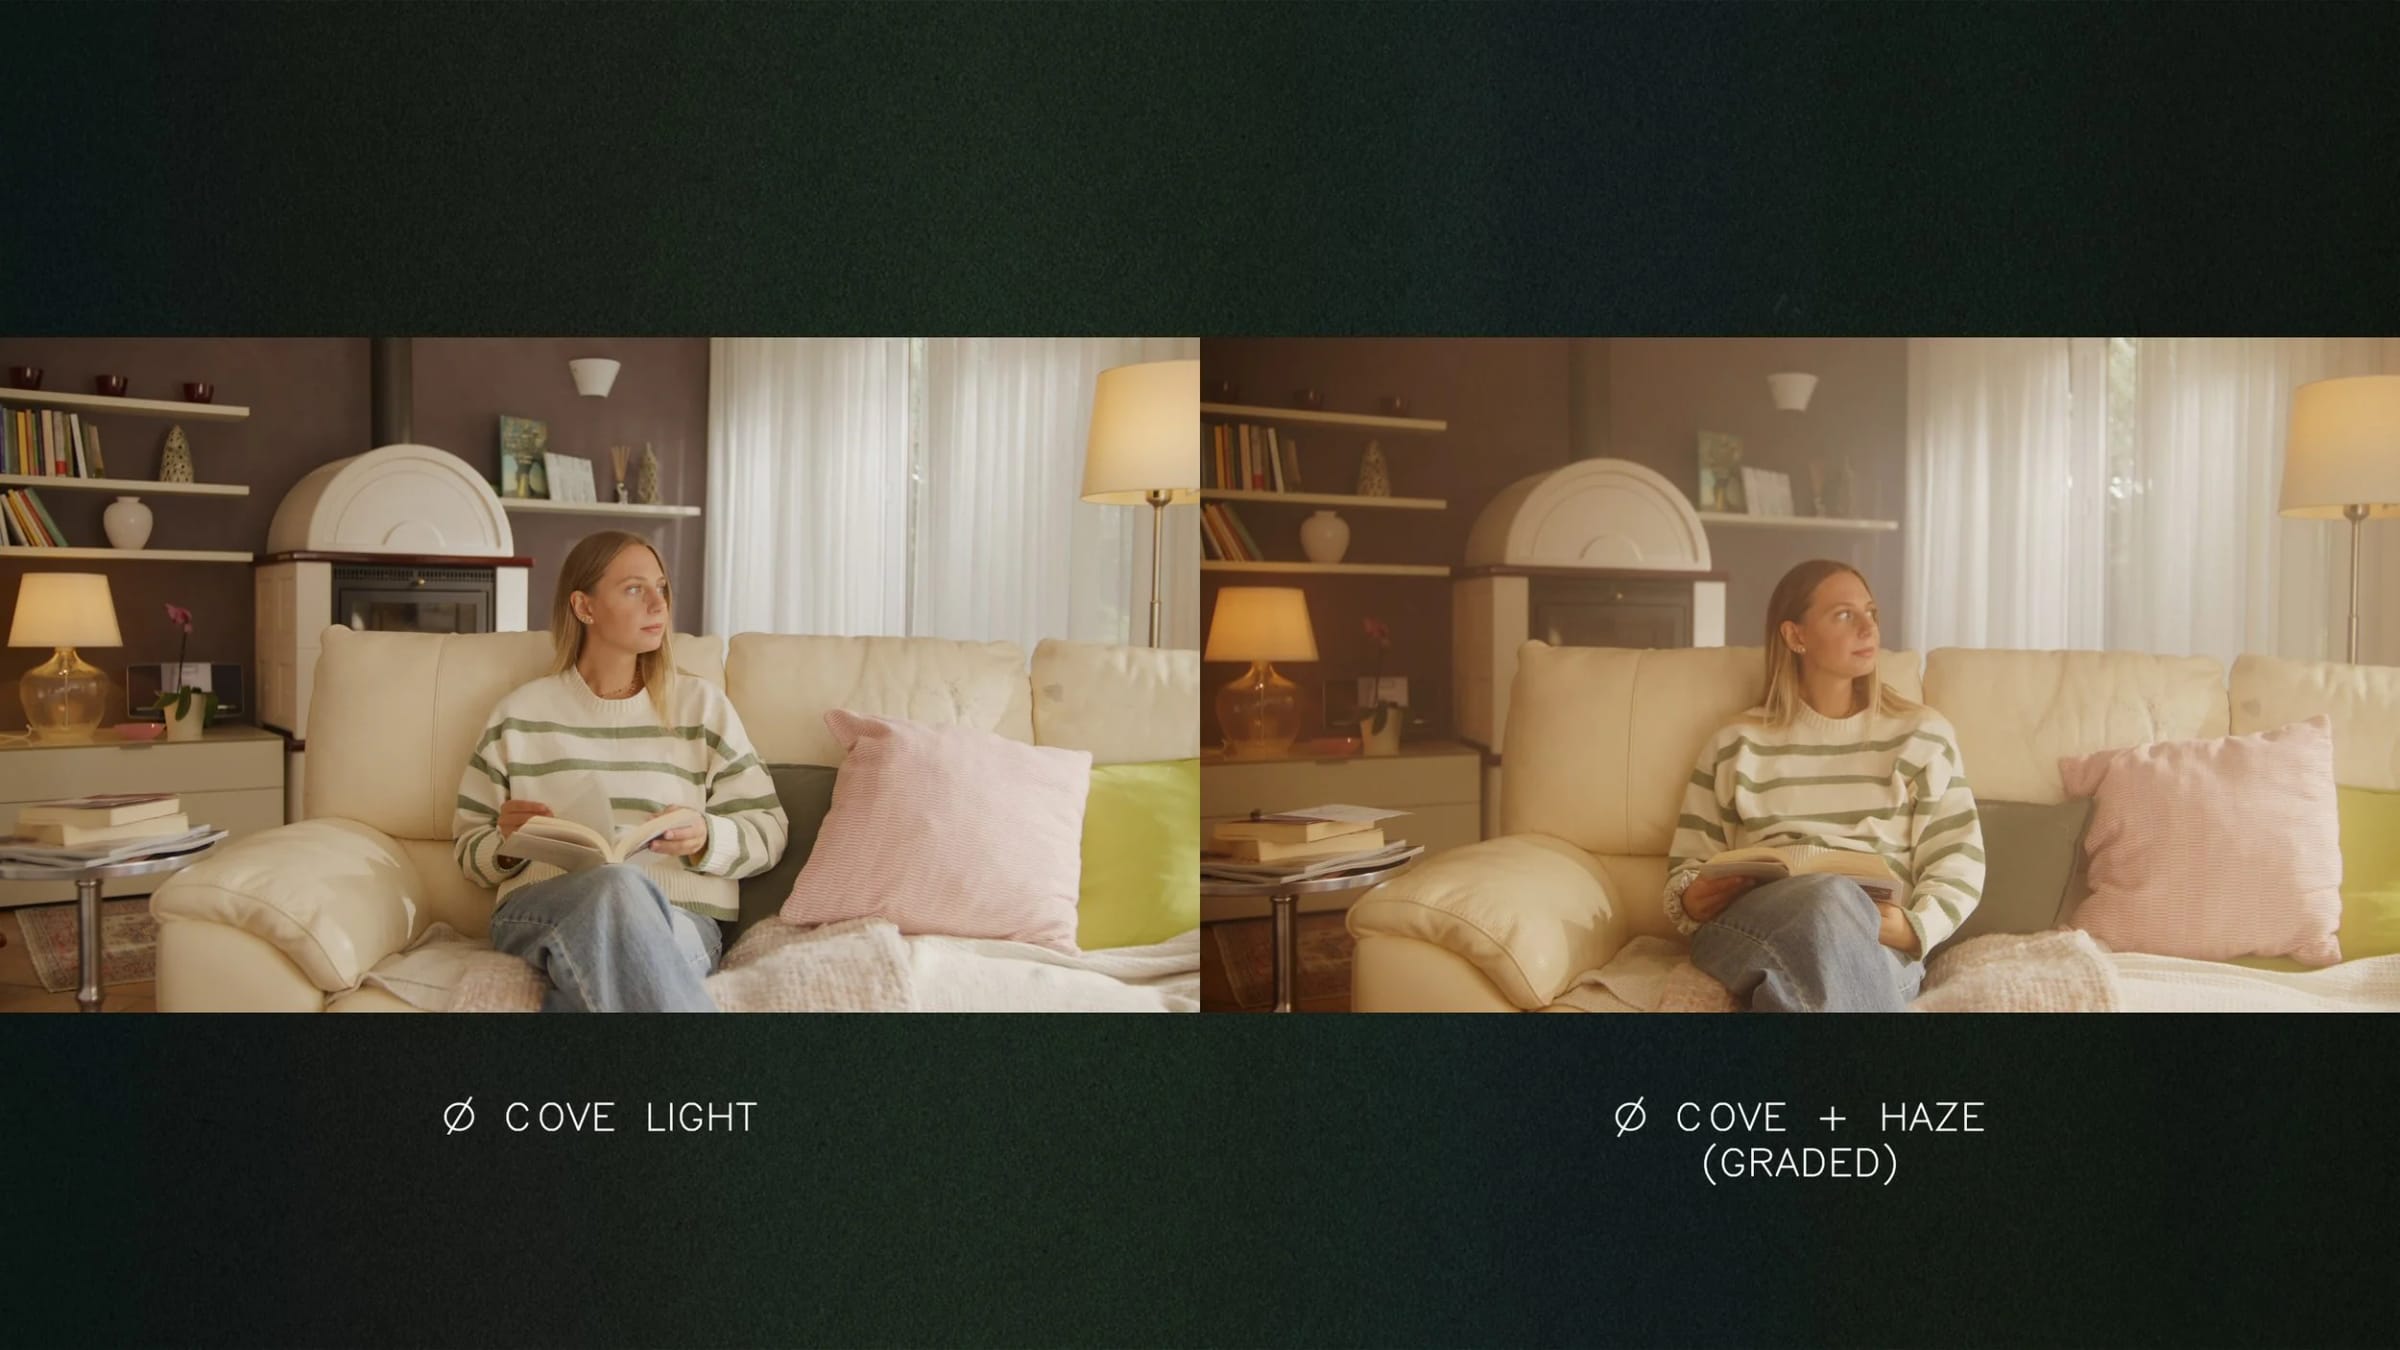
The next experiment is Haze. We filled the room with a lot of ultra-thin haze and waited for it to settle. The raw look is a bit too gray, but it improves a lot when graded. We also tried the Reverse Cove with the Haze, and the look improved a lot for some reason.
Compared to Other Methods
Then we wanted to compare this method to other common lighting methods and see how they fare.
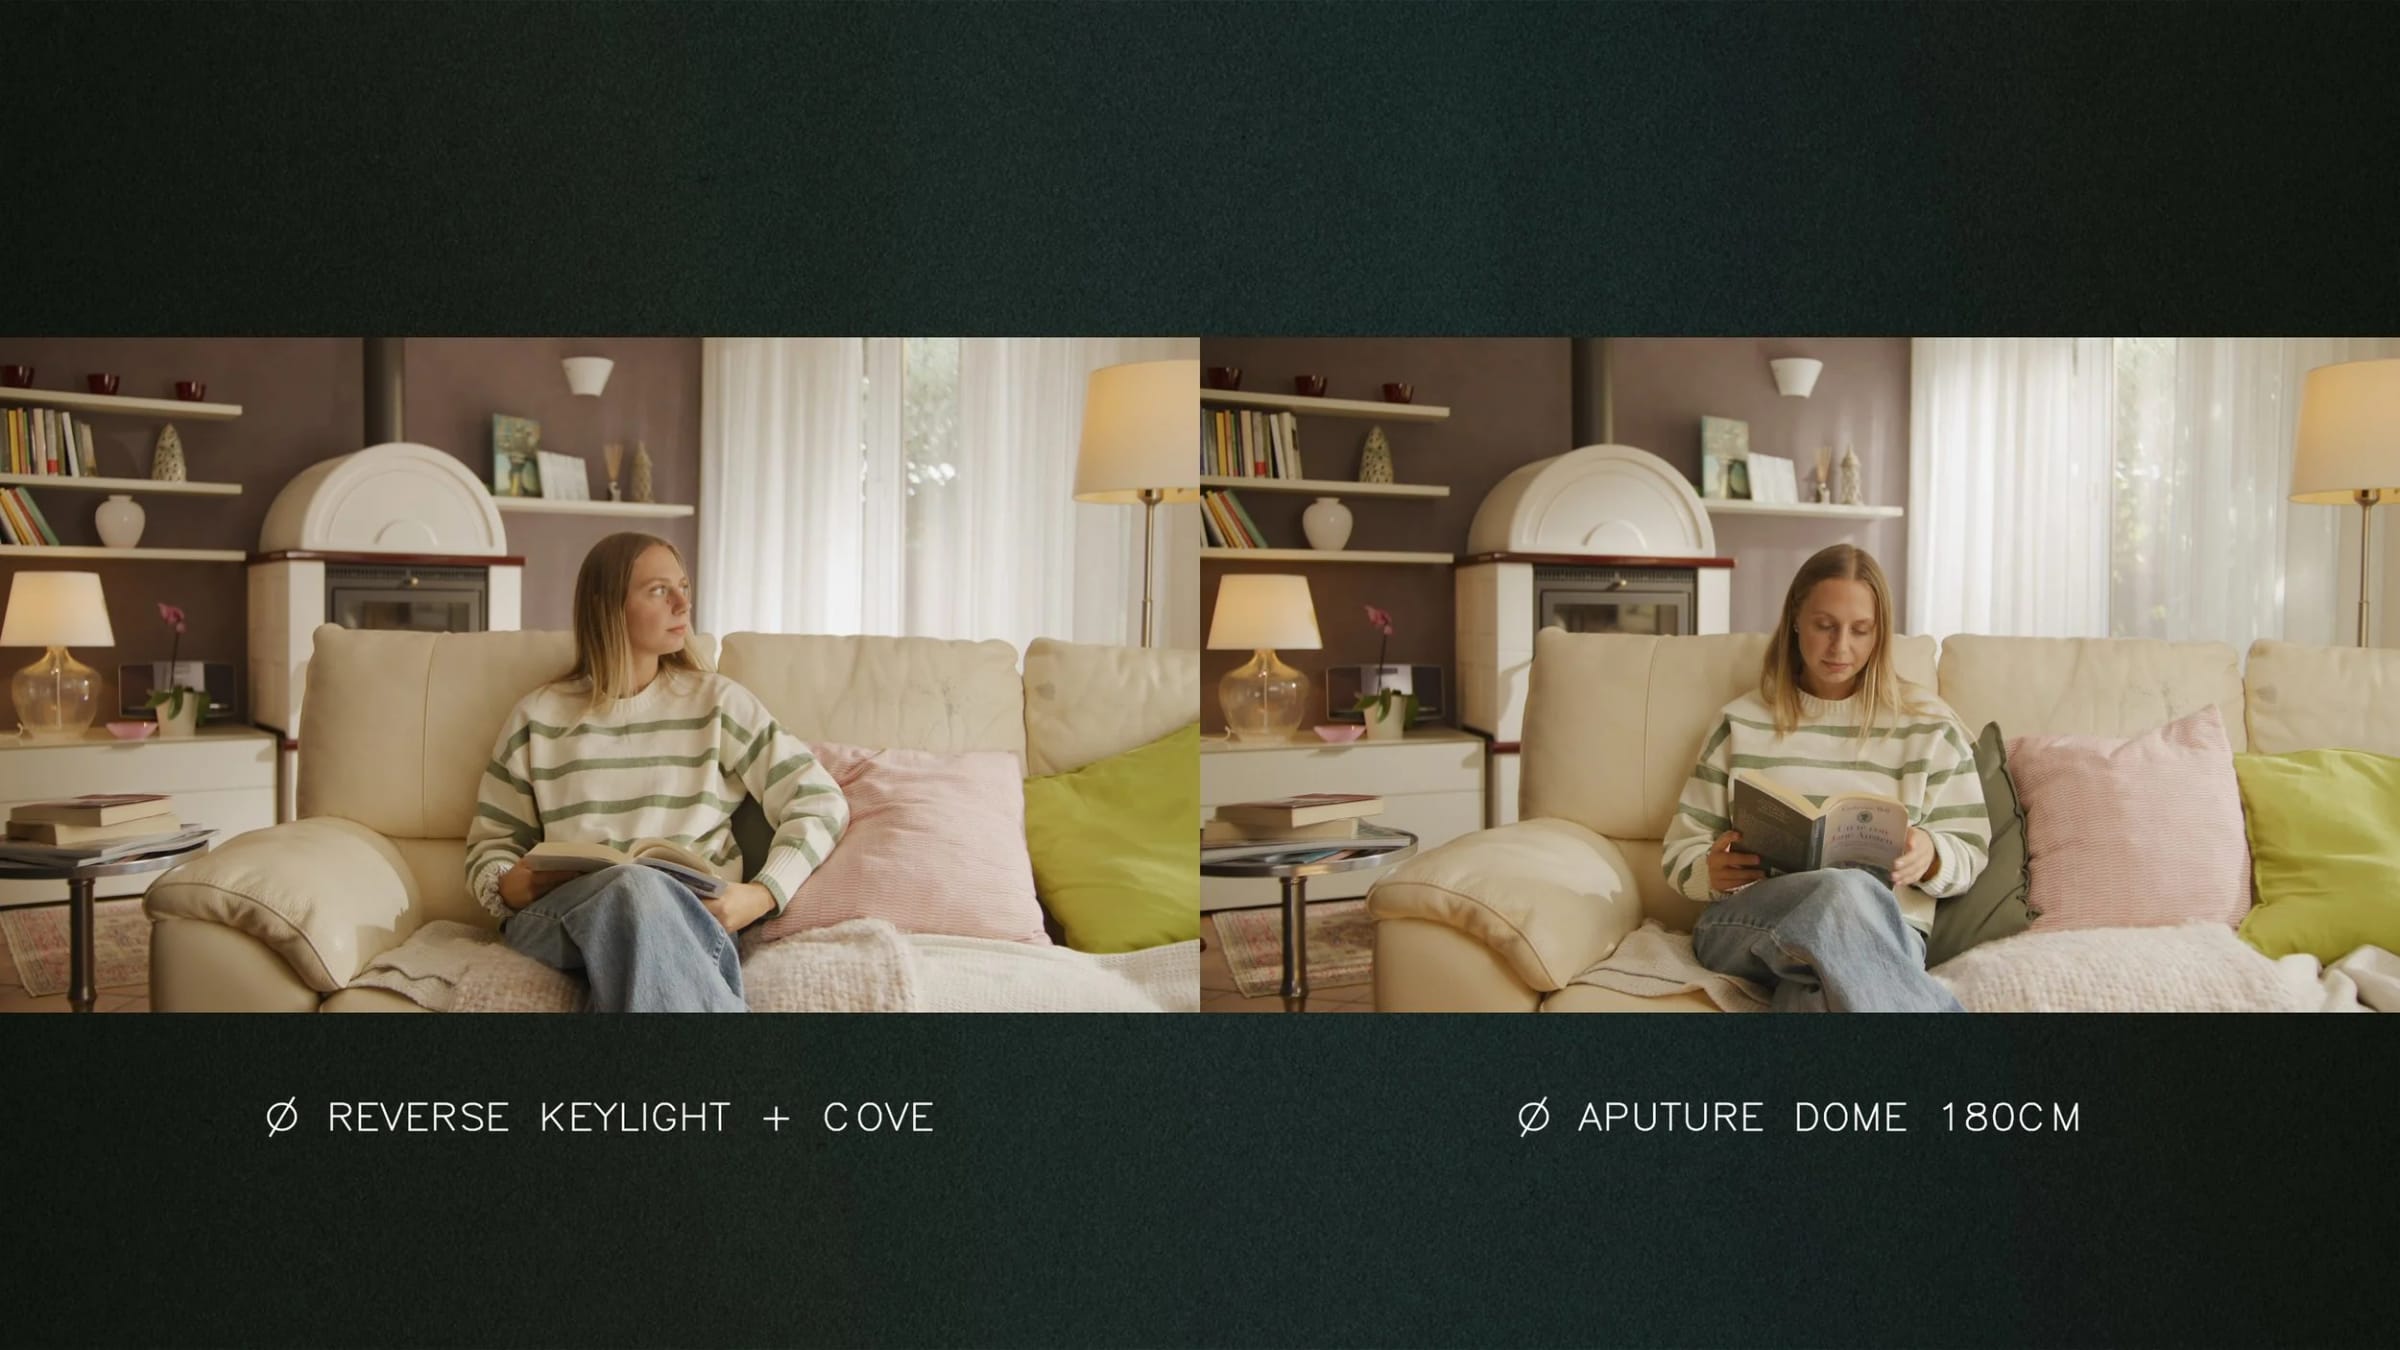
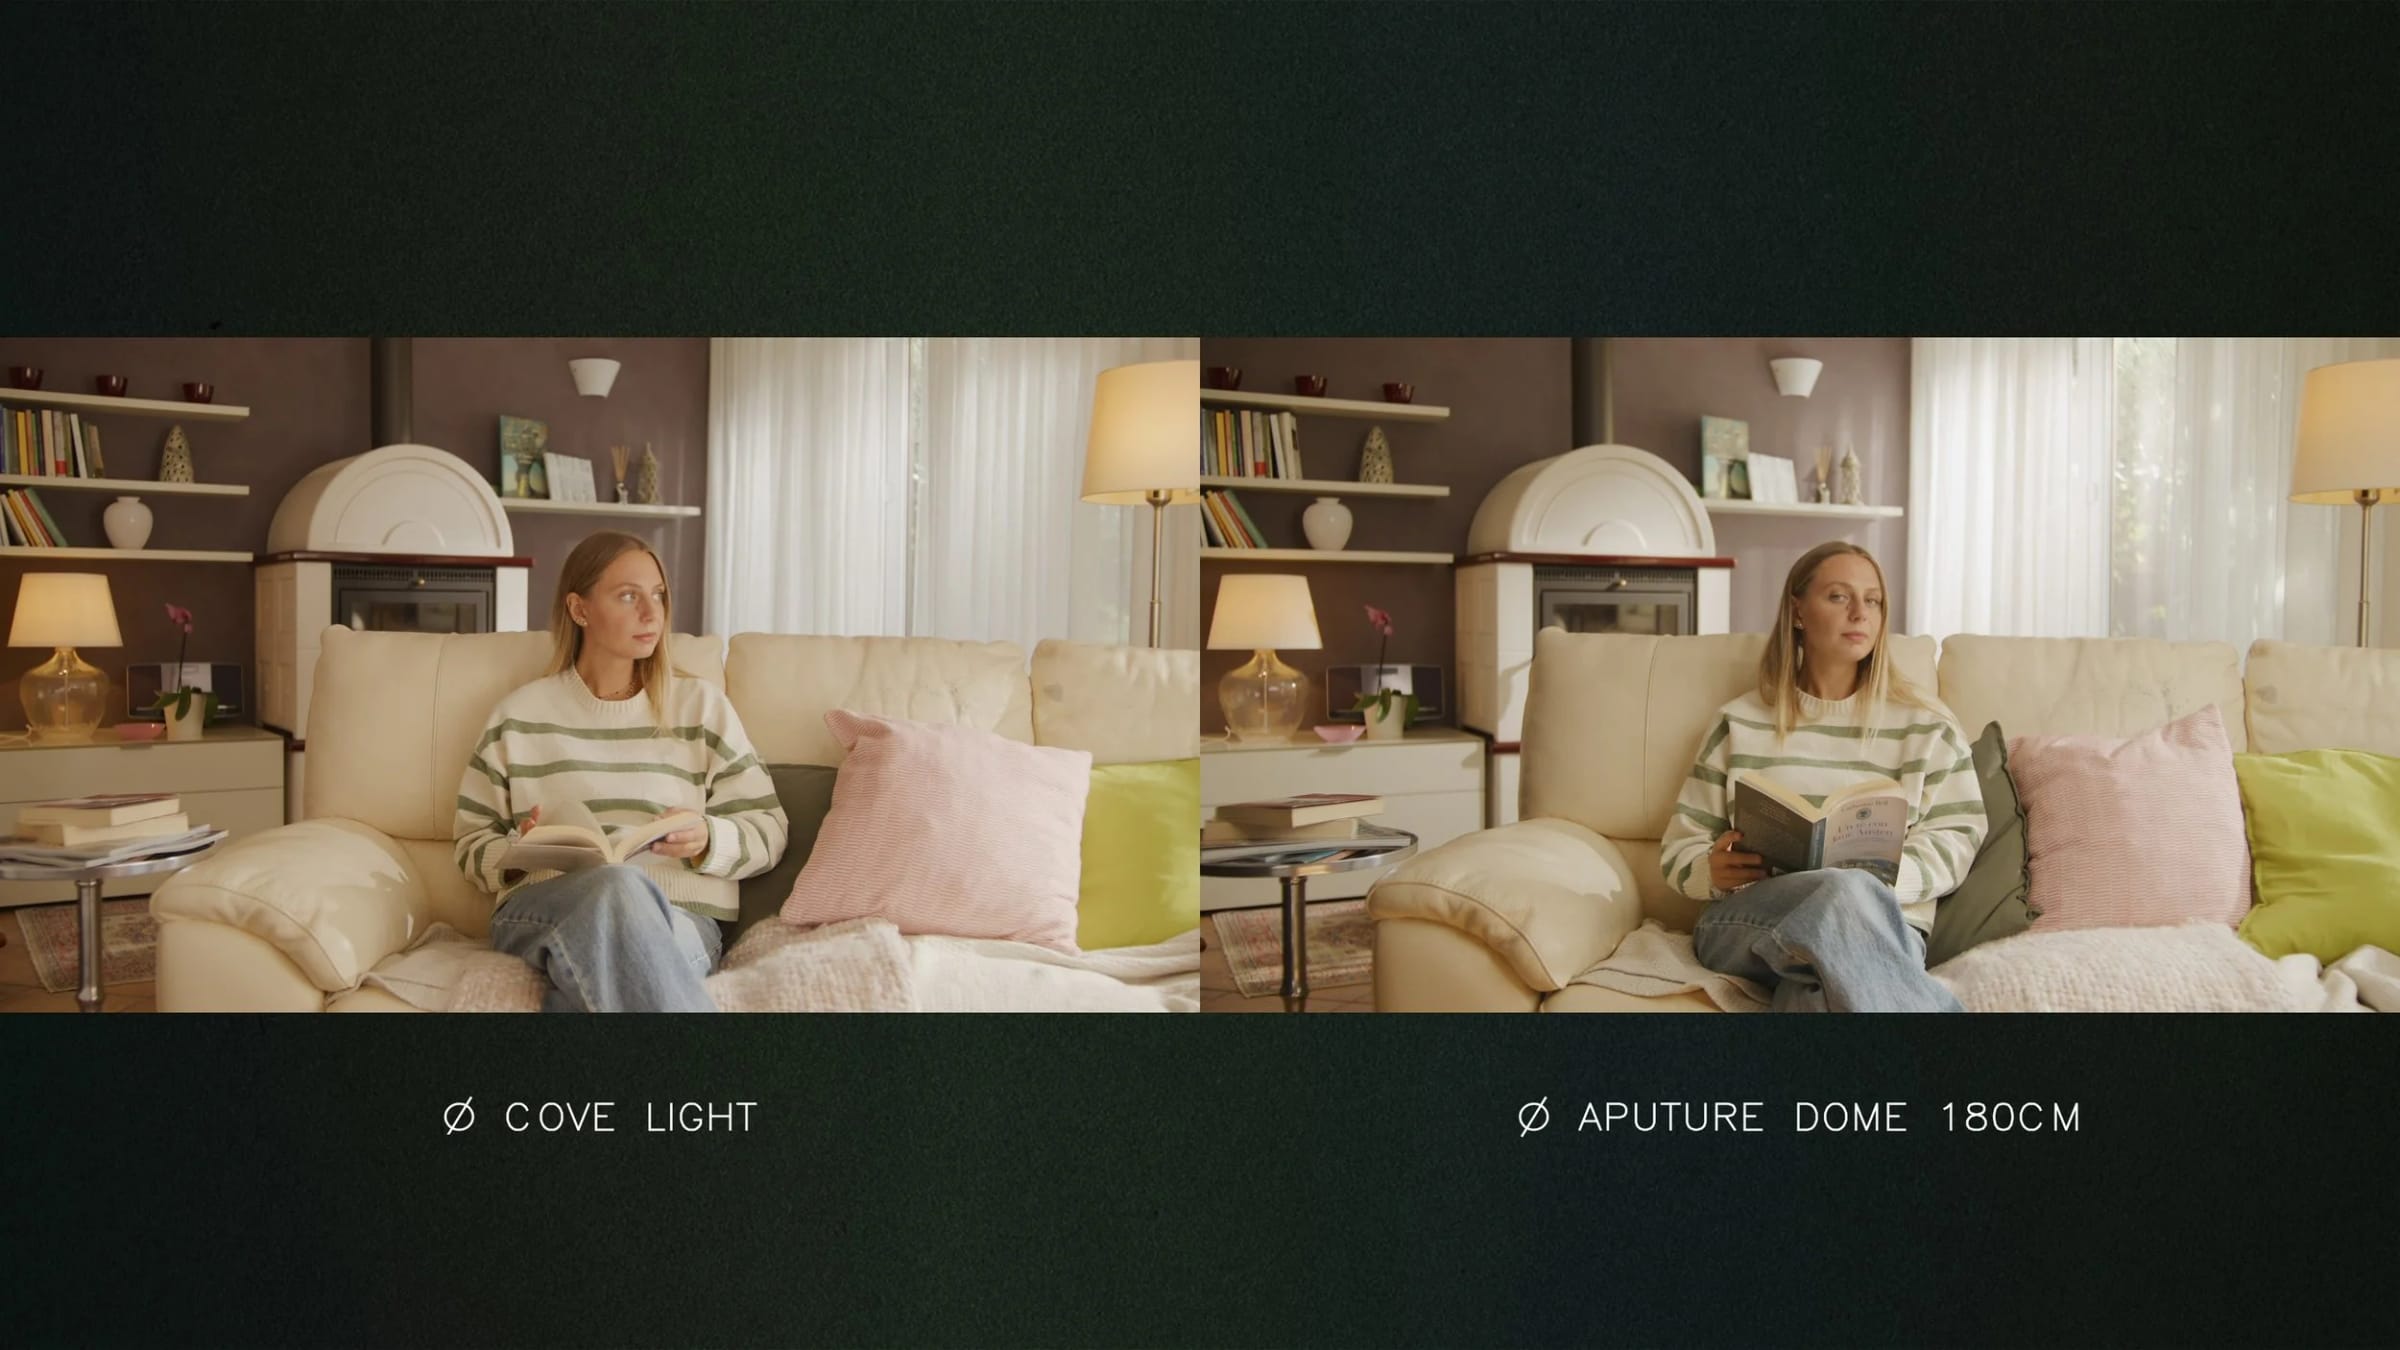
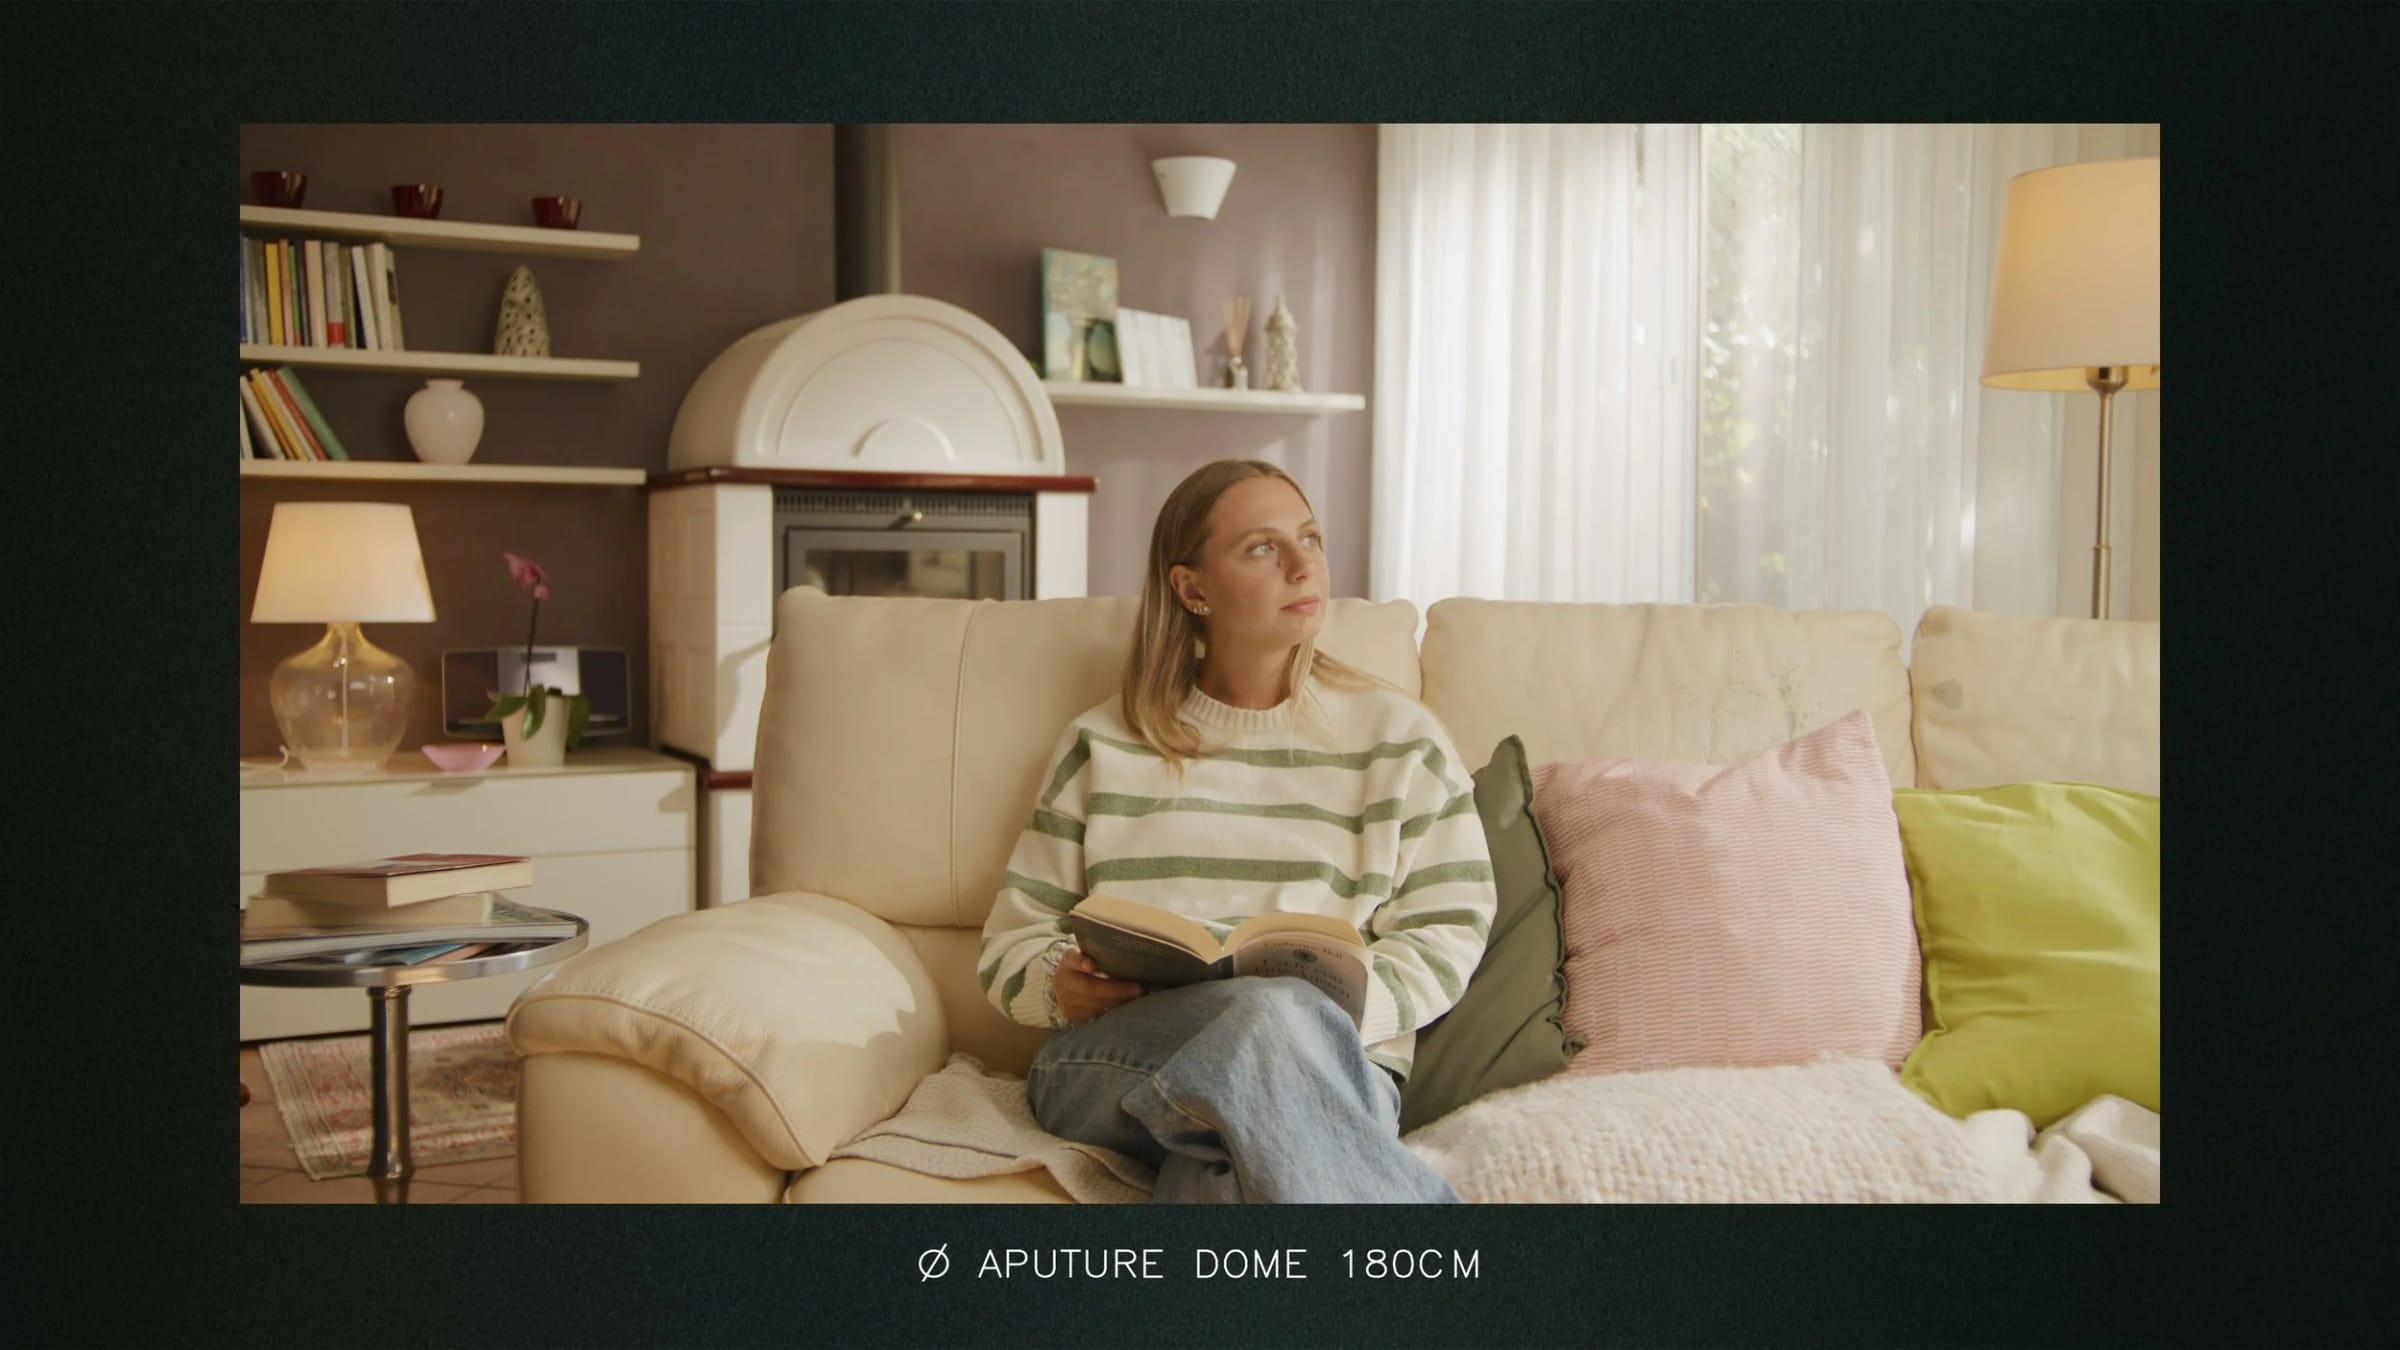
The first we tried is a Softbox. I’m usually not a fan of softboxes because I find them harsh and generally too small to work well. This one we used is Aputure’s biggest one, the Dome, which is actually pretty good, apart from its huge size, which makes it very difficult to move around. The lighting is very similar to the Reverse Cove, with the main difference being that the light comes from the top instead of the bottom, so it hits the forehead first. I personally prefer the light coming from the bottom, so I prefer the Cove.
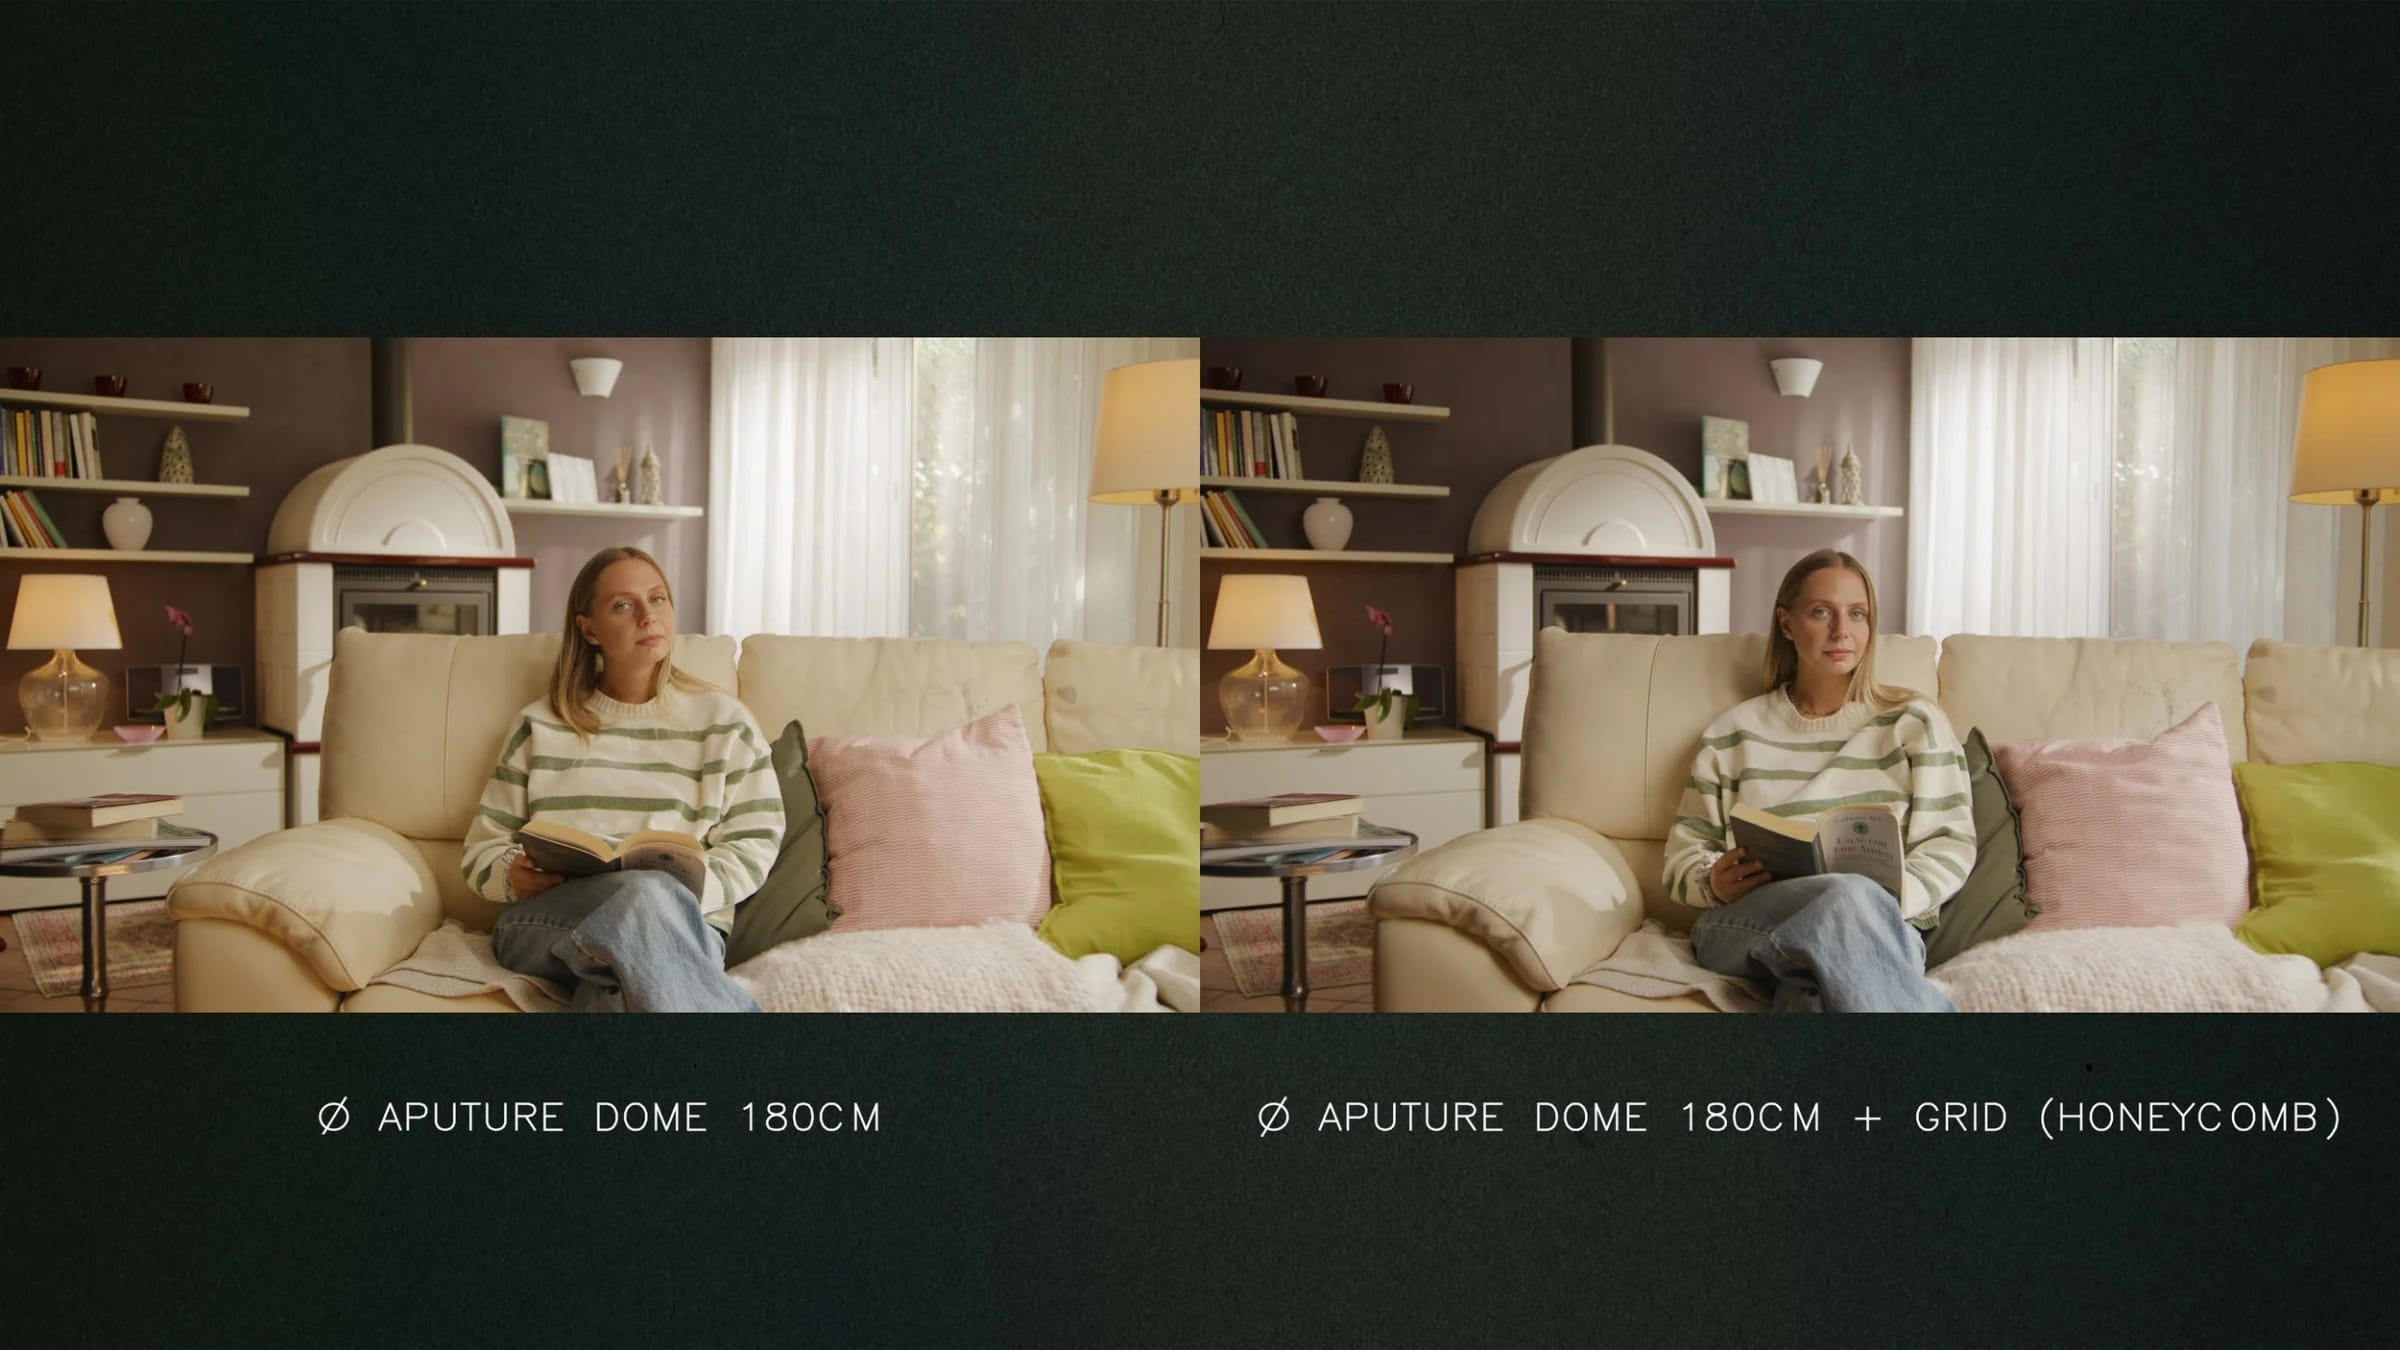
But everything changes when you put the Honeycomb on the softbox. The Honeycomb is the directional black grid that you strap on top, and it helps control the spread of the light. The difference here is very drastic — and although the image looks more lit and less natural, the light falls in a much more interesting way and the subject pops out a lot more. I’d say this is probably my second favorite look.
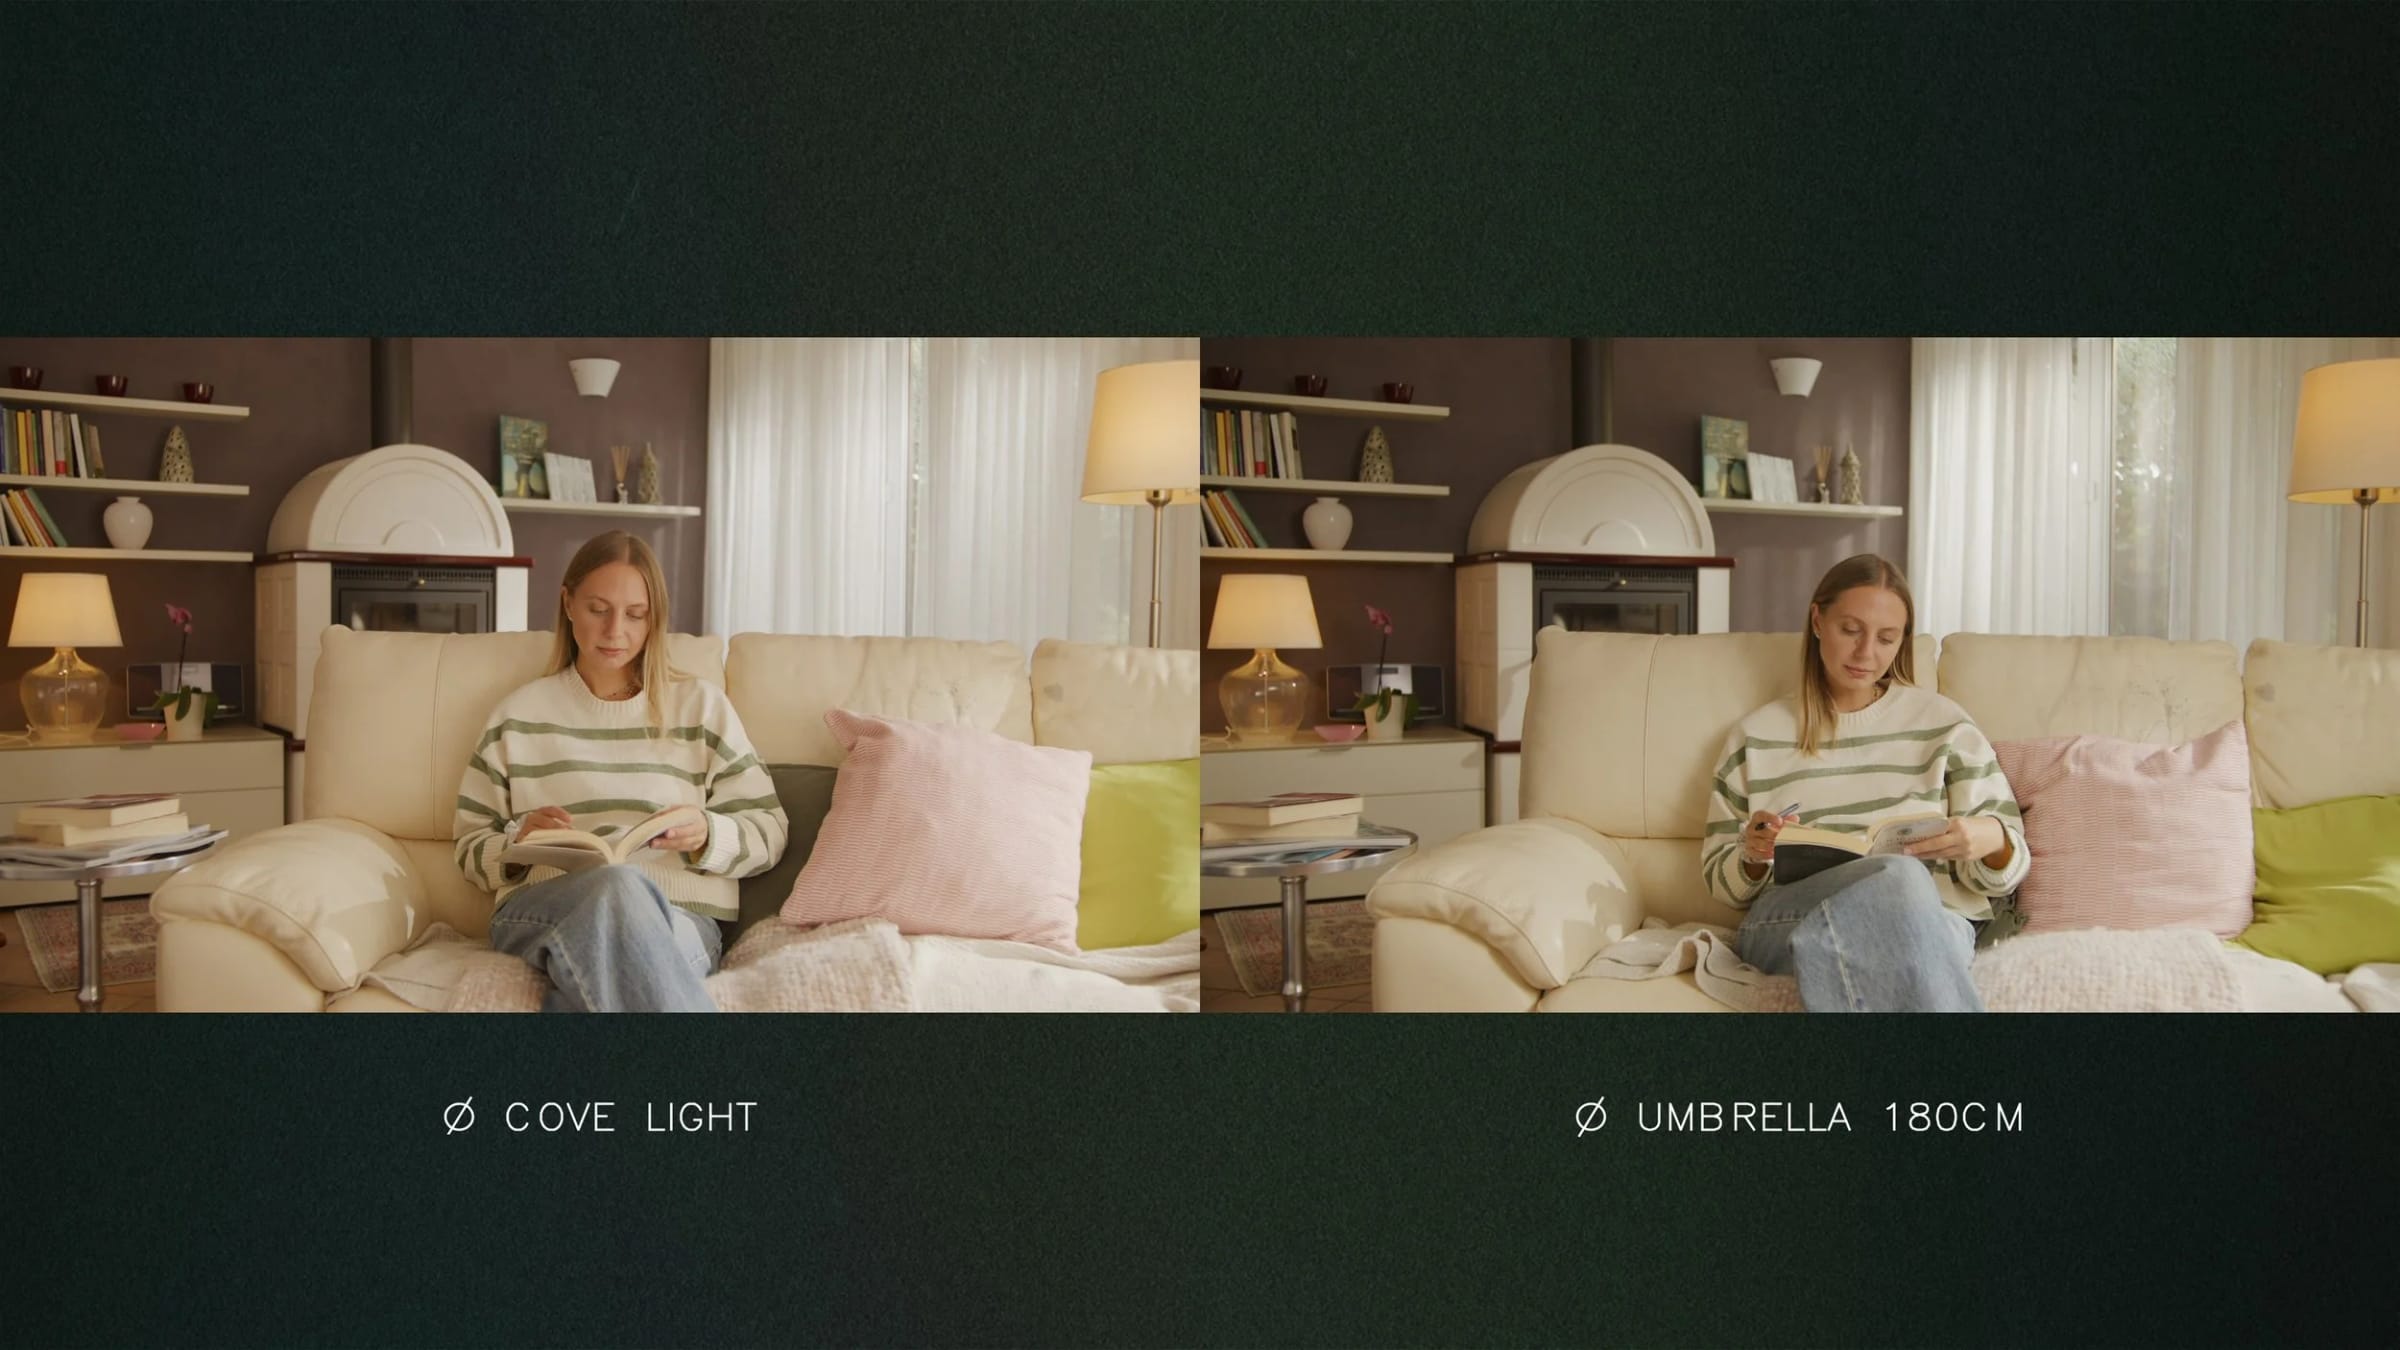
Lastly, I always wanted to try a photographic umbrella. I bought a cheap one that is huge and tried it to see how it compares to the lights I usually use, and it looks kind of bad, even with its diffusion on. It’s very harsh and makes the skin very shiny, it creates a lot of spill and a lot of shadows.
It can probably be a good solution to spread light in a tight space, but it is no match for a softbox.
Final Thoughts
Among all the different looks and tweaks, these are the ones I prefer.
- The Cove is definitely a great look. It makes the subject stand out a lot, while at the same time you barely notice that there’s much more light coming from the front of the camera than from the rest. The light is very soft and very pleasing on faces. Definitely a great choice for commercials and ads, where actors need to look their best. It’s also a great look when people have to move around, because the light spreads a lot and stays consistent throughout space. The ProMist version didn’t make much sense to me, but the Haze one does have its use. Here the smoke is a bit on the extreme end, but it is overall very soft and warm — definitely suitable for a more artsy application, such as short or indie films. The smoke is too much of a hassle for anything that has to last long, so I’d avoid it in interviews.
- The Reverse Cove is also a viable look, especially in combination with the negative fill, so a Half Cove with some Haze or other diffusions. The look is much more realistic, and the negative fill gives the image more drama. I would use this for a documentary, where the light needs to be consistent and natural, but you also want to be expressive.
- I don’t usually care much about softboxes, so I didn’t expect to like the softbox with the Honeycomb this much. The light doesn’t feel very natural, but it is expressive and draws faces very well. It is a great look for internet ads, podcasts, or any other content that needs to run long and carry a punch. It reminds me of the Masterclass teasers.
So, what is your favorite look? Leave a comment and let us know!